Selling Flights from Air Availability
Network (GDS) Carriers
The following steps show the minimum tasks required to search for and sell flights from Air Availability.
Note that Network Carriers typically require a PNR/Booking File to be end transacted before paid seats and ancillary services can be added.
- Create minimum Customer Information. Be sure to include loyalty memberships, which may affect fares and ancillary service prices.
- Search for Air Availability.
- If available, view seat maps. Depending on the carrier, view-only seat maps my be available before booking.
- Book flights for unbranded or branded fares. Note that prices for branded fares are estimated only until they are priced in the following step.
- Price flights (Fare Quote).
- Optional. View Fare Rules.
- Enter a Received By indicator and end transact (ER) to create a PNR/Booking File.
- If applicable, view seat map to select free or paid seats or to request airline-assigned seats.
- If applicable, select ancillary services, such as paid baggage, meals, or lounge access. Some branded fares include ancillary services in the base price, but may allow additional ancillary services to be purchased separately.
- If you selected paid seats and/or additional ancillary services, price flights (Fare Quote) again to include any paid seats and ancillary services in the total price.
- Enter a Received By indicator and end transact (ET or ER) to update the PNR/Booking File.
Detailed Steps
The following steps show the minimum tasks required to search for search for and sell flights from Air Availability.
To book flights on Network Carriers:
-
Click the Edit
 icon and select Create/Edit Customer Information to create minimum Customer Information. Be sure to include loyalty memberships, which may affect fares and ancillary service prices.
 -
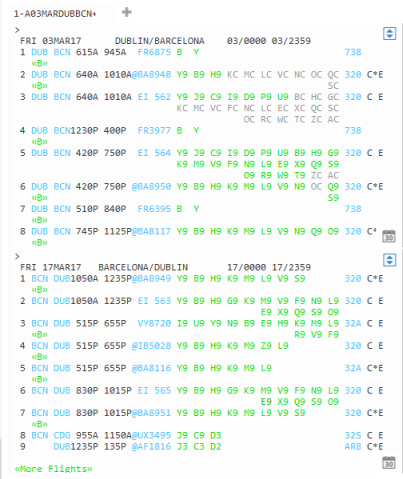
Create an Air Availability search.
-
If available, view seat maps. For some carriers, view-only seat maps may be available before booking.
-
From the list of available flights, book your flights. As you select flights, the PNR/Booking File view displays the flight legs.

-
A pound/hash sign # indicates the segment is a Direct Payment Carrier. All segments without a pound/hash sign are Network Carriers.
-
Book flights for unbranded or branded fares. Branded fares are indicated by a Branded Fares
 icon. Note that prices for branded fares are estimated only until they are priced in the following step.
-
-
Request an initial fare quote to price the booked segments. See More Information for links to additional modifiers.
-
Travelport+ (1G): Enter FQ to price an itinerary as booked. In Travelport+, the fare is stored when it is quoted.
-
Apollo (1V): Enter $B to price an itinerary as booked. In Apollo,
 More Information
For general information, see the Fares & Pricing category in the Travelport Knowledge Base.
For additional formats and modifiers:
-
Travelport+ (1G): Fare quote in the Travelport+ Format Guide.
-
Apollo: Apollo Format Guide for Fares in the Travelport Knowledge Base.
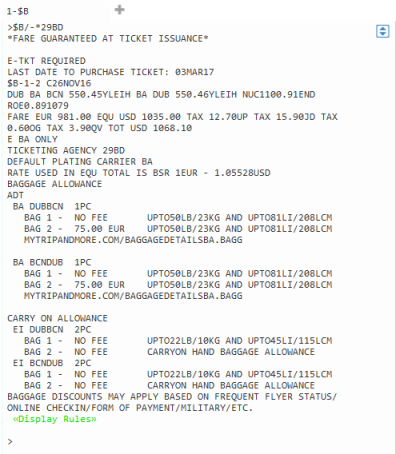
The fare quote is displayed. This initial Fare Quote is for a branded fare for two passengers.
-
-
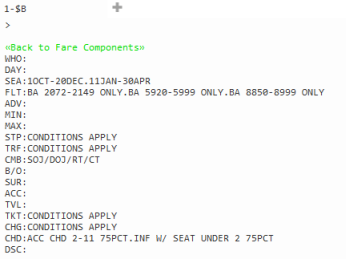
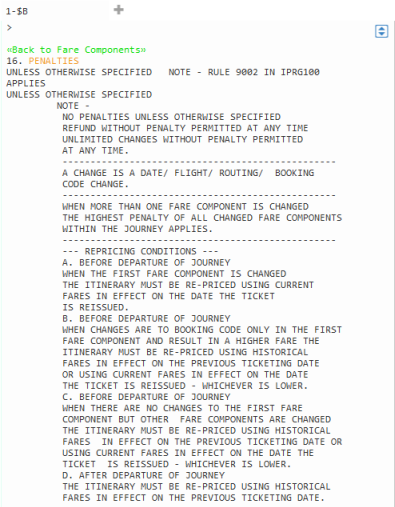
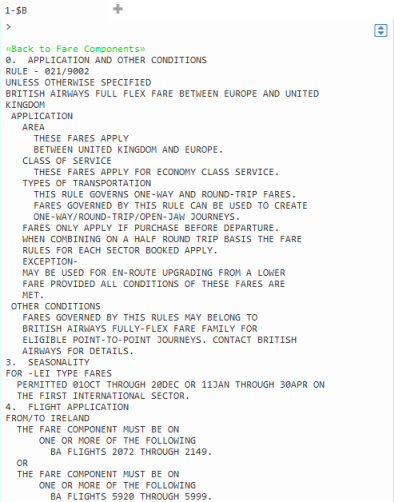
Optional. Click Display Rules in the fare quote to view the Fare Rules and Price Details for your selected segments. Direct Payment Carriers only return Long Fare rules. These rules frequently contain a link to the carrier's web site for full rule details.
Example
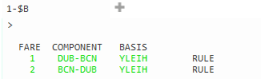
Click a Fare number to see a summary of rules for that fare.
Click a Component link to see the penalty rules for that component.
Click a Basis link to see the full fare basis rules for that component.
-
Enter a Received By indicator.
-
Travelport+ (1G): Enter R.followed by the name or code for the initiator of the itinerary. For example: R.PSGR.
-
Apollo (1V): Enter R: followed by the name or code for the initiator of the itinerary. For example: R:PSGR.
Tip! You can set an automatic Received By indicator in the Application Settings. -
-
Enter ER to end transact and redisplay the itinerary. A PNR/Booking File is created.
-
Optional. Click the class of service to view seat maps and select seat assignments.
-
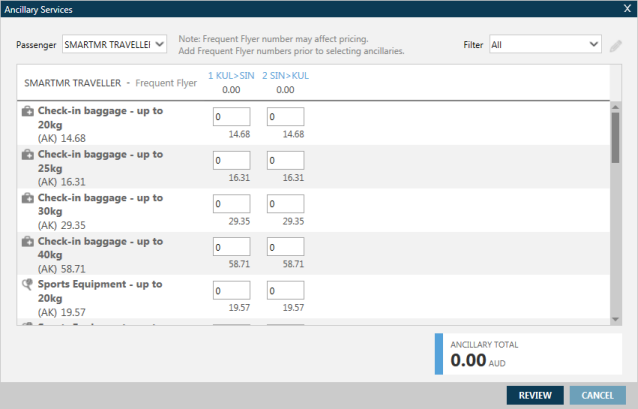
Optional. Click the Shopping Cart
 icon Shop in PNR Viewer to add ancillary services (optional services). Available ancillaries vary by carrier and flight.Example
The following example shows ancillary services for a Branded Fare that are not included in the baseline fare brand. Branded fares typically include ancillary services as part of the fare brand. However, additional ancillaries that are not part of the baseline fare brand may be available for an additional fee.
See Ancillary Service Shopping for more information about selecting ancillaries for both branded and unbranded fares.
-
If you added ancillaries or paid seat assignments in Steps 7 and 8, enter request another fare quote to include these costs in the fare totals and breakdowns.
-
Travelport+ (1G): Enter FQ.
-
Apollo (1V): Enter $B.
Example
In this example, the fare quote indicates two passengers who have selected a branded fare. In addition to any ancillaries that are available as part of the fare brand, the passengers have selected:
- Different paid seat options for the inbound and outbound flights.
- Checked luggage.
- Pet in cabin.
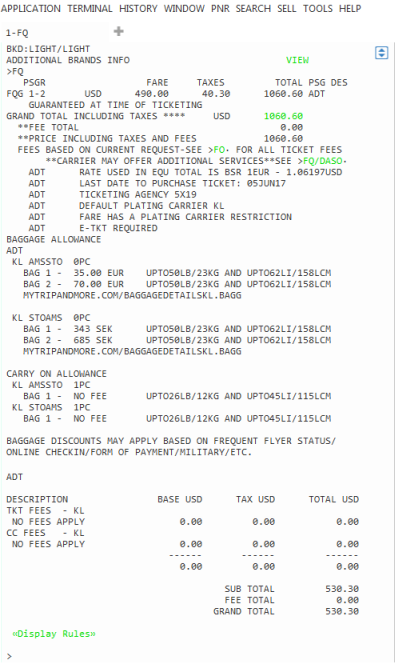
- OptSvcs indicates the total amount of ancillary services for each passenger.
- For each passenger, an Optional Services Amount indicates the subtotal of ancillary services for that passenger. The specific ancillary services selected for each passenger are not listed in the fare quote.
-
-
Enter ER to end transact and redisplay the itinerary, or enter ET to end transact and close the itinerary.
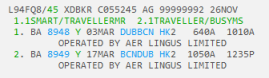
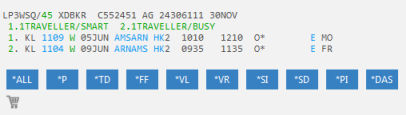
The following example shows a PNR/Booking File created for a KLM itinerary.

Next Steps
After end transacting the booking, you can: