Trip Quote (Smartpoint 9.1 and Earlier)
Creating Trip Quote Itineraries
Trip Quote allows you to send itinerary quotes from your agency to travelers. Trip Quote provides the details of their trip itineraries to travelers.
To create a Trip Quote itinerary:
- Add the desired itinerary options.
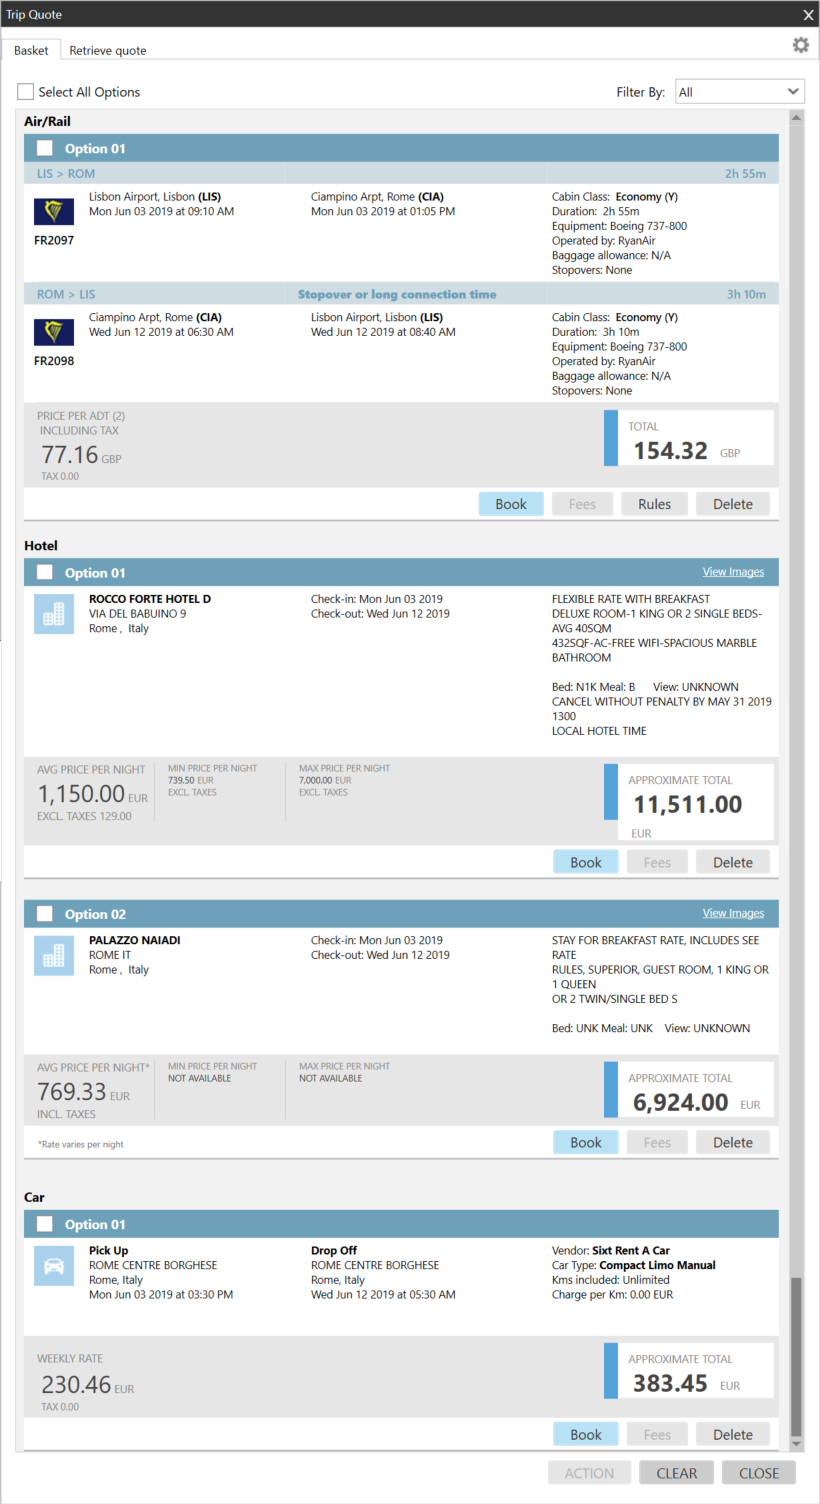
You can add an unlimited number of options. After you add an itinerary, the Trip Quote indicator changes from 0 to reflect the number of options currently in the Trip Quote basket. For example, a Trip Quote basket with three options:
Adding Air Schedules from the Air Availability Filter
You can add air schedules to Trip Quote from the filter for Air Availability results.
Note: This option provides flight information so that your traveler can compare schedules, but does not include fare quotes. As such, you cannot book or add fees from this option.

From the Filter screen, click +TQ.
This selection is added to Trip Quote as an Air Schedules option.
You can add air options to Trip Quote from Flight Shopping Search results.

For the selected Pricing Option, click the Add Trip Quote
icon.
This selection is added to Trip Quote as an Air/Rail option. Note that Rail quotes are available only to agencies that are provisioned to receive both air and rail in their Flight Shopping responses.
You can add air options to Trip Quote for Fare Quote (FQ)/Pricing ($B) from the Fare Calculator.

For the selected fare, click the <+CALC> icon to display the Fare Calculator.

From the Fare Calculator, click +TQ to add the fare to Trip Quote.
This selection is added to Trip Quote as an Air/Rail option. Note that Rail quotes are available only to agencies that are provisioned to receive both air and rail in their Flight Shopping responses.
Known Issues for Smartpoint 8.2:
- In Apollo, if an agent prices by cabin, and then repeats the entry using a different cabin class, Smartpoint does not reprice with the new cabin class.
- When using an account code for more than one segment (FQS1(account code)2 or $BS1), the account code is applied to the second flight segment instead of the first.
You can add hotel options to Trip Quote from Hotel Complete Availability results.
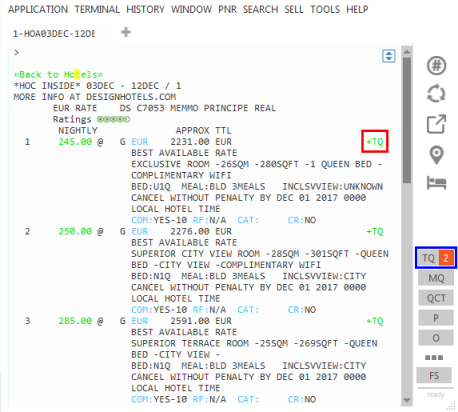
For the selected Pricing Option, click the Add Trip Quote
This selection is added to Trip Quote as a Hotel option.
Click the Add Trip Quote
icon for a rate in the Rate Details pane of the Hotel Retail window.
The total number of selected rates, for all properties, is displayed at the bottom of the Hotel List.

For the selected Pricing Option, click the Add Trip Quote
This selection is added to Trip Quote as a Hotel option.
You can add information from a Hotel Passive Sell to Trip Quote.
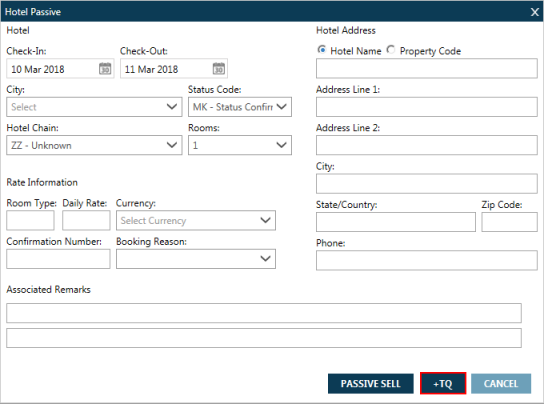
After you enter the passive sell information, click the +TQ icon.
This selection is added to Trip Quote as a Hotel option.
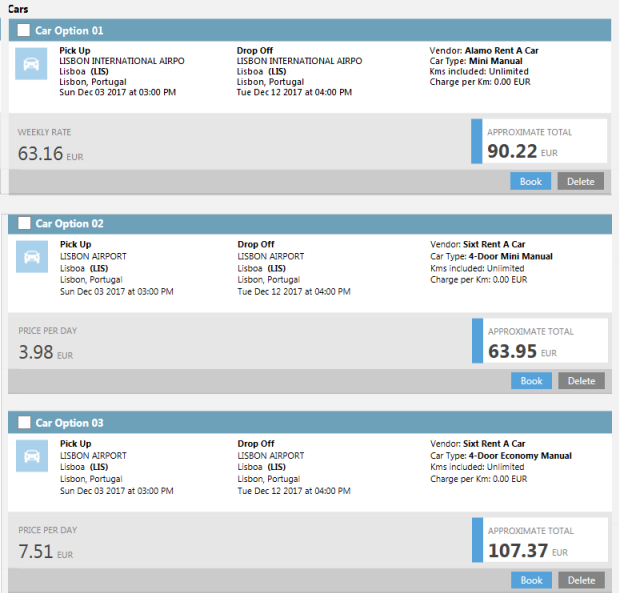
You can add car options to Trip Quote from Car Availability results.
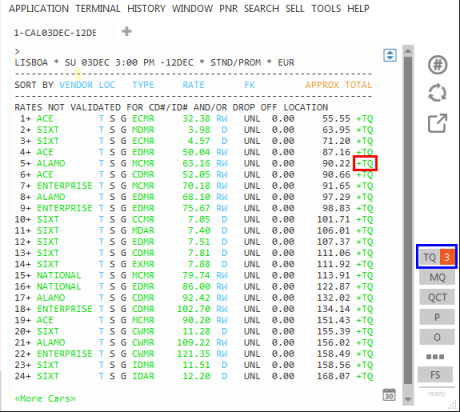
For the selected Pricing Option, click the Add Trip Quote
This selection is added to Trip Quote as a Car option.
You can add information from a Car Passive Sell to Trip Quote.
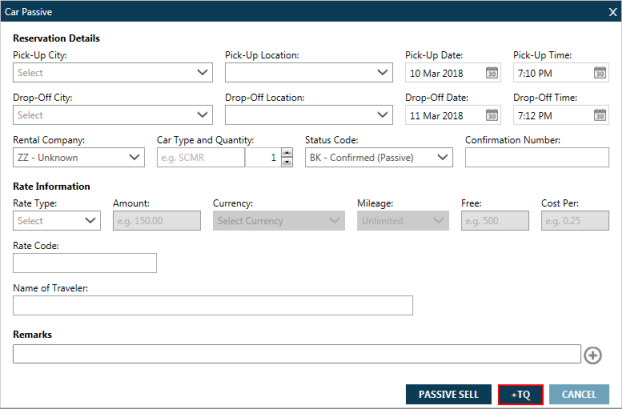
After you enter the passive sell information, click the +TQ icon.
This selection is added to Trip Quote as a Hotel option.
Tip! You can select more than one option of the same type to show your traveler for comparison. For example, you can select three rental car options for the same city.
Select three rental car options.
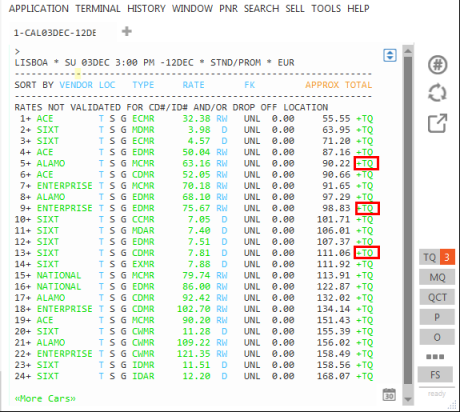
When you click the Trip Quote icon, all three car options are added to the quote.
- After you add itinerary options, open the Trip Quote basket with your current selections.
- Classic Windows. Click the Trip Quote
 icon in the Terminal Window or in the plug-in window.
 - Flex Windows. Click the Trip Quote
 icon in the Flex Windows menu.
This example shows an itinerary with one Air/Rail option, two Hotel options for the traveler to choose from, and one Car option.
When you open the Trip Quote basket, the following message may be displayed at the top of the basket: Only minimum functionality supported. Please contact your agency technical team for assistance.
This warning displays if your agency has a firewall setting that restricts access to the web addresses (URLs) required for full Trip Quote functionality within Travelport Smartpoint.
If your agency chooses to:
- Unblock the URLs, Trip Quote will regain full functionality.
- Not to unblock the URLs:
- The ACTION button is disabled. You are not able access the Trip Quote Actions screen to customize, preview, email, or copy to clipboard.
- You cannot add or remove a quote in the basket.
Contact your agency's technical support to determine how your agency wants to manage this issue.
For Technical Support: URL and IP address information for Trip Quote is available in the Technical Installation Guide for Travelport Smartpoint. This guide is available with the product download on the Travelport Marketplace and at KB0016425 in the Travelport Knowledge Base.
- Review the itinerary options added to Trip Quote. For each option, you can:
- Air/Rail only. Click Rules to see the fare rules for the option.
- Click Delete to remove the option from Trip Quote.
- Click Book to add the option to the PNR/Booking File.
- Optional. Click the Filter By arrow to view only a specific type of option.

You can click the Filter By arrow and select Hotel to display only the Hotel Options.
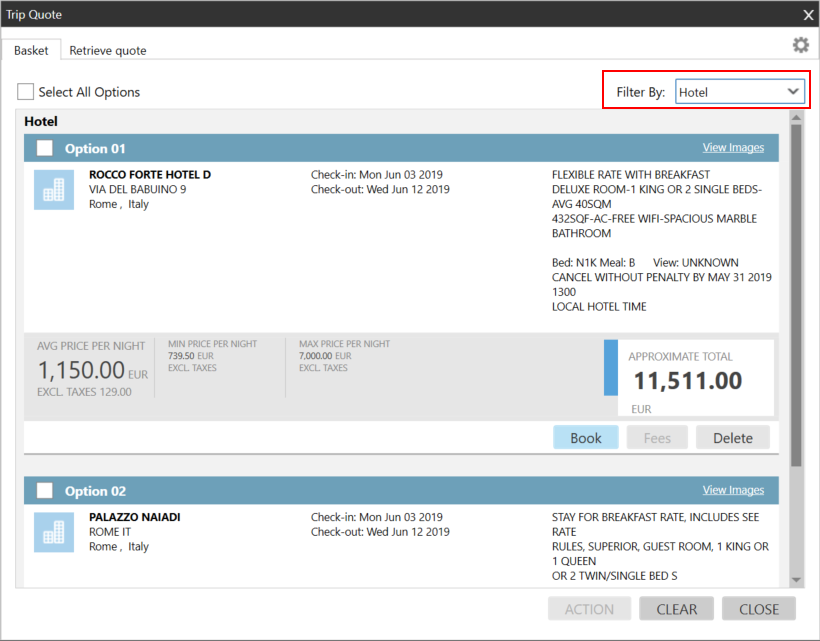
Select All in the filter to redisplay all options.
- Optional. Click Fees for a selected option to . Currently, adding fees is supported only for Air/Rail segments in Trip Quote.
- When you are ready to create an itinerary, select the desired options.
Tip! Click Select All Options if you want to add all options in the Trip Quote basket to the itinerary.
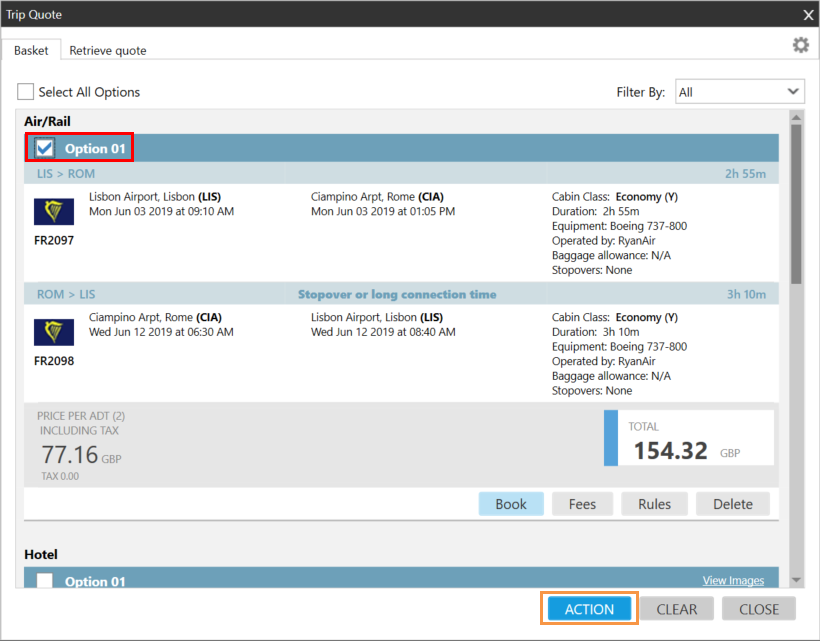
- Click ACTION to display the Trip Quote Actions screen.

- Optional.Customize the itinerary in the Trip Quote Actions screen.
- After you complete any desired changes, you can:
- Preview the itinerary.
- Copy the itinerary information to the Windows clipboard.
- Send the itinerary in an email.