Assisted Ticketing
Voluntary Changes: Exchanging Tickets with a Refundable Balance and Change Fee Collected as a Tax (BSP)
In this example, air segments were downgraded segments from Business class to Economy class. The Voluntary Change tab in Assisted Ticketing to exchange the tickets with refundable balance and change fee collected as an tax.
| Important!
The Assisted Ticketing - Voluntary Change feature does not provide any guarantee against ADMs:
|
To exchange tickets with a refundable balance and tax collection:
-
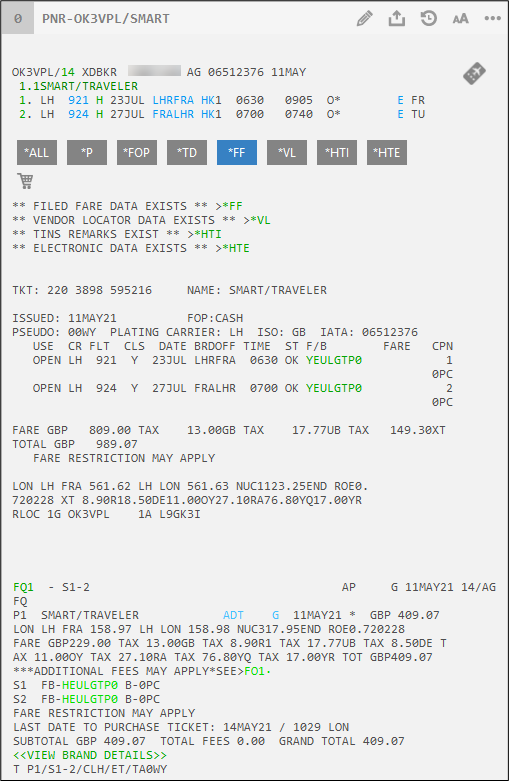
Change the PNR/Booking File by adding a new fare quote. To be eligible for a quote, the record must have:
-
Segments with an HS or HK status.
-
A stored fare (Filed Fare/ATFQ) for each passenger.
-
-
End and retrieve (ER) the PNR/Booking.
-
Open the Smartpoint Assisted Ticketing window by either:
-
Entering the format: #SATVOL.
-
Clicking the Assisted Ticketing
 icon. Then, click the Voluntary Change tab.
-
-
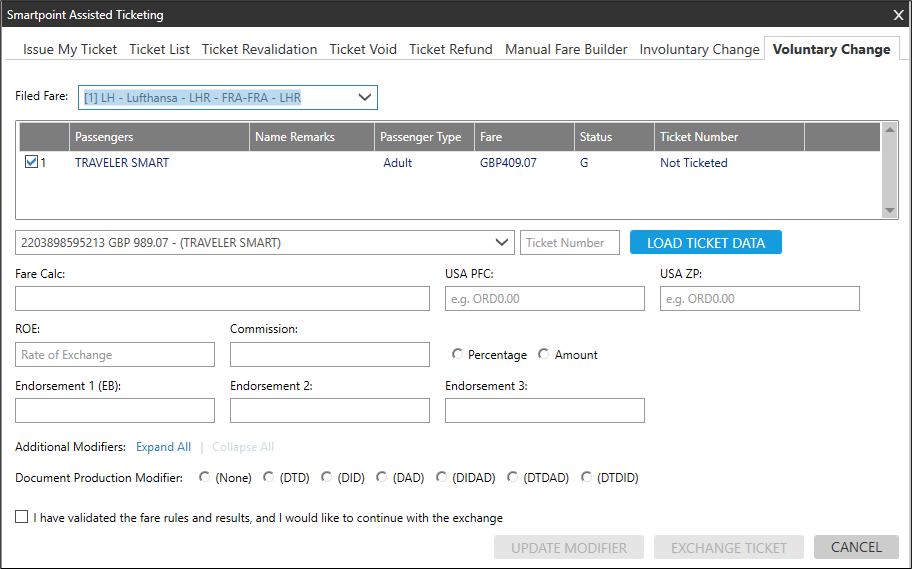
Click the Filed Fare arrow to select the stored fare.
-
Click the ticket arrow to select the desired ticket number.
-
Click LOAD TICKET DATA to display the comparison table. This table provides a side-by-side comparison of the ticket and the stored fare, while the third column displays the difference between the original fare and the new fare.
 Multiple Reissues
For voluntary changes in Assisted Ticketing, the availability of multiple reissues after the first exchange and reissue varies by version.
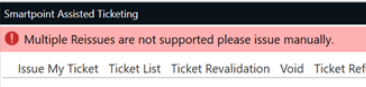
Smartpoint 11.4.1 and Earlier
In Smartpoint 11.4.1 and earlier, multiple reissues are not supported. A warning message is displayed.
Smartpoint 11.5 and Later
In Smartpoint 11.5 and later, multiple reissues are supported. However, functionality varies by settlement plan.
ARC
Fare and tax fields are pre-filled. However, for best practice, always review amounts for accuracy.
BSP
Each time a ticket is reissued after the first reissue, a confirmation message with instructions is displayed.

Because Assisted Ticketing cannot validate the ticket fare and taxes, the fields in the exchange column are blank.
-
Complete the fare and tax fields.
-
In the tax fields:
-
Enter the total of all taxes for the current exchanged ticket and all previous tickets. New taxes may be required depending on the details of the exchange.
-
Enter 0 if a value does not apply to the exchanged ticket.
-
-
Click Yes to confirm the conditions for reissue and continue with the voluntary change process.
Tip! If you make changes to the PNR/Booking File or retrieve another PNR/Booking File, click REFRESH to update the data on the screen without leaving Assisted Ticketing.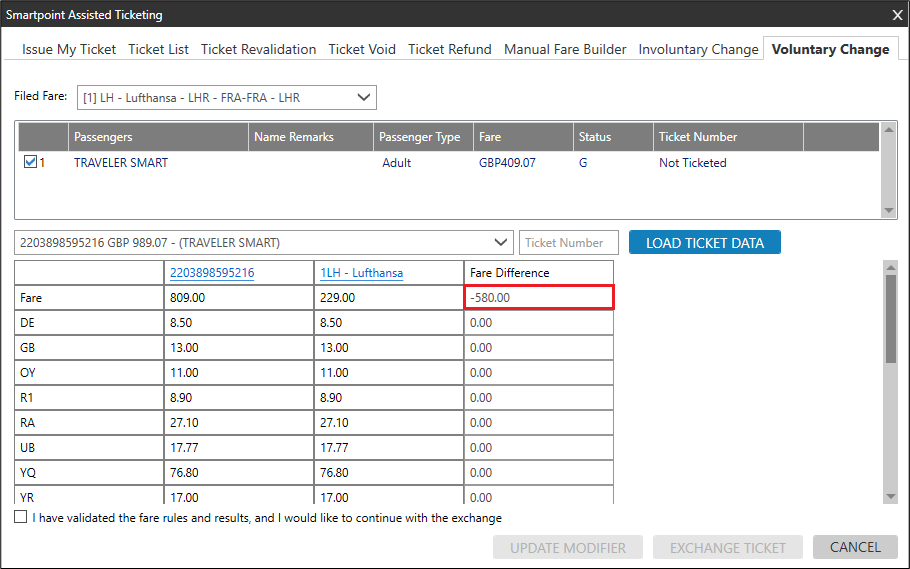
-
-
Review the exchange details the comparison table and modify, if needed.
More Information
-
If applicable. In the Airline Change Fee row, add a change fee for the new stored fare.
-
If applicable. To forfeit or ignore a fare, adjust the amounts in the Fare Difference column.
-
If applicable. In the Tax On Change Fee row, add the tax for the airline change fee. If additional taxes are needed, click the Plus
 icon to add more lines.
Note: If the carrier’s method of change fee collection is not available in the fare rules or is unknown, please contact the carrier to confirm the collection method.
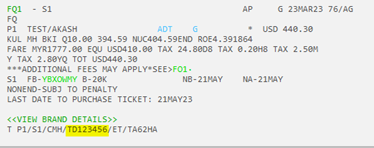
To add the change fee and tax as a Tax Change Fee, add the amount in the first box and the 2-letter tax code in the tax box of Filed Fare section.

The Grand Total is automatically calculated when you add the change fee values.
-
-
Optional. Enter any additional ticket modifiers for the voluntary exchange.
Note: Any existing modifiers from the stored fare (Filed Fare/ATFQ) are automatically populated in the corresponding fields. -
Optional. In Additional Modifiers, click Expand All to enter more optional ticket modifiers. You can click Collapse All at any time to close the Additional Modifiers section.
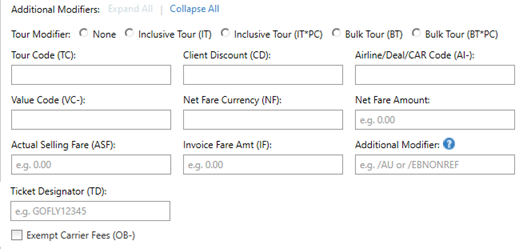 Additional Modifiers
Ticket Modifier
Details
Tour Modifier
Select the radio button for the desired Inclusive Tour or Bulk Tour modifiers.
This indicator be used in conjunction with a Tour Code and other modifiers.
See E-ticketing functionality information for all participating Travelport Airlines in the Travelport Knowledge Base to determine if a carrier supports BT and/or IT ticketing.
Inclusive Tour
Inclusive Tour fares include charges in addition to the airfare, such as accommodations or ground transportation as part of a "package".
-
Inclusive Tour (IT)
Suppresses the fare and does not print the fare construction on the passenger receipt.
Terminal Format Equivalent: -
Inclusive Tour (IT*PC)
Suppresses the fare and prints the fare construction on the passenger receipt.
Terminal Format Equivalents:
-
Without tour code: TMU1IT or TMU1IT*PC
-
With tour code: TMU1TCXX123456/IT or TMU1TCXX123456/IT*PC
Bulk Tour
Bulk Tour fares are usually given to agencies who book a high volume of seats such as a consolidator or wholesaler. However, typically accommodations or other package items are not required for this fare.
-
Bulk Tour (BT)
Suppresses the fare and does not print the fare construction on the passenger receipt. -
Bulk Tour (BT*PC)
Suppresses the fare and prints the fare construction on the passenger receipt.
Terminal Format Equivalents:
-
Without tour code: TMU1BT or TMU1BT*PC
-
With tour code: TMU1TCXX123456/BT or TMU1TCXX123456/BT*PC
Tour Code (TC)
A Tour Code is issued by an airline to identify a tour deal.
More Information
The tour code must be entered into the fare as a ticket modifier so that both the airline and the local BSP know the source of the fare and the agency's authorization to use the fare.
The Tour Code can be a maximum of 14 characters. The code can also be used in combination with an Inclusive Tour or Bulk Tour indicator.
issued by an airline in order to identify the deal an agent has been given.
Equivalent Terminal Format: TMU1TCXX123456.
Client Discount (CD)
A Client or Corporate ID number associated with a tour. Maximum of 24 characters.
Equivalent Terminal Format: /CD-Y736245
Airline/Deal/CAR Code (AI-)
Airline Information is a modifier for net fares that is also known as a "deal number" or Commercial (or Carrier) Agreement Reference (CAR). Between two and eight alphanumeric characters.
See E-ticketing functionality information for all participating Travelport Airlines in the Travelport Knowledge Base to determine if a carrier supports net fare ticketing.
More Information
When an agency approves a contract with an airline, BSP is advised of the deal number. When you issue a ticket for the agreed fare, BSP cross-checks the deal number with the information supplied by the airline to ensure that your agency is authorized to sell this type of fare.
Terminal Format Equivalent: TMU1AI-45678.
Value Code (VC-)
Value Code is a supplementary commission or amount input. The Value Code is printed in the Tour Code box of the ticket.
More Information
A modifier for net fares, the Value Code is used by some airlines so that their own revenue accounts department can interpret the type of arrangement that the airline has agreed with your agency.
The Airline/Deal/CAR Code (AI-) is the contract number, but the Value Code represents the actual amount.
The first letter of the code identifies a commission percentage or amount.
-
C = Commission Percentage
-
K = Commission Amount
The next alphanumeric characters are provided by the airline. Typically, these characters indicate the amount of the supplementary commission. For example:
-
A commission of 20%:
TMU1AI-45678/VC-C0020 -
A commission of GBP 25.00:
TMU1AI-45678/VC-K0025
However, some airlines may use an encoded value in letters and/or numbers that does not explicitly state the commission amount.
Note: Each airline will advise you which codes to use, and also if you are required to include any additional information when you issue a ticket for a net fare. If you are in any doubt, contact the airline for clarification. Each airline may have different requirements.
Net Fare Currency (NF) and Net Fare Amount
The amount that the agency owes the supplier.
More Information
With the NF modifier, the selling fare is shown in the Fare box on the ticket, and a different amount is shown in the remittance area.
Net Fare amounts can be added by either quoting an automatic fare or by using a manual fare build.
Terminal Format example for a Net Fare of GBP 700.00:
TMU1AI-45678/NFGBP700.00Note: The commission rate remains at the standard level.
See General information on Nett Remit Tickets in the Travelport Knowledge Base for more information.
Actual Selling Fare (ASF)
The actual amount of the fare reported to BSP and with IF when followed by the actual amount for invoicing purposes and not reported to BSP.
Actual Selling Fare (ASF) and Invoice Fare (IF) are mutually exclusive.
Invoice Fare Amt (IF)
The actual amount of the fare used for invoicing purposes and not reported to BSP.
Actual Selling Fare (ASF) and Invoice Fare (IF) are mutually exclusive.
Ticket Designator (TD)
Smartpoint 11.2 and later
US ARC and CA BSP
A designator filed by carriers to indicate a type of fare such as a specific private fare, promotion, or discounted fare.
Note: This modifier displays only for United States (ARC) and Canadian (BSP) PCCs.More Information
The ticket designator value is displayed differently in the PNR/Booking File depending on whether UPDATE MODIFIER or ISSUE TICKET – TKP is clicked.
-
Update Modifier
If UPDATE MODIFIER is clicked, the ticket designator value is updated and displayed as part of the T-Line (ticketing line) of the stored fare.
-
Issue Ticket
If ISSUE TICKET – TKP is clicked, the ticket designator value is added as part of the fare basis code (FBC) line of the issued electronic ticket. The modifier is not updated in the stored fare.
Known Host LimitationThe maximum length of the ticket designator modifier is 10 alphanumeric characters. However, this ticket designator combined with the FBC (fare basis code), cannot exceed a total of 15 alphanumeric characters.If this 15-character limit is exceeded, an error displayed as either a pop-up message or as header text: ERROR 340 - TICKET DESIGNATOR IS TOO LARGE.Exempt Carrier Fees
Select this check box to exempt OB Fees from the ticket.
These fees are used by airlines to instruct pricing systems how to collect fees on an airline's behalf when they are the validating/plating carrier. These fees are used by the airline to cover the costs of accepting payment by credit card or other form of payment.
-
-
Optional. In Document Modifiers, select options for ticket and itinerary documents.
-
After you enter all modifiers, select I have validated the fare rules and results, and I would like to continue with the exchange.

-
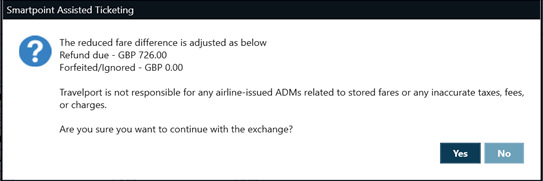
Smartpoint 11.7 and later. After you select the fare validation, a pop-up message is displayed to indicate a refund and any forfeited/ignored amounts, as well as reminder that agents are responsible for validating taxes, fees, and charges to avoid ADMs.
-
Click EXCHANGE TICKET to display the Manual Fare confirmation message.
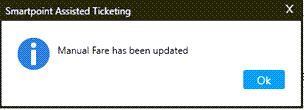
-
Click OK to approve the fare update. If there are changes to the ticket modifiers, the record is updated, and a confirmation message is displayed.
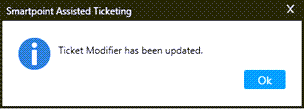
-
Click OK. The stored fare and any modifiers are now updated and saved. If you do not want to continue, you must delete the stored fare and start again.
The first Additional Payment screen displays to show the new fare details and ticket details. The ticket details are automatically populated, but can be changed.
Important! Assisted Ticketing cannot confirm with Category 31 (Cat31) if the original fare was a refundable fare. Therefore, you must confirm that if refund can be made and, if applicable, manually adjust the refund.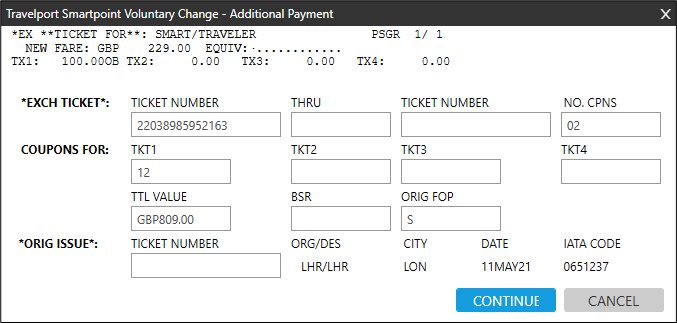
-
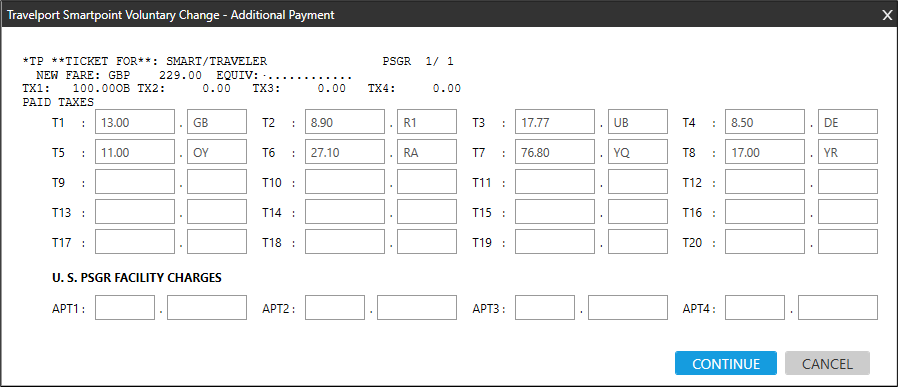
Click CONTINUE to display the second Additional Payment screen, which contains the paid taxes and US Passenger Facility Charges. The tax fields are automatically populated, but can be changed.
-
Click CONTINUE to display the third Additional Payment screen, which contains the add collect and form of payment information.
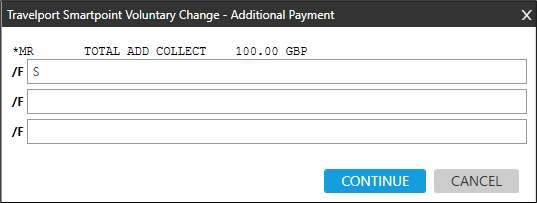
By default, the form of payment from the original ticket is displayed. However, the form of payment can be changed, if necessary.
More Information
Forms of payment:
-
Cash: S
-
Check: CK
-
Credit card example: VI4444333322221111*D1226
Tip! Be sure to use an asterisk * rather than a forward slash / between the card number and expiration date.
For more information on forms of payment, see Ticket Preparation and Form of Payment in the Travelport+ Format Guide.
-
-
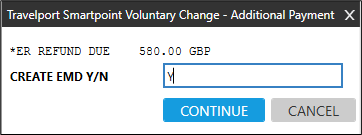
Click CONTINUE to display the fourth Additional Payment screen to create a Refundable EMD.
-
Type Y to create a Refundable EMD.
Note: If you type N, the refundable EMD is not raised, and the confirmation screen displays the ticket issuance only.
-
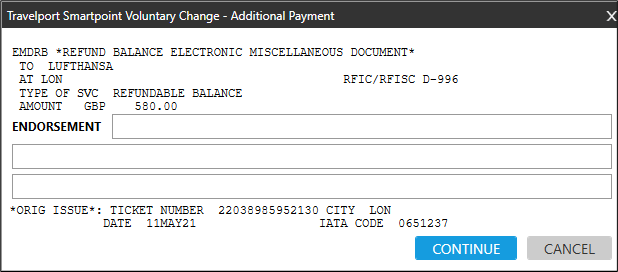
Click CONTINUE to display the fifth Additional Payment screen.
-
If applicable. In the ENDORSEMENT lines, enter endorsement information.
-
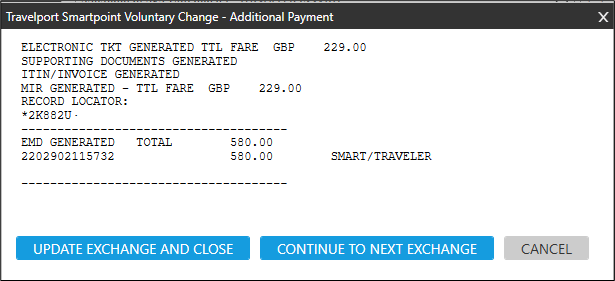
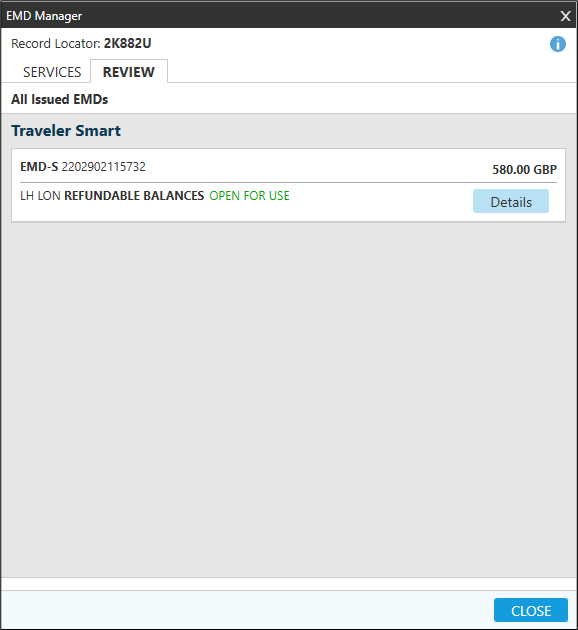
Click CONTINUE to display the confirmation page, which advises that both the Refundable Balance EMD and ticket have been issued. A service segment for the Refundable Balance EMD is automatically added to the PNR/Booking File.
-
Review the updates and select the next step:
-
Click UPDATE EXCHANGE AND CLOSE to save the exchange details and exit Assisted Ticketing.
-
Click CONTINUE TO NEXT EXCHANGE to save the exchange details. Assisted Ticketing remains open, and you can begin another exchange.
-
Click CANCEL to close Assisted Ticketing without saving the exchange details. However, the stored fare (Filed Fare/ATFQ) updates are saved.
The PNR/Booking File and ticket details display the new ticket information and exchange status.
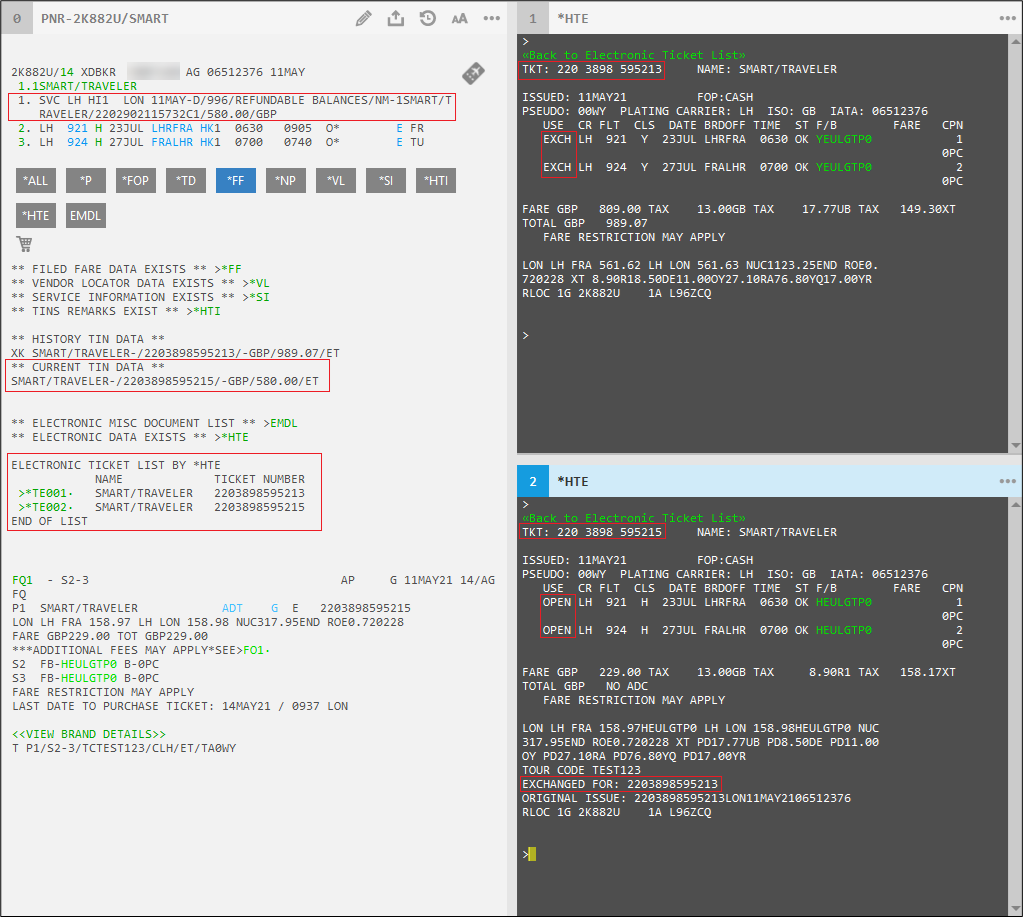
Notepad remarks may be displayed for an updated or exchanged ticket.
More Information
The display for notepad remarks may vary depending on the Smartpoint version and selected setting:
-
In Smartpoint 11.5 and earlier, you can enter *NP to view historical notepad entries related to the original ticket before the exchange (H*EXCH) in the face of the PNR/Booking File.
Example
The details of the original ticket are recorded in the Historical Notepad field. For example:
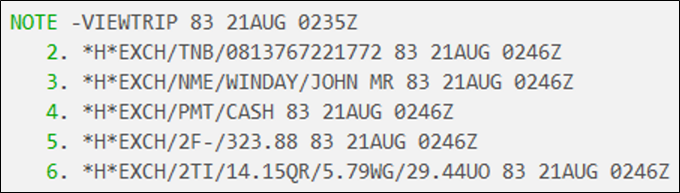
• TNB = Ticket Number
• NME = Passenger Name
• PMT = Payment
• 2F = Fare
• 2TI Tax Breakdown
-
In Smartpoint 11.6 and later, you select an application setting to choose from several options for notepad remarks.
More Information
You can select an application setting for these notepad remark options:
-
None to not add any historical fare quote or exchange notepad remarks to the PNR/Booking File.
-
Default to add the same original ticket remarks that are provided in Smartpoint 11.5 and earlier. Enter *NP to view remarks.
-
Historical Notepad (Face of the PNR) to add historical notepad remarks in the face of the PNR/Booking File when a ticket modifier update (HF*FQ) or ticket exchange (HE*EX) is made. Enter *NP to view remarks.
-
Historical Notepad (History alone) to add notepad remarks only in the history of the PNR/Booking File when a ticket modifier update (HR*FQ) or ticket exchange (HR*EX) is made. Enter *HNP to view remarks.
-
-
Forfeit/Ignored Amounts (ARC)
Enter *NP to view penalty and forfeit amounts in historical notepad remarks on the face of the PNR/Booking File.
More Information
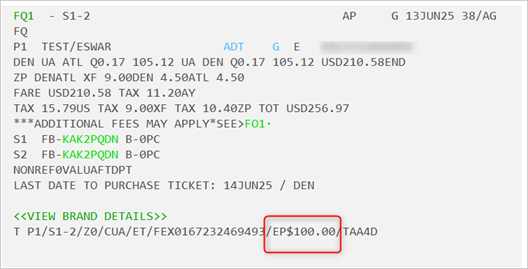
In ARC transactions, the forfeited/ignored amount is considered with the airline change fee as an EP$ modifier, so that the amount is correctly included in the exchange calculation. The EP$ modifier is added in the T line of the stored fare (filed fare) if the modifier is updated before exchange. The modifier is considered internally when the ticket exchange is attempted directly.
Penalty and forfeit amounts are stored in historical notepad remarks on the face of the PNR/Booking File.

-
In Smartpoint 11.7 Service Release and later, you can enter *NP to view historical notepad remarks on the face of the PNR/Booking File for refunds and residual MCO remarks (ARC).
BSP
-
Update Modifier: NP.HF FQ/REFUND:USD726.00
-
Exchange Ticket: NP.HE EX/REFUND:USD726.00
ARC
Residual MCO (MCO Checkbox Selected)
-
Update Modifier: NP.HF FQ/RESIDUAL:USD1451.01
-
Exchange Ticket: NP.HE EX/RESIDUAL:USD1451.01
Refunds (MCO Checkbox Not Selected)
-
Update Modifier: NP.HF FQ/REFUND:USD1451.01
-
Exchange Ticket: NP.HE EX/REFUND:USD1451.01
-
The Refundable EMD-S is issued. See Exchanging E-Tickets with EMD-S Vouchers for more information.
-
-