Assisted Ticketing
Using the Involuntary Change Tab
Assisted Ticketing provides a user interface make involuntary changes to tickets. Use the Involuntary Change tab in Assisted Ticketing to add modifiers before sending the exchange request.
| Important!
The Assisted Ticketing - Involuntary Change feature does not provide any guarantee against ADMs:
|
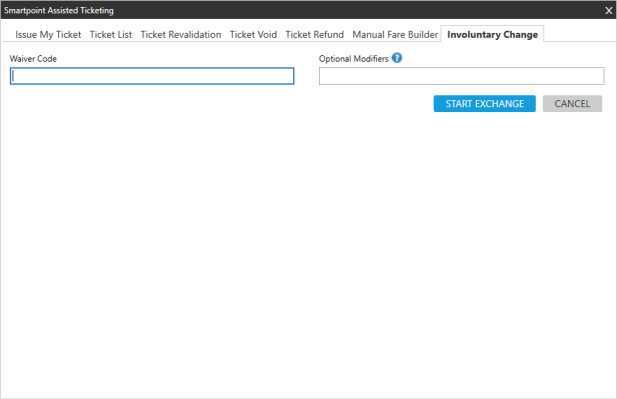
To use the Involuntary Change tab:
-
Retrieve a PNR/Booking File with ticketed fares.
-
Change the itinerary to include new dates, flight numbers, and/or airlines. Routing must remain the same to be valid for involuntary change.
-
Click the Ticket
 icon to launch the Smartpoint Assisted Ticketing window.Tip! You can also enter the #SATINVOL Quick Command.
 -
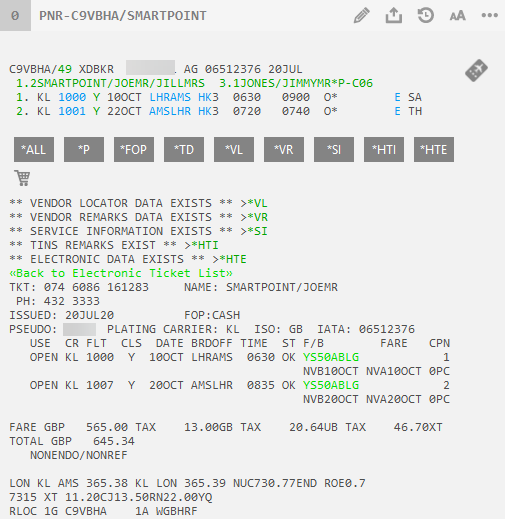
Select the Involuntary Change tab. The following example shows a PNR/Booking File with two Open tickets.
Tip!NDC and Direct Payment Carrier segments are not supported in Assisted Ticketing.
 More Information
Involuntary changes require an HK (confirmed) ticket status. However, involuntary changes for NDC segments are sent using order change notifications and do not use HK/TK codes. As a result, itineraries with NDC segments continue to display the existing error message: All segments must have HK status prior to INVOL.
-
Optional. Enter a Waiver Code. The waiver code entered in this tab overrides any existing waiver codes.
-
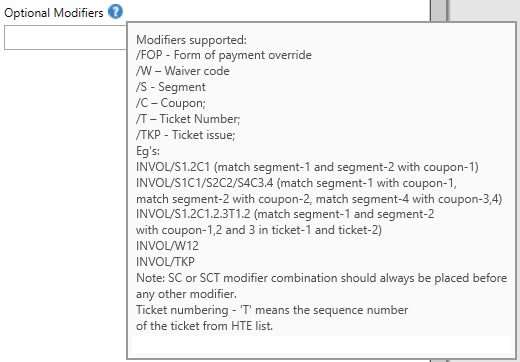
Optional. In Optional Modifiers, enter one or ticketing modifiers. Agents can click the Help icon to see the list of supported modifiers and examples.
-
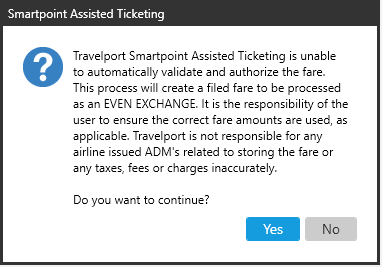
Click START EXCHANGE to display a disclaimer message about ADMs (Agency Debit Memos) for unauthorized fares.
-
Click Yes to accept the disclaimer conditions and continue the exchange process.
-
First, Assisted Ticketing tries to revalidate the ticket. If revalidation is impossible because of the types of changes or airline policies, Assisted Ticketing prepares Fare Quote and Ticket Modifier Update (TMU) masks with all of the data required for involuntary exchanges.

-
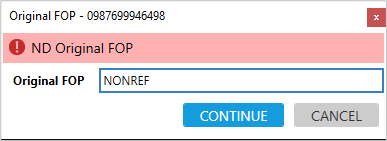
Smartpoint 11.0 and later. If the original fare is missing a form of payment (FOP), or an update to the FOP is required, the Original FOP window is displayed.
-
If applicable. Enter a miscellaneous form of payment and click CONTINUE.
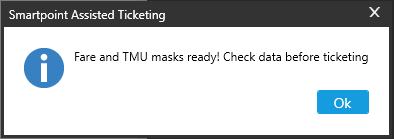
A success message is displayed.
-
Click OK to complete the change process.
-
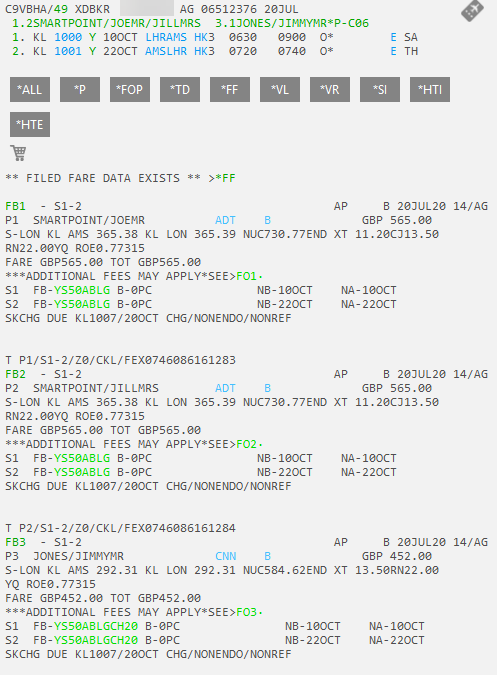
In the PNR/Booking File, verify the Filed Fare setup for exchange.
-
Receive and end transact (ER) the PNR/Booking File.
-
Issue the new tickets (TKP).