Direct Flights Only
The Add a Rule page allows Content Optimizer users to create rules that affect the shopping query results. Rules are tied to a PCC/SID and apply to all users within that PCC/SID.
The Direct Flights Only rule limits Shopping/Search requests to non-stop and stopping direct flights only.
-
The process for this rule uses a BIAS in which it tries to keep to direct flights for the market, but will allow some single connects to be considered, especially in markets where there are few direct flight carriers.
-
This rule was previously named Promote Direct Flights and contained a bias value. Any existing rules using Promote Direct Flights will continue to work as they did.
Application Scenario
Description
Prioritizes direct flights.
Problem scenario
“I want to display only direct flights between HKG and TPE to travelers, as the flight time is short and the fares for direct flights are usually quite competitive. I achieved this by applying the ‘Direct Flights only’ rule.”
Technical example:
A search response such as LAX-NYC with a wide choice of routings, can be manipulated to return an increased number of direct itineraries.
Create Rule
Note: Required fields are indicated by a red asterisk *
-
From the Rules tab, click the New Rule button to display the Select a Rule to Create dialog.
-
From the Rule Type list, select Direct Flights Only. Refer to Air Rule Types for an explanation of each type of rule.
Notes:-
Direct flights only rule does not support airline specification. Each rule has individual limits for the number of airlines the rule supports, if any. See Airline List for more information.
-
If a rule supports NDC carriers, an NDC logo displays by the rule name.

-
Search for a specific rule by entering the search word in the Search by rule name field.
-
This rule promotes a BIAS to direct flights, keeping direct flights for the market, but will allow some single connects to be considered, especially in markets where there are few direct flight carriers.
-
-
Set up the rule on the following screen by filling out the following fields:
-
Rule Name Only Alpha Numeric characters, spaces and commas are allowed, and can not be greater than 25 in length.
-
Campaign Name (Optional) Only Alpha Numeric and certain characters (-,:()'.+&) are allowed and can not be greater than 25 in length.
-
Description (Optional). Only Alpha Numeric and certain characters (-,:()'.+&) are allowed and can not be greater than 100 in length.
Note: In the description field, ensure you explain why this rule is created, what are the goals, what is the target, why are you creating this rule, so that everyone who sees the rule understands its reason for creation. E.g., you are creating a rule that limits results for an airline because there is a bankruptcy risk and you don't want your passengers stranded, and later, the airline might be strong but results are still being limited because the rule is still enacted. -
Complete the fields associated with the option chosen.
-
Customize Direct Flights Only rule
To customize this rule:
-
This rule limits Shopping/Search requests to non-stop and stopping direct flights only.
In the Content application area, select one of the following:
-
Traditional (default)
-
NDC
-
Both
The default setting is Traditional.
-
If NDC is selected, the rule is only be applied to those airlines from which the customer is authorized to receive NDC content. Customers should work with their account managers to be authorized to receive NDC content.
-
If Both is selected, the rule applies to both Traditional and NDC content.
-
-
-
Click Next to display the Target and Schedule screen.
Target and Schedule
The Target and Schedule screen continues the rule creation process by allowing you to specify PCC/Groups, geography, rule timing, and travel dates.
What will be the rule target?
-
Enter the Galileo (1G), Apollo (1V), or Worldspan (1P) PCC(s)/SIDs or PCC Group Name that this rule affects.
-
To enter a single PCC or multiple PCCs:
-
Indicate which Travelport GDS the PCC applies to along with the input. For example. if PCC ABC is a Galileo PCC, the system requires this as the input: ABC-1G.
-
The list of matching values display. Click to select the correct PCC or Group.
-
You can enter multiple PCCs. For example, XYZ5-1V, ABC7-1G.
-
-
To add from a PCC group list:
-
Click Add from PCC group list to select a PCC group.
-
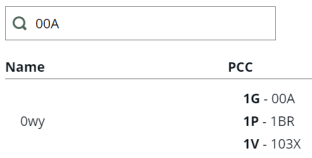
Search for the PCC group in the Search box.
-
Scroll to the bottom of the results and enter the page number, or click the right / left arrows.
-
Click the Add button
 next to the PCC group to add it to the rule. Items already added display a blue button
  .
.
-
-
-
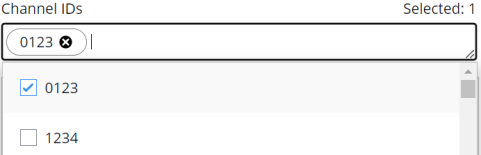
Optionally, enter the associated Channel IDs. The available Channel IDs display when the box is selected.
Geography and Exceptions
This section allows you to specify how geography will affect the rules, and create exceptions to these rules.
Note: See Geography Exceptions and Global Geography Application to review exception notes and see how to make Content Optimizer default the rule to worldwide application, a.k.a. “global.”
-
-
If the option is presented, select the Location type:
-
Select the Geography values for the From/Between and To/And options. Optionally, select Both ways if available.
Note: Both ways is not available for Promote Preferred Fares, NDC content preference, and NDC response time*.
-
Optionally, select values in the Geography Exceptions, if available, to enter exceptions to the general Location Type.
-
Optionally, click Add geography exception to add an additional exception to the rule.
-
Multiple geography exceptions can be added.
-
Click the delete icon
 to remove an exception option.
-
-
Optionally, for the Exclude Fare of Fare Family rule, select the Enforce directionality checkbox. This allows you to exclude directional fares when a fare is being excluded in both directions. This ensures that a fare being excluded will only be excluded for the proper direction. Initially, this only applies to fares being excluded by fare basis code.
-
 * Understanding Promote preferred fares, NDC Content Preference, and NDC Response Time Geography Rules
These examples demonstrate the difference when selecting From / To versus Between / And
Note: Between/and setting for NDC Content Preference and NDC Response Time geography is not yet available, and will be in a future release.
When From / To is selected
This option is unidirectional. The Origin must match the From element and the Destination must match the To element.
-
Rule is applied to One-Way and Round-Trip.
-
From airport is DEN
-
To airport is ORD
Rule:
-
Runs DEN > ORD (one-way)
-
Runs DEN > ORD > DEN (round trip)
-
Runs DEN > LAX > ORD (one way with connection)
-
Runs DEN > LAX > ORD > LGA > DEN (round trip with connections)
-
Does not run ORD > DEN, ORD > DEN > ORD, or ORD > LAX > DEN
-
Does not run if DEN > ORD are stopovers or layovers.
E.g., LAX > DEN > ORD > LGA -
Does not run if the origin or destination doesn't match.
E.g., LAX > DEN > ORD
-
-
When Between / And is selected
This option is omnidirectional. The Origin can match either the Between or And element, with the Destination matching the other element.
-
Rule is applied to One-Way and Round-Trip.
-
Between city is DEN
-
And city or ORD
Promote preferred fares:
-
Runs DEN > ORD or DEN > ORD > DEN
-
Runs ORD > DEN and ORD > DEN > ORD
-
Runs DEN > LAX > ORD > LGA > DEN (round-trip with connections)
-
Does not run if DEN > ORD are stopovers or layovers.
E.g., LAX > DEN > ORD > LGA -
Does not run if the Origins or Destinations do not match the rule.
E.g., LAX > DEN > ORD
-
-
-
Select Flight Options if the Booking Codes rule was selected on the previous screen, The rule can selectively be applied to the origin and destination of either the entire trip or sectors within a trip.
When will the rule run?
This section lets you specify the dates and times when the rule will run for airlines, e.g., when the rule is live (i.e., the dates and local time during which the search results will be affected by the rule).
-
Select Continuously, Daily, or Weekly from the Run rule drop-down box.
-
If the rule is to be effective every day but only during certain time windows during the day, then select the Daily option.
-
You can then specify up to five time windows during which the rule will be effective.
-
The times are based on the time zone of each PCC or SID specified in the rule.
-
-
If the rule is to be effective only on selected days of the week, select the Weekly option.
-
-
Click the Start date field to select the date when the rule will start running.
-
Specify the time the rule begins on the date selected. The times are based on the time zone of each PCC specified in the rule.
-
If Daily was specified in step 1, specify time windows within each day for the rule to be effective in the Recurring start time and Recurring end time fields by selecting the clock icon
 .
. -
Optionally, click the plus sign
to add additional time windows. You can then specify up to five time windows during which the rule will be effective. -
If the selection is between 7 AM - 9 AM:
-
Starting at 7:00 AM, the rule is active.
-
From 9:01 AM - 6:59 AM the following day, the rule is not active.
-
-
-
Specify the End date and time for when the rule will stop running or select the check box to run rule indefinitely.
Note: Leave the rule End date empty to run indefinitely. Content Optimizer defaults to December 31, 2059 in these instances.
-
If Daily was specified in step 1
-
Specify a time windows within each day for the rule to be effective in the Recurring start time and Recurring end time fields.
-
Optionally, click the plus sign
to add up to five additional time windows.
-
-
If Weekly was selected in step 1:
-
Specify the number of weeks the rule will run in the Recur every field.
-
If the rule is to be effective every week, then leave the Recur Every value at its default setting of ‘1’. Otherwise, specify a number of alternating weeks for the rule to be effective.
-
Use the checkboxes to select which days of the week the rule should be effective, i.e., the days the rule will run.
-
Travel Dates
This section lets you optionally specify when the air rules apply continuously, or specific days of the week.
Notes:
-
Multiple travel date ranges can be specified for only the Booking Code and Fare Basis Code/Booking Code rule types.
-
The rule is only applied if all travel falls within the date range(s).
-
It is Best Practice to add an end-date to your rule, for example, three months, and create a reminder for yourself to recheck the rule then to see if it's still valid, or whether the data still applies. Perhaps for a Commercially Important Airline it may be valid, but a contract for a block carrier may only be for three months, but if the rule is set to run continuously without end, you may experience issues at a later date.
-
If the rule is built One Way:
-
The travel dates for only the matched geography segment must fall within the rule Travel Start and End dates.
-
The travel dates of any other segments are not taken into consideration.
-
-
If the rule is built for Both Ways:
-
The travel dates for the entire itinerary must fall within the rule Travel Start and End dates.
-
If either the outbound or return date fails this check, the rule will not be applied.
-
-
Select Continuously, or Weekly from the Run rule drop-down box.
-
Optionally, select the Date window check box to specify dates for the rule to run. If this is selected, go to step 7
-
Enter a Start date and End date when the rule will start running.
Note: Leave the travel End date empty to run indefinitely. Content Optimizer defaults to December 31, 2059 in these instances.
-
Specify the time the rule begins on the date selected. The times are based on the time zone of each PCC specified in the rule.
-
Specify the End date and time for when the rule will stop running
-
If Weekly was selected in step 1:
-
Specify the number of weeks the rule will run in the Recur every field.
-
Select which days of the week the rule will run.
-
-
Click the add
at the end of the row to add another date range. -
If Date window was selected in step 2, enter values in the Starting and Ending fields to specify the number of days from the current date the rule will run. Enter a value between 1 and 90 in the ‘Ending’ text box.
Notes:-
This number represents the number of days from the date an entry is made (current date) and is compared to the travel date in the entry. If this is the only value entered, then the restriction is applicable from the current date for the number of days matching the entered number.
-
For example, if you want to apply a rule to travel that will be in effect for travel for the next 30 days from the date the agent is making the entry, you would then enter ‘30’ in the Ending textbox and leave the Starting textbox set to ‘0’.
-
-
Alternately, if you want the rule to start being effective ‘x’ days from the date an agent is making an entry (current date), then use both the Starting and Ending textboxes.
-
The Starting textbox will be the number of days from the current date when travel will be impacted, and the Ending textbox will be the number of days from the current date when travel will be no longer be impacted.
-
The Ending number must be greater than or equal to the number is the Starting textbox and cannot be any greater than 365.
-
For example, if you want to apply a rule to travel that will be in effect for travel 60 days from the date the agent is making the entry, but the rule will not apply to travel 90 days from the entry, then you would enter ‘60’ in the Starting textbox and ‘90’ in the Ending textbox. This results in a ‘sliding’ 30-day window restriction.
-
-
The number of days varies by airline. Therefore, we recommend neither the Starting nor Ending field value should be greater than 362 days.
-
This functionality is available for all rules except for the Exclude marketing airlines for time window.
-
-
Click Activate. Optionally, click Previous to return to the Setup screen.