|
Custom Itinerary As of 15 September 2018, the enhancements added to the Custom Itinerary feature in Travelport Smartpoint 8.1 have been removed. The current Custom Itinerary feature has reverted to the previous Travelport Smartpoint 8.0 functionality. Travelport will continue to add enhancements to Custom Itinerary in future releases.
|
Custom Itinerary
Adding Documents to Custom Itineraries
When you create a custom itinerary, you have the option of including adding ticket, miscellaneous charge, orbaggage information that is present in the PNR.
To include documents in the custom itinerary:
- Open the Custom Itinerary script to create a custom itinerary.
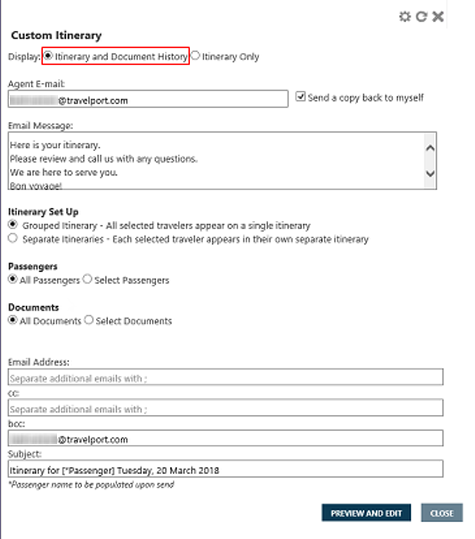
- In Display, select Itinerary and Document History. When you select this option, a Documents section is displayed.
- Enter the Agent E-mail and the optional Email Message fields.
- In Itinerary Set Up, select an option for Grouped Itineraries or Separate Itineraries.
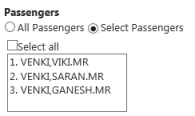
- In Passengers, select All Passengers or Select Passengers.
Tip! See Set Up Options for Custom Itineraries for examples of itineraries based on the selected set up and passenger combinations.
- In Documents, select the desired documentation option. The available options vary depending on the itinerary set up and passenger selections in Steps 4 and 5.
Grouped Itinerary with All Passengers
You have the option to select between:
- All Documents, which includes all documents for all passengers in a single custom itinerary.
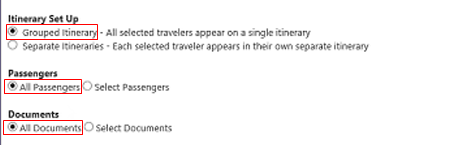
- Select Documents, which allows you to select specific documents from the list of all documents for all passengers. Selected documents are included in the single custom itinerary.
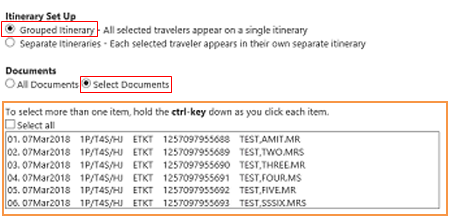
To select the document, you can either:
- Click Select all to include all documents.
- Press the CTRL key to select individual documents.
If you choose Select Passengers in Passengers, the Documents list does not display because all associated documents for each selected passenger are automatically included in the custom itinerary.
- Complete any other tasks associated with the custom itinerary. See Creating Custom Itineraries for more information.
- Click PREVIEW AND EDIT to display the customized itinerary.
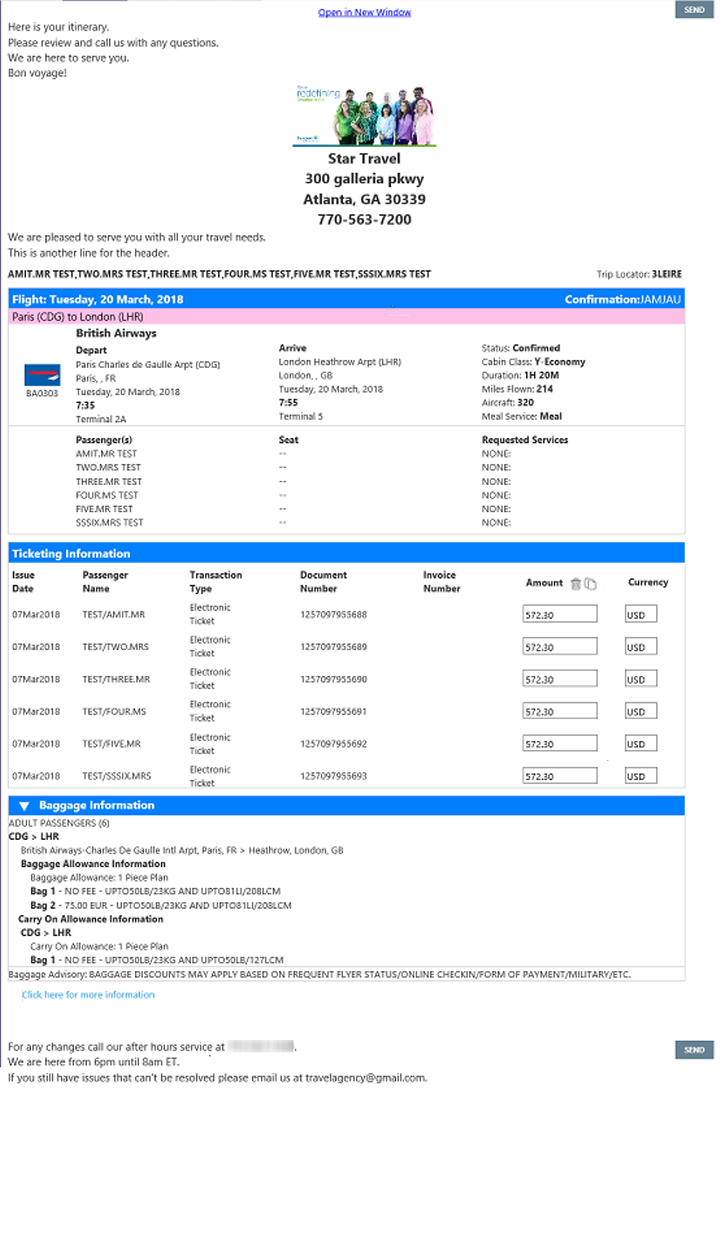
In this example, ticket information for six travelers is displayed in the Documents section.
If present in the PNR, baggage information is also displayed. A link is provided to the carrier's web site for more information about carrier's baggage policies.
- Optional. For each ticket, enter the fare in Amount field and the associated currency in the Currency field.
- Optional. Arrange the itinerary to move or delete certain itinerary items.
- Optional. Click Open in New Window at the top of the Custom Itinerary pane to view the entire itinerary in a new browser window. You can copy and paste content from this window directly into an email or other document.
- When your customizations are complete, you can either:
- Click SEND to email the customized itinerary.
- Click the Print
 icon to print a hard copy of the customized itinerary. Depending on your computer's setup, you may be able to fax through your printer software.