Rule Override
The Add a Rule page allows Content Optimizer users to create rules that affect the shopping query results. Rules are tied to a PCC/SID and apply to all users within that PCC/SID.
Rule Override specifies if the system settings will override optional customer entries for a limited number of rule types. I.e., Rule Authorization allows customers to specify whether indicated rules are allowed to be overridden by the agent’s use of a host entry modifier or whether the rules should always be applied regardless of the use of a modifier.
The Rule Override rule can potentially affect other rules you create, causing them not to run correctly due to conflicting conditions. If your rules are not processing correctly, check your rule override rule conditions. Rule override affects the following rules and will cause them not to run if the rule conditions conflict:
-
Exclude Fare or Fare Family - Fare basis Code only
Important: You may have to create two Rule override rules to have one that applies to Traditional and one that applies to NDC. Only create a rule for “both” if these are the only rules where you want to change the default behavior.
Application Scenario
Description
Specifies whether or not the Content Optimizer settings will override any optional customer entries, were the inhibited criteria is specifically requested.
Problem scenario
“I can apply ‘Rule Override’ to ensure that Content Optimizer rules are always applied irrespective of agent inputs, so that I can guarantee consistent results across the online channel and the terminal.”
Technical example
E.g. Rule in place to inhibit Fare Basis ABC123.
Hierarchy set to ‘User Input’. Agent specifically requests the restrict Fare Basis by entering: FQ@ABC123 - and the rule is overridden. Fare is returned
Or
Hierarchy set to ‘CO System Table’. Content Optimizer rule always applies, irrespective of agent input.
Create Rule
Note: Required fields are indicated by a red asterisk *
-
From the Rules tab, click the New Rule button to display the Select a Rule to Create dialog.
-
From the Rule Type list, select Rule Override. Refer to Air Rule Types for an explanation of each type of rule.
Notes:-
Rule Override does not support airline specification. Each rule has individual limits for the number of airlines the rule supports, if any. See Airline List for more information.
-
If a rule supports NDC carriers, an NDC logo displays by the rule name.

-
Search for a specific rule by entering the search word in the Search by rule name field.
-
-
Set up the rule on the following screen by filling out the following fields:
-
Rule Name Only Alpha Numeric characters, spaces and commas are allowed, and can not be greater than 25 in length.
-
Campaign Name (Optional) Only Alpha Numeric and certain characters (-,:()'.+&) are allowed and can not be greater than 25 in length.
-
Description (Optional). Only Alpha Numeric and certain characters (-,:()'.+&) are allowed and can not be greater than 100 in length.
Note: In the description field, ensure you explain why this rule is created, what are the goals, what is the target, why are you creating this rule, so that everyone who sees the rule understands its reason for creation. E.g., you are creating a rule that limits results for an airline because there is a bankruptcy risk and you don't want your passengers stranded, and later, the airline might be strong but results are still being limited because the rule is still enacted. -
Complete the fields associated with the option chosen.
-
Customize Rule Override rule
To customize this rule:
-
Select Content application:
-
Traditional (default)
-
When Traditional is selected, and no boxes are selected in the Traditional content list, the default behavior for traditional (EDIFACT) content is for the user input to override the rule.
-
If a box is selected, the agent cannot override the rule.
-
-
NDC
-
If NDC is selected, the rule is only be applied to those airlines from which the customer is authorized to receive NDC content. Customers should work with their account managers to be authorized to receive NDC content.
-
When NDC is selected, and no boxes are selected in the NDC content list, the default behavior for NDC content is for the rule to override agent’s input of a host entry modifier.
-
If a box is selected, the agent can override the rule.
-
-
Both
-
If Both is selected, the rule applies to both Traditional and NDC content. The default behavior for traditional (EDIFACT) content is for the user input to override the rule, and for NDC content, the rule overrides any user input.
-
-
-
In Choose agent/rule priority, select one or more rule check boxes to override. Checking the box next to the rule names below:
-
For traditional (EDIFACT) content, it means the rule overrides the agent’s use of a host entry modifier.
-
For NDC content, it means the agent is allowed to override the rule by use of a host entry modifier.
-
By checking one or more boxes, for NDC the user input would apply, for Traditional the rule would apply
-
-
Traditional content - select the rules to always apply regardless of user input:
-
Exclude Fare or Fare Family (fare basis code only)
-
‘@XXXXXXXX’ fare basis code modifier
-
-
Maximum journey time
-
‘JT’ Search/Shopping modifier
-
-
Exclude undesirable connection points
-
‘X-AAA’ Search/Shopping modifier.
-
-
Exclude marketing/codeshare airlines
-
Override can only be applied for this rule when the operating airline is set to blank.
-
-
Maximum connection time
-
Maximum overnight connection time
-
Select all
-
-
NDC content - Select the rules user input is allowed to override when NDC is selected:
-
Exclude marketing/codeshare airlines
-
‘/XX/YY’ modifiers
-
Note: Override can only be applied for this rule when the operating airline is set to blank.
-
-
Maximum connection time
-
Maximum overnight connection time
-
Select all
-
-
Both content - By checking one or more boxes, for NDC the user input would apply, for Traditional the rule would apply.
-
Exclude marketing/codeshare airlinesOverride can only be applied for this rule when the operating airline is set to blank.
-
Maximum connection time
-
Maximum overnight connection time
-
Select all
-
-
For Traditional content only, in the Choose one list, select which split rule should have priority.
Notes:
-
These rules are only available to selected customers, and if there is an overlap in applicability, only one rule can be applied. This allows the customer to specify which of the three rules will be applied in the case of an overlap.
-
If you have a combination of split rules the priority order is:
-
Public/private/net fare split
-
Unbundled/bundled fare split
-
-
The split rules has a dynamic display which displays the priority of the rules based on the customer’s selection, i.e., the Split rules priority is: box changes based on the priority selected.
-
-
Click Next to display the Target and Schedule screen.
Target and Schedule
The Target and Schedule screen continues the rule creation process by allowing you to specify PCC/Groups, geography, rule timing, and travel dates.
What will be the rule target?
-
Enter the Galileo (1G), Apollo (1V), or Worldspan (1P) PCC(s)/SIDs or PCC Group Name that this rule affects.
-
To enter a single PCC or multiple PCCs:
-
Indicate which Travelport GDS the PCC applies to along with the input. For example. if PCC ABC is a Galileo PCC, the system requires this as the input: ABC-1G.
-
The list of matching values display. Click to select the correct PCC or Group.
-
You can enter multiple PCCs. For example, XYZ5-1V, ABC7-1G.
-
-
To add from a PCC group list:
-
Click Add from PCC group list to select a PCC group.
-
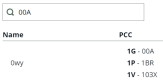
Search for the PCC group in the Search box.
-
Scroll to the bottom of the results and enter the page number, or click the right / left arrows.
-
Click the Add button
 next to the PCC group to add it to the rule. Items already added display a blue button
  .
.
-
-
-
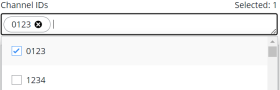
Optionally, enter the associated Channel IDs. The available Channel IDs display when the box is selected.
When will the rule run?
This section lets you specify the dates and times when the rule will run for airlines, e.g., when the rule is live (i.e., the dates and local time during which the search results will be affected by the rule).
-
If available, select Continuously, Daily, or Weekly from the Run rule drop-down box.
-
If the rule is to be effective every day but only during certain time windows during the day, then select the Daily option.
-
You can then specify up to five time windows during which the rule will be effective.
-
The times are based on the time zone of each PCC or SID specified in the rule.
-
-
If the rule is to be effective only on selected days of the week, select the Weekly option.
-
-
Click the Start date field to select the date when the rule will start running.
-
Specify the time the rule begins on the date selected. The times are based on the time zone of each PCC specified in the rule.
-
If Daily was specified in step 1, specify time windows within each day for the rule to be effective in the Recurring start time and Recurring end time fields by selecting the clock icon
 .
. -
Optionally, click the plus sign
to add additional time windows. You can then specify up to five time windows during which the rule will be effective. -
If the selection is between 7 AM - 9 AM:
-
Starting at 7:00 AM, the rule is active.
-
From 9:01 AM - 6:59 AM the following day, the rule is not active.
-
-
-
Specify the End date and time for when the rule will stop running or select the check box to run rule indefinitely.
Note: Leave the rule End date empty to run indefinitely. Content Optimizer defaults to December 31, 2059 in these instances.
-
If Daily was specified in step 1
-
Specify a time windows within each day for the rule to be effective in the Recurring start time and Recurring end time fields.
-
Optionally, click the plus sign
to add up to five additional time windows.
-
-
If Weekly was selected in step 1:
-
Specify the number of weeks the rule will run in the Recur every field.
-
If the rule is to be effective every week, then leave the Recur Every value at its default setting of ‘1’. Otherwise, specify a number of alternating weeks for the rule to be effective.
-
Use the checkboxes to select which days of the week the rule should be effective, i.e., the days the rule will run.
-
-
Click Activate. Optionally, click Previous to return to the Setup screen.