New Profile
The Agency Administrator profile is created by Travelport for the customer. The Agency Administrator is then responsible for creating other profiles for the agency (e.g., Branch Administrators and Agents).
The profile controls a user’s or group's settings and also contains personal information and preferences. A traveler's profile may contain frequent traveler information and passport details.
You can use the Travelport Admin Portal to create new profiles of type agent, traveler, traveler group, and account. Profiles of type branch, branch group, and agency must be created by Travelport.
This help topic focuses on creating profiles for accounts and travelers. See Create Agent Profile and Create Traveler Groups for information on creating these types of profiles.
Some profile types may not be available based on your security permissions. The information that can be added to a profile depends upon the type of profile being created:
-
Account profiles include information for back offices, contracts, and service fees, and travel preferences. Account profiles are used to create corporate or company profiles of the businesses that use the services of the Agency. There must be Travelers associated to these profiles. An account profile is at the top of the Account hierarchy.
-
Agent profiles include information for terminal and printer connections, contracts, commissions, service fees, and travel preferences. See Create Agent Profile for more information.
-
Traveler Group profiles include information for contracts, commissions, fees, and travel preferences. This type of profile is optional and can be used to group or organize the travelers of a company into sub-groups. There may be up to eight traveler groups associated to an Account profile. See Create Traveler Groups for more information.
-
Traveler profiles include information for payment, contact, address, passport, traveler visa, travel preferences, and loyalty programs. Traveler profiles are used to create personal profiles for individual customers (or travelers) who use services of the Agency. These profiles may be associated to Account and Traveler Group profiles, or may be stand-alone profiles. A traveler profile falls at the bottom of the Customer profile hierarchy.
Create a Traveler or Account Profile
-
Select New Profile from the Profiles menu. The New Profile tab displays with two tabs: General and Details. The General tab contains the profile type and description, while the Details tab contains all other profile information, including hierarchy associations.
-
In the General tab of the New Profiles screen, select a profile type.
-
Complete the General tab details, then click Save. Information required depends on the profile type selected.
-
Account profiles do not require any other information on the General tab.
-
Travel Group profiles require you to select an account to which the group belongs, then select the level for the group.
-
Traveler profiles require do not require any other information on the General tab. The traveler name is entered in the Details tab.
-
Click the Details tab.
-
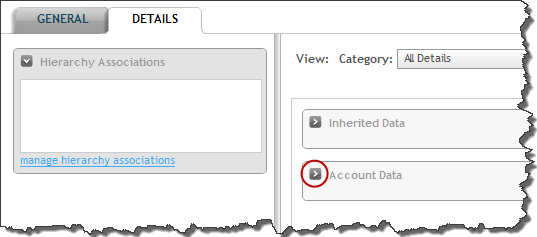
Select the hierarchy to which this profile is associated.
- Expand the Hierarchy Associations container on the left side of the screen.
- Click the manage hierarchy associations link.
- Click the Find Profiles tab.
-
To search for a profile, select the profile type (e.g., Branch Group), select the search criteria (e.g., Name), then enter the search value. An asterisk can be used as a wildcard at the end of the search value.
-
To browse for a profile, click the name of the profile to navigate down the hierarchy. When the parent profile displays, click the assign link. Travelers can have up to 10 parent profiles. Travelers can be associated to profile of type Agency, Branch Group, Branch (WAB), Account, and Traveler Group.
Note: By default, a traveler profile is associated to the work area branch of the administrator who is creating the profile. -
Once the profile association has been assigned, click the Set button.
-
Enter profile-specific information in the right side of the screen. The profile type determines the information that can be entered. For more information, go to the following sections:
-
Click Save when all information has been entered.
Account Profile Details
-
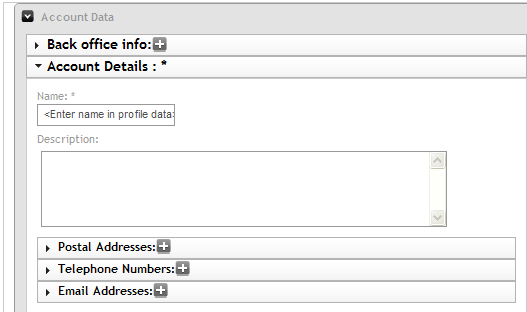
Expand the Account Data section by clicking the arrow.
-
In the Account Details section, enter the Account Name.
-
When all necessary information has been entered, click the Save button.
Traveler Group Profile Details
-
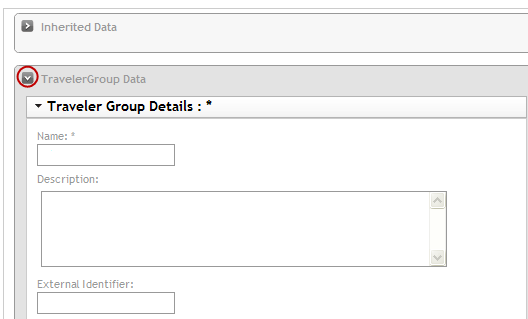
Expand the Traveler Group Data section by clicking the arrow.
-
Enter the Name.
-
When all necessary information has been entered, click the Save button.
Traveler Profile Details
-
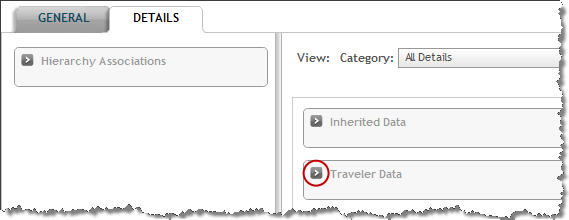
Expand the Traveler Data section by clicking the arrow.
-
In the Traveler Details section, enter the traveler's first name and surname. The name fields are the only required data; however, you can also enter the traveler's address, travel preferences, contact information, and loyalty information. To add information to any category, click the + button to the right of the category.

-
When all necessary information has been entered, click the Save button.