Ticket
Held bookings must be ticketed within the ticketing time limit. Depending on the airline, you have the option to reprice a held booking.
Important: Agencies can restrict ticketing. If you do not have the appropriate permission, a blue information message displays above the graphical booking file.
-
 ) icon in the window header to open the graphical view.
 -
If you have not yet ticketed the booking, the ticket time limit date/time information displays in the Booking information section's Ticketing arrangement and in the Reservation details Tickets section.

-
Add or modify information as needed.
-
If the booking was held without selecting a form of payment, continue with the next steps in order to add form of payment. You will need to select the Reservation section then the Issue ticket button in order to add or edit the form of payment.
-
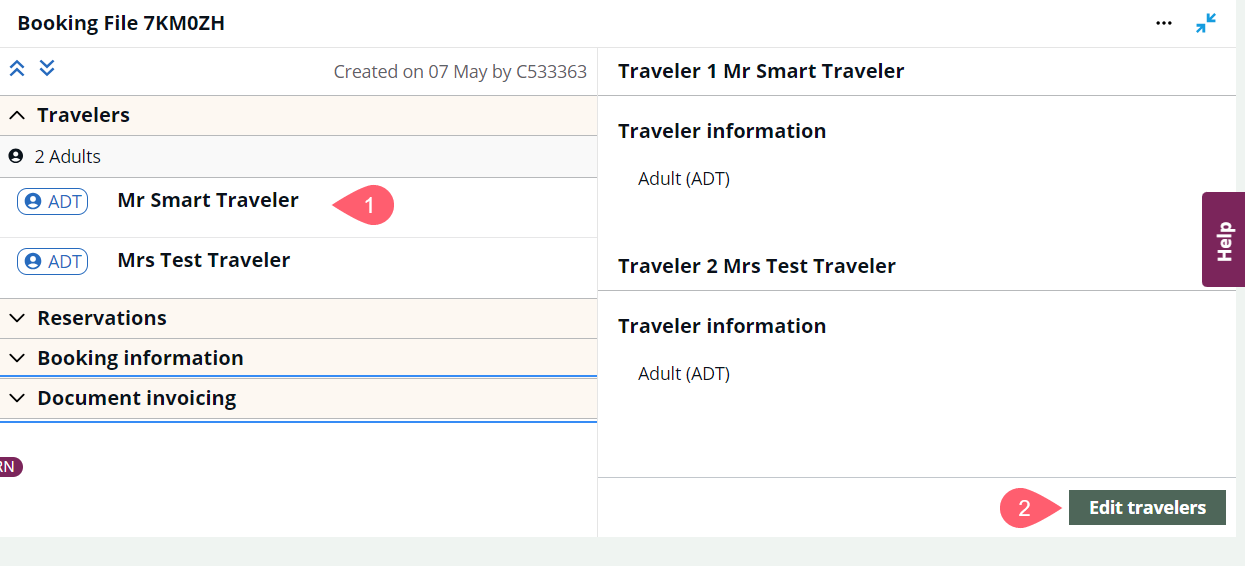
To add membership information, select a traveler, then select Edit travelers. Enter the supplier code and membership number, then select Apply changes.
-
-
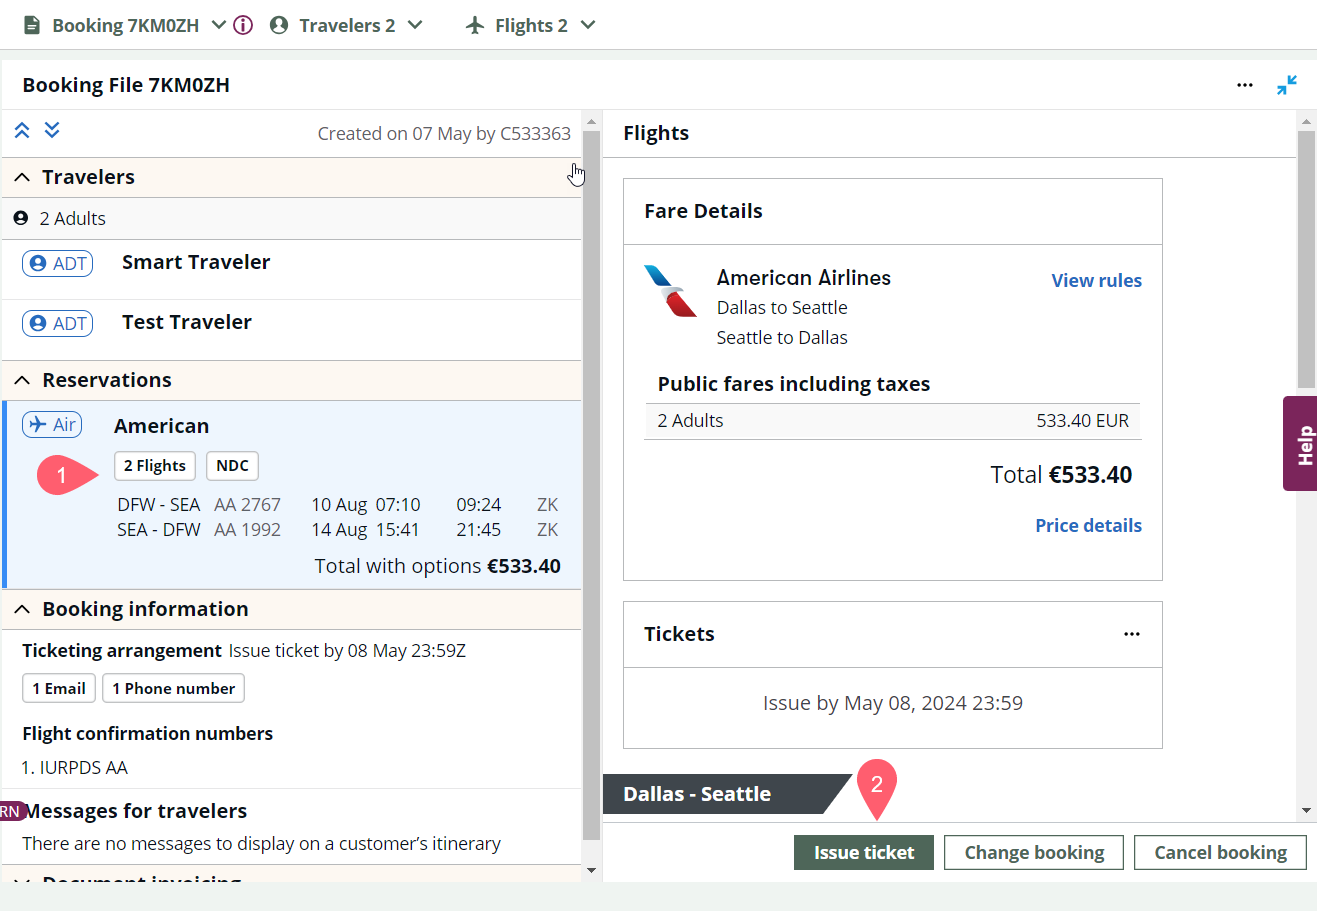
Select the flight summary in the Reservations section. Flight details display in the right panel.
-
On the right, select Issue ticket. The Issue ticket button is only visible when an air card is selected.
-
A review and confirm page displays with the booking total at the top.
Important: If you selected None as a form of payment for a Hold, you must enter a form of payment before you can issue tickets. Once added, select Save changes to keep the booking on hold or select Issue ticket.
For traditional bookings, you can also add or edit some ticketing details prior to issuing the ticket.
-
For commission, select whether it is a percentage or amount, then enter a value.
-
Endorsements
-
For IT/BT fare type, select whether it is an Inclusive tour (IT) or Bulk tour (BT). Default is None.
-
Tour code
-
-
Select Issue ticket to issue the tickets.
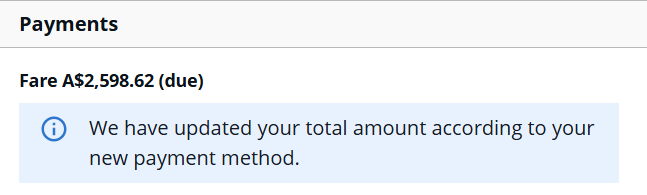
Note: If during ticketing a change is made to the FOP of a held booking, the system performs a background reprice to ensure the OB-Fee reflects the correct payment method. A blue informational banner on the payment component notifies agents of the updated fee.
-
A warning message displays to confirm ticket issue. Once the booking is ticketed, you cannot modify or add other ancillaries. Select Pay and close the booking to issue the ticket.
-
Confirmation information displays. Upon ticketing, all passenger ticket information displays, including airline, name, ticket number, and associated passenger type code (PTC).
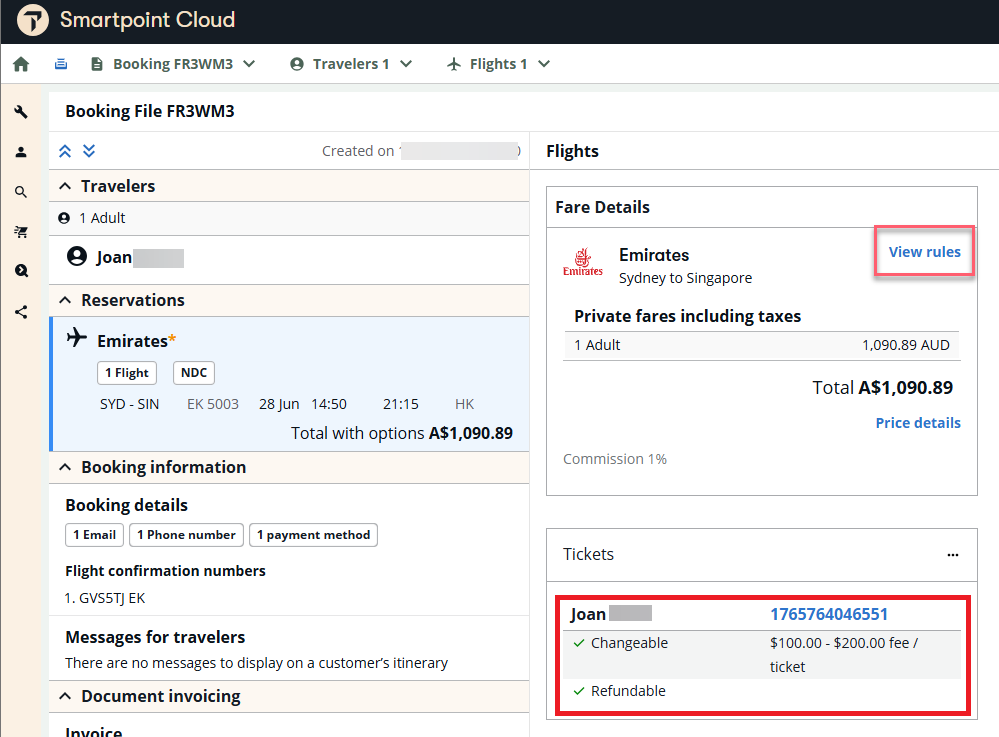
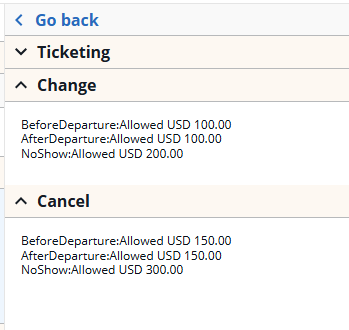
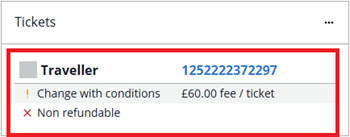
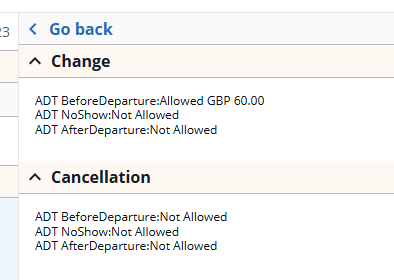
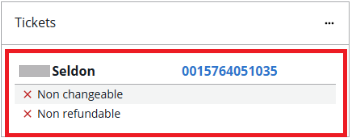
Change and refund eligibility indicators
In the Ticket card, change and refund eligibility displays below the passenger name and ticket number.
-
A green check indicates a change or refund is available.
-
An amber exclamation point indicates there are conditions for a change or refund.
-
A red x indicates the a change or refund is not allowed.
Select View rules in the Fare Details card to view full details.
 Message types:
-
Ticket can be changed or refunded with a penalty fee as indicated.

-
Ticket rules have conditions – a combination of allowed and not allowed.
-
Changes or refunds are not allowed.
-
Eligibility information is unavailable.

Note: For multiple passenger bookings, in cases where different rules apply for different PTCs, eligibility information displays per passenger.

-
For NDC bookings, ticketing information is added to the DI lines.
Important: Ticket display (*HTE) is not supported in the terminal view for NDC transactions. Some carriers allow ticket display through the EDIFACT (GDS) path. However, this behavior is not consistent across all carriers. For both NDC and EDIFACT (GDS) bookings, use Smartpoint Cloud's graphical booking file to display tickets for a reliable and consistent experience.