Ticket Exchange Plus: Automatic Exchange (Rapid Reprice)
Adjusting Ticketing Entries
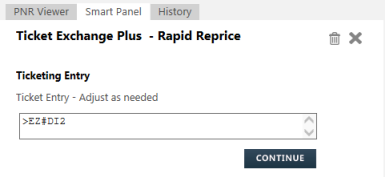
After you add exchange elements for an automatic ticket exchange and click CONTINUE, the Ticketing Entry screen is displayed. The Ticketing Entry screen allows you to confirm the ticketing information in the PNR before issuing the exchange ticket ro storing .
Tip! You can hover the cursor over a field to display tooltips with additional information.
To adjust ticketing entries:
- Review the Ticketing Entry and make any needed changes to the cryptic ticketing format.
- If you selected Issue Ticket in the previous Exchange Elements screen, the cryptic entry for issuing the ticket is displayed. For example: EZ#DI1.
- If did not select Issue Ticket, the PNR with the Document Instruction (DI) line and exchange information is displayed.
- Click CONTINUE.
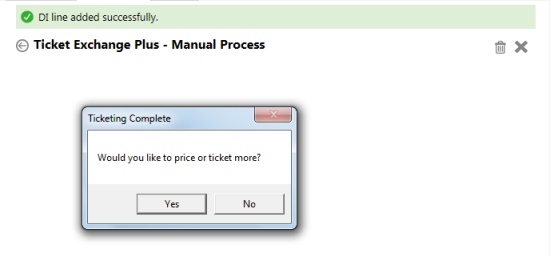
- If you issued the exchange ticket, a confirmation is displayed.

- If you did not issue the exchange ticket, the confirmation indicates that the exchange information is added to the PNR in a Document Instruction (DI).
- Enter *DI to display the DI line.
- See Issuing Ticket Exchanges from Stored Document Instructions for instructions to issue the tickets from exchange information stored in the PNR.
- If there are additional passengers in the PNR, the Ticketing Complete message is displayed.
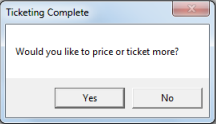
- Click Yes to reprice tickets for additional passengers.
- Click No to close Ticket Exchange Plus. If fees or taxes will be collected as an EMD-S, the Service Segments (SVC) script displays automatically to allow you to add begin the EMD process.