seating
Assigning Paid Seats
Some airlines allow agencies to pre-book and pay for premium seating requests. Each airline stipulates the booking and payment conditions at the time of request. For example, Delta Air Lines requires a credit card payment to secure seat reservation for their economy comfort seats.
The seat map and booking process is managed in the same way that free seat requests are made. However, there is additional information displayed and a payment screen to complete.
Important!
- There may be differences in the availability of seat maps depending on the carrier and also whether your seat map request is made before or after booking. See Previewing Seat Maps for more information.
- Typically, paid seats are added:
- Before the PNR/Booking File is ended for Direct Payment Carriers.
- After the PNR/Booking File is ended for Network (GDS) carriers.
- Some Direct Payment Carriers allow paid seats to be canceled or modified after they have been booked, but may have limitations on the types of changes. See the list of Direct Payment Carriers for more information for each carrier.
To assign paid seats from the seat map:
- Enter passenger names for the PNR/Booking File. Other customer information can also be added to the PNR/Booking File, but passenger names are the minimum requirement to view seats.
- If applicable, enter any loyalty information for your passengers before selecting seats. A passenger's frequent traveler status can affect the availability of free or reduced-price seats for a flight.
- Before displaying the seat map, you may need to end and retrieve the PNR.
- Display the seat map.
Why did a seat map not display?
- A seat map frame with no map is displayed if no seats are available for Galileo and Apollo. (For agencies that also use Worldspan, an error message is returned if no seats are available: Graphical seat map not avail.)
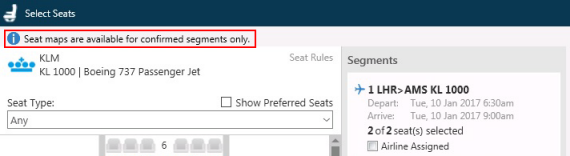
- Seat maps are displayed only for confirmed (Status HK) segments.
- If one or more segments are unconfirmed, a warning is displayed at the top of the seat map.
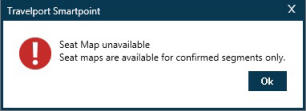
- If all segments are unconfirmed, a warning message is displayed.
Seat maps are displayed as they become available from the airline. Therefore, if your itinerary includes more than one seat map, some maps may display more quickly than other maps.
You can begin to select seats from any available seat maps before the additional maps to display.
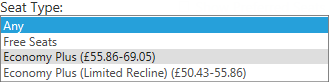
- Optional. In Seat Type, click on the Any arrow to select from any available paid seat options. The availability of free and paid seats depends on the carrier, flight, and passenger's frequent traveler status.
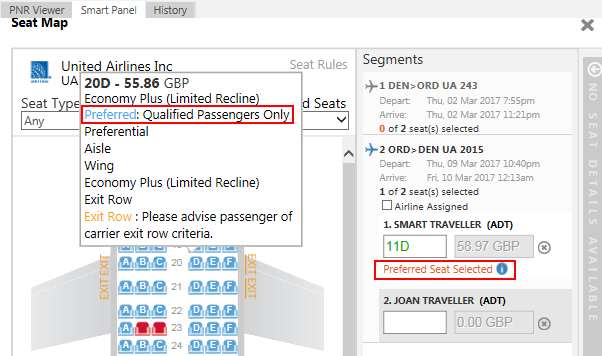
- Optional. Select Show Preferred Seats to display preferred seats applicable to the passenger's frequent traveler account. Typically, seats are available at free or reduced prices for frequent travelers.
By default, only non-preferred seating is returned in the seat map, and the Show Preferred box is not selected.
- Select Show Preferred Seats to include Preferred Seating options in the display.
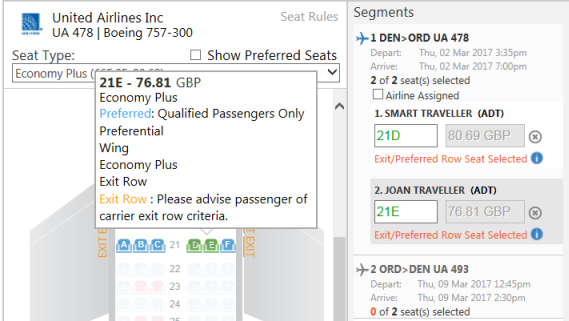
- Hover over a seat to see if it has Preferred: Qualified Passengers Only status.
- Preferred Seat selected is indicated in the traveler's selected seats.
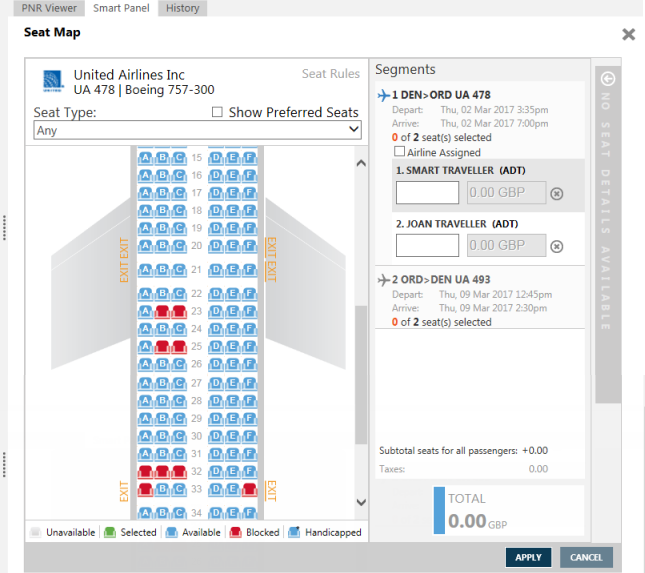
- In the Segments section, click on the desired segment. The first passenger in the segment is automatically selected.
- In the seat map, hover over either:
- An available seat as a blue seat
 icon .
 - An available handicapped seat, which displays as a blue seat
 icon with an asterisk .
Note: Blocked seats display as a red seat
icon. Airlines may block some seats for airport check-in only or for frequent fliers.
- Click the desired seat to change the seat to a selected green seat
 icon . The corresponding seat information is in the Segments section for that segment and passenger.
 - If applicable, click the name of the next passenger repeat in the segment. Repeat Steps 6 and 7 for each passenger in the segment.
- If applicable, click on the next segment and select seats for each passenger in the segment.
The TOTAL SEAT PRICE in the lower right corner displays:
- "0" currency if all selected seats are free seats or airline-assigned seats.
- Another amount if the selected seats are paid seats or a combination of free and paid seats.

- When all seats are assigned, including any airline-assigned seats, free seats, and paid seats, click REVIEW.

- Review the seat assignments. If you want to change your selections, click MODIFY to redisplay the seat maps.
- Click the SUBMIT to confirm the seat assignments.
- Enter the form of payment.
- Paid seats for some Network (GDS) carriers, such as KLM, require an EMD-A for payment. If an EMD is required, Airline requires payment via EMD is displayed next to the flight information. The EMD Manager can automate applicable EMDs and ASVC segements.

- For other forms of payment, the Payment Information dialog box displays the payment options available . Click the Form of Payment arrow to select the form of payment option for the airline. The form of payment fields change, depending on your selected form of payment option.

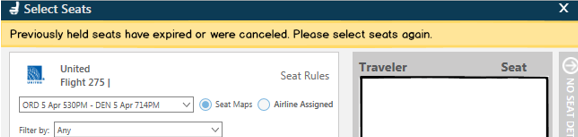
Depending on the carrier and fare, paid sets can be held without payment. After the hold deadline, the assigned seats are automatically canceled if they have not been purchased.
To hold seats:
Click Hold Seats and Defer Payment. Then, click SUBMIT.
If the request is successful, a confirmation message displays.

Note: Held seats cannot be modified. To change held seats, you must cancel and reassign the seats.
To pay for held seats:
- From the PNR Viewer, either:
- Click the class of service to display the held seat options.
- Click *DAS in Additional Services in the PNR, then click PAY NOW.
- Display the Seat Map, then click PAY.
- Select your seating option.
- Click Seat Map to redisplay the seat map if you want to cancel and reassign seats. Or, if the held seats have expired, you can re-select seats.
- Click Pay for Held Seats to display the available Form of Payment options for the held seats.

To purchase seats by credit card or debit card:
- Click Credit Card or Debit Card to display the Payment Information screen.
If you do not want to used the stored credit or debit card for seat payments, you can override the existing information by entering new card information.

Any existing credit or debit card payment information that was added in the PNR/Booking File is pre-populated, with card numbers masked. However, Security Code (CVV) information is not pre-populated and must always be manually added.
- In Form of payment, select or enter the card number
- In Cardholder's name, confirm or enter the card holder's name as it is listed on the credit card.
- In Card Type, confirm or select from the credit card types available for the selected airline.
- In Card Number, confirm or enter the credit card number.
- In Expiration Date, confirm or enter the expiration date for the credit card in MMYY format.
- In Security Code, enter the three- or four-digit CVV (Credit Verification Value) code, if applicable. Security codes may be required by some credit card types, airlines, countries, or types of purchase.
Tip! If a CVV code is required for this purchase, the SUBMIT button is disabled until the Security Code field is complete.
- In Approval Code, confirm or enter an approval code from the credit card company, if it is required by the airline for ticketing. A maximum of seven alphanumeric characters can be entered for the approval code.
Note: You cannot enter both a security code and an approval code. If you enter one type of code, the other code field is disabled.
- In Country, Street Address, City, State/Province/Region, and Zip/Postal Code, confirm or enter the card holder's address that is associated to this card.
- Complete the information for the selected form of payment.
- Click SUBMIT.
- If there is more than one airline in the itinerary, additional Payment Information dialog boxes display for each airline. Repeat Steps 11 through 13 for each payment.
- After all form of payment information is entered, click SUBMIT to display the seat assignment confirmation.
In the following example, the seats are placed on Hold and Deferred Payment. A warning to complete payment and the Amount Due is displayed. If payment is completed, the Amount Paid is shown.

- Click CLOSE to exit the Review screen.
- End transact (ER or ET) to store the assigned seats.
In the PNR/Booking File:
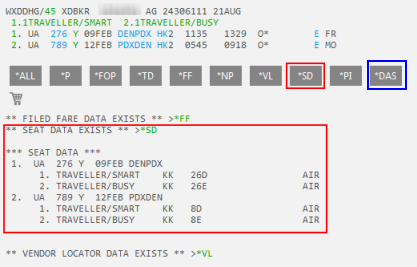
- *SD in Travelport+ (1G) or 9D in Apollo (1V) displays the seat information in the PNR/Booking File.
- *DAS in Travelport+ (1G) and Apollo (1V) displays any ancillary services, including ASVC SSRs, that were created for the paid seats. If the carrier supports payment by EMD, paid seats are ancillary services that are fulfilled by issuing an EMD-A.