Contact Report
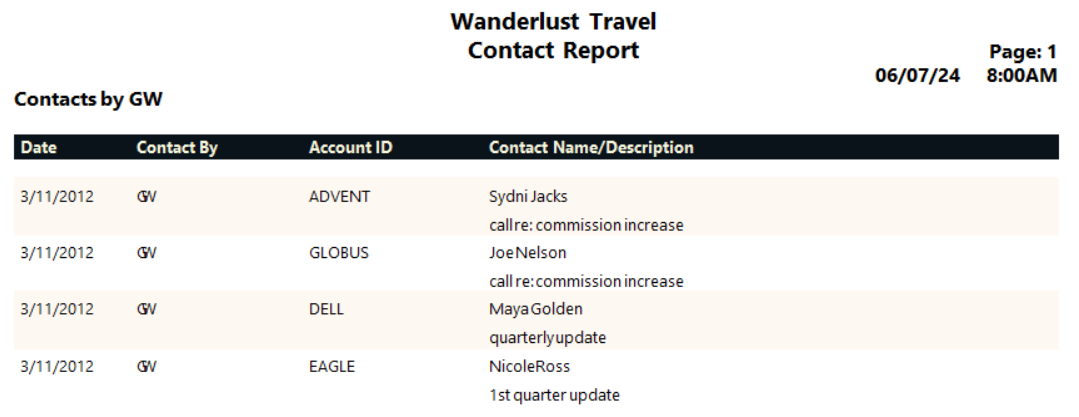
The Contact Report gives a detailed listing of all information on the Contact Manager screen, as well as the account ID for each contact. The search criteria enables you to narrow your search by date ranges, a specific account ID, or a specific agent. Thus, you could create a contact report for your employee for any given date range.
Running the Report
To run the report:
-
On the Accounts submenu, click Contact Report.
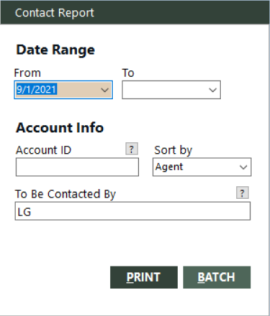
The Contact Report dialog box appears.
 Field descriptions
The following table describes the fields on the Contact Report dialog box.
Field Description From (for date range)
Enter the earliest date to include on the contact report.
To (for date range)
Enter the latest date to include on the contact report.
Account ID
Enter the account ID of the account for which you want to view the contact information or leave the field blank for all accounts.
To find and select an account ID, click the lookup (
 ) button. The Find an Account ID screen appears. For details, see Using the Lookup Buttons and Screens.
Sort by
Enter how you want the report sorted, by agent or account ID.
To Be Contacted By
Enter the code of the agent who is supposed to make the contacts. If you want to view the contacts for all your agents, leave the field blank.
To find and select an agent, click the lookup (
) button. The Employee screen appears. For details, see Using the Lookup Buttons and Screens. - Complete the fields as appropriate.
- Choose one of the following print options:
To print the report immediately, click PRINT.
The Send to dialog box appears. Select a report destination. For more information, see Printing Overview.
To store the report as part of a batch for printing later, click BATCH.
The Choose a Batch dialog box appears. For more information, see Batch Printing.
Report Example
Contact Report example