Applied History Report
The Applied History Report lists each instance of applying customer or provider items (receipts to charges, checks to refunds, and so forth). The report lists the item and the amount applied, and identifying information about the item it was applied to.
Note: This report is limited to the branches to which the employee has access.
The report uses general ledger transactions. The account ID is the Reference 2 field.
If you apply in Bank Deposit or in a Checks function there will be one line on the report for that application. The left side of the report is the applied to transaction (for example, charge or refund) and the right side the cash receipt or check. If you apply in Adjust Accounts, there will be two lines on the report (for example, the charge and the receipt).
On the customer report, the receipt number is the receipt number of the applied-to item (customer checks and adjustments also have receipt numbers). In some cases, "inv in ctrl" will appear in the App. To Receipt # column. If a charge is applied to a refund, both lines will have "inv in ctrl" in the receipt number column. For an invoice applied to a non-invoice item in Adjust Accounts, the line for the invoice item will have the applied-to receipt number, and the line for the non-invoice item will have "inv in ctrl" in the receipt number field (because invoice items do not have receipt numbers). In this situation, you can determine what the non-invoice item was applied to by matching its pay ID (in the fourth column) to the item in the same general ledger control with that pay ID in the App. To Pay ID column (last column). These items will be adjacent or close because the report is sorted by general ledger control and sequence number.
On the provider report, the App. To Receipt # column will have a value only for items applied to cash receipts in Post Deposit. The App. To Check # column will have a value only for items applied to checks in a Check function.
Running the Report
To run the report:
-
On the Accounts submenu, click Applied History Report.
The Applied History Report dialog box appears.
 Field descriptions
The following table describes the fields on the Applied History Report dialog box.
Field Description Account Type
Type of account (Customer or Provider). Select Customer to run the report for applied customer receivables. Select Provider to run the report for applied payables and commission receivables.
Account ID
Customer account ID (if you selected Customer in the Account Type field) or provider account ID (if you selected Provider in the Account Type field).
- Leave this field blank to include all customers.
- Enter the full account ID if you want to run the report for one account ID.
- Enter @ plus an interest to run the report only for customer accounts with that interest code.
- Enter @TAGGED to run the report only for customer accounts that are tagged.
To find and select an account ID, click the lookup (
 ) button. The Find an Account ID screen appears. For details, see Using the Lookup Buttons and Screens.
Customer Type
Select a customer type to limit the report to account IDs with that type. Leave this field blank to include account IDs with any customer type.
Date Range
Enter the general ledger transactions Post Date range.
New Page Per ID
Check this start each account’s transactions on a new page.
Landscape
Check this to print the report in landscape format, which prints more of the GL Transactions comment field.
-
Complete the fields as appropriate.
Note: The date fields for Date Range are required.
- Choose one of the following print options:
To print the report immediately, click PRINT.
The Send to dialog box appears. Select a report destination. For more information, see Printing Overview.
To store the report as part of a batch for printing later, click BATCH.
The Choose a Batch dialog box appears. For more information, see Batch Printing.

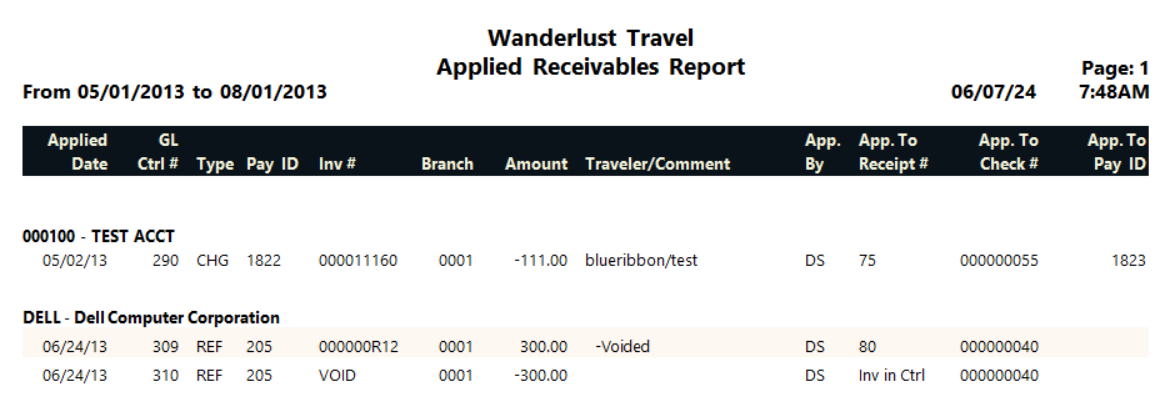
Report Example
Applied History Report example