Deleting Accounts
You can delete accounts that either do not have or have transactions (invoices, checks, cash receipts, adjustments, or general ledger) associated with them.
- Accounts without transactions – Use GlobalWare's Account ID screen or the appropriate edit account screen (Edit Customer, Edit Employee, Edit Provider, or Edit Vendor). For details, see Deleting Accounts Not Associated with Transactions below.
- Accounts with transactions – Use GlobalWare's Account Editor (Acctedit.exe) utility. For details, see Deleting Accounts Associated With Transactions below.
Deleting Accounts Not Associated with Transactions
For accounts that do not have transactions associated with them, you can delete individual accounts from the Account ID screen and from the edit account screens (Edit Customer, Edit Employee, Edit Provider, and Edit Vendor). You can also delete multiple accounts at once from the Account ID screen.
To delete one or more accounts from the Account ID screen:
- Specify the appropriate search criteria to find the accounts you want to delete. For more information, see Using the Account ID Screen.
-
Click SEARCH.
The Search Results grid lists the accounts that match the specified search criteria.
- To ensure that no accounts are already tagged, click Clear Tagged.
- Tag the accounts you want to delete. For more information, see Tagging Accounts.
-
Click DELETE.
A confirmation message appears.
- Click Yes.
To delete an account from an edit account screen (for example, Edit Customer):
- On the Account ID screen, specify the identifier of the account you want to delete in the Account ID box.
-
Click SEARCH.
An edit account screen appears with the account displayed.
-
Click DELETE.
A confirmation message appears.
- Click Yes.
Deleting Accounts Associated with Transactions
For accounts that have transactions associated with them, you can use the Account Editor (Acctedit.exe) utility to delete individual accounts or a group of customer or provider accounts. This utility moves transactions from accounts targeted for deletion to the account you specify.
Note: If you want to move transactions to a new account, use the Account ID screen to add the account before you perform procedures below to delete accounts. See Adding Accounts.
Starting the Account Editor Utility
To start the Account Editor utility, use Windows Explorer to open the Gblware folder and double-click Acctedit.exe.
Note: You indicated where the Gblware folder should be located when you installed GlobalWare.
The Account Editor dialog box appears.

Deleting an Individual Account
To use the Account Editor utility to delete an individual account:
- On the Account Editor dialog box, specify the identifier of the account you want to delete in the Account ID box.
- Select Delete Account.
-
Click SAVE.
The Delete Account dialog box appears.
- In the text box, specify the identifier of the account to which you want to move transactions from the account targeted for deletion.
-
Click OK.
A confirmation message appears, indicating that your request has been processed.
- Click OK.

Deleting a Group of Accounts
You can use the Account Editor utility to delete a group of customer or provider accounts. (This utility does not enable you to delete a group of employee or vendor accounts.)
Deleting a Group of Customer Accounts
To use the Account Editor utility to delete a group of customer accounts:
- Tag the customer accounts you want to delete, and then create a customer interest to group them together for deletion.
- On the Account ID screen, specify the appropriate search criteria to find the customer accounts you want to delete. For more information, see Using the Account ID Screen.
Click SEARCH.
The Search Results grid lists the customer accounts that match the specified search criteria.
- To ensure that no accounts are already tagged, click Clear Tagged.
- Tag the accounts you want to delete. For more information, see Tagging Accounts.
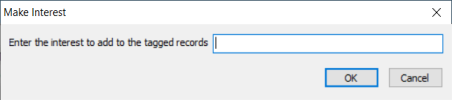
Click MAKE INTEREST.
The Make Interest dialog box appears.
- In the text box, type the name of a new customer interest (for example, DEL-ACCTS) and click OK. For more information about creating customer interests, see Adding Interests.
-
On the Account Editor dialog box, select Delete Group of Accounts. (To access the Account Editor utility, see Starting the Account Editor Utility above.)
-
In the Interest box, specify the customer interest you created in step 1 to group customer accounts together for deletion (for example, DEL-ACCTS).
-
Click SAVE.
The Delete Account dialog box appears.
The box on the right side lists the customer accounts that match the customer interest you specified.
-
In the text box, specify the identifier of the account to which you want to move transactions from the accounts targeted for deletion (for example, you could move transactions to an account named OLDCUSTS for inactive customer accounts).
-
Click OK.
A confirmation message appears, indicating that your request has been processed.
-
Click OK.
_376x161.png)
Deleting a Group of Provider Accounts
To use the Account Editor utility to delete a group of provider accounts:
- First, you must tag the customer accounts you want to delete.
- On the Account ID screen, specify the appropriate search criteria to find the provider accounts you want to delete. For more information, see Using the Account ID Screen.
Click SEARCH.
The Search Results grid lists the customer accounts that match the specified search criteria.
- To ensure that no accounts are already tagged, click Clear Tagged.
- Tag the accounts you want to delete. For more information, see Tagging Accounts.
- On the Account Editor dialog box, select Delete Group of Accounts. (To access the Account Editor utility, see Starting the Account Editor Utility above.)
-
Click SAVE. The Delete Account dialog appears.
- In the text box, specify the identifier of the account to which you want to move transactions from the accounts targeted for deletion (for example, you could move transactions to an account named OLDPROVS for inactive provider accounts).
-
Click OK.
A confirmation message appears, indicating that your request has been processed.
- Click OK.