Actions: Edit Criteria
Specify the criteria that a PNR/Booking File must meet before a handler is used. A typical example of such criteria would be that the booking file has a HK status, or that it has all the relevant back office information before an Electronic ticket can be issued. This can all be set up within the Edit Criteria functionality provided by Queue Control Console.
The Edit Criteria section is available in the Schedules tab as part of a valid action.
On the Action details page, click the Edit criteria button to set up your criteria (displays under the Queues to monitor section).
-
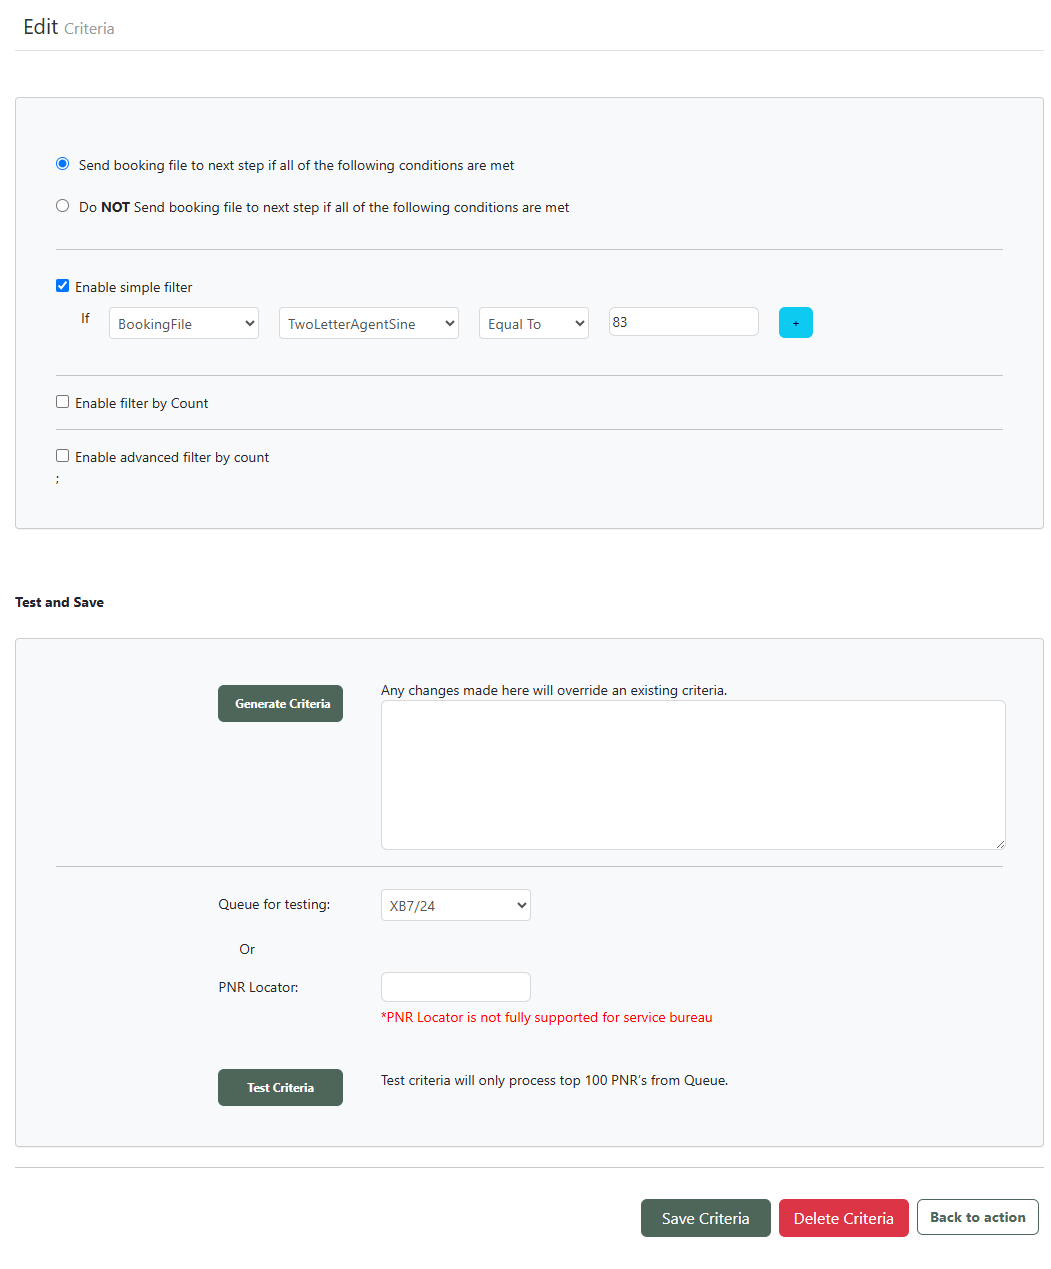
Select Send booking file to next step if all of the following conditions are met if you want to send booking files found on the queue defined in the Queues to monitor area to the next step of your action (e.g., Ticketing).
-
Select Do NOT send booking file to next step if the following conditions are met to will ignore all booking files that meet the condition and does NOT send them to the next step defined in your action.
-
Select a condition filter type.
-
Enable Simple filter provides drop-down lists from which you can specify a condition. When AND is selected, all conditions must be met. Refer to Supported Data Fields.
 Simple Filter example
Queue Control Console looks at all booking files found on queue that have document information lines (DI.) that contain OSCAR AND document information lines that contain FF18/12345. Click on the +/- icons to add or delete conditions.
Note: This condition will only work if ALL conditions are met, if you needed to only look for one of these conditions, you should select OR instead of AND.
-
Enable Filter by Count lets you create conditions based on counts of fares, passengers, or air segments.
Item
Description
Fares
Equal To
Different From
Less Than
Less Than or Equal To
Greater Than
Greater Than or Equal To
Passenger
AirSegment
Filter by Count example
In the example below, Queue Control Console looks at all booking files found on queue that have an Air Segment count that is greater than 2 OR a passenger count that is equal to 2. Click on the +/- icons to add or delete conditions.

-
Enable advanced filter by count provides a combination of simple filter and filter by count fields.
Advanced filter by count example
In the example below, Queue Control Console looks at all booking files found on queue that have an Air Segment count that is greater than 1 where the booking file contains Airline Code BA. Click on the +/- icons do add or delete conditions.

-
-
The Test and Save area lets you test and save the condition that you have created.
-
Once you have condition filters defined, click Generate Criteria to add the conditions to the criteria box. Any changes made to the criteria text box will overwrite the automatically generated code.
-
You can either specify a queue or a PNR to test the criteria against.
-
When testing against a queue, only the top 100 bookings are processed.
-
When specifying a PNR, the test is run only against that PNR to determine if it meets the defined criteria.
-
You cannot test against a PNR where the access method is service bureau-enabled and an emulation to a specific PCC is required to retrieve the PNR.
-
-
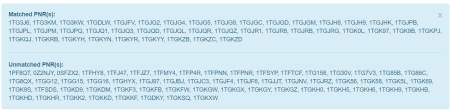
Click Test Criteria to validate your conditions. Validation may take some time depending on number of PNRs in the selected queue.
If matched and unmatched PNRs are found, a message displays at the top of the page.
-
Click Save Criteria once you have successfully tested.
-
When the “criteria” is saved, it will validate the criteria query against any syntax errors. This will help the users to rectify the criteria — if there are any errors — before waiting for the error to occur during the run time of the schedule. If any errors are found, a warning message displays at the top of the page.
-
Click Delete Criteria to delete the criteria you have defined.
Once you have saved your criteria, click Back to action to return to the action screen. Ensure you have saved your criteria before you click Back to action; otherwise you will have to start again.
Next Step
- Add Handlers.