Provider Credentials
Some content sources accessed through Travelport hubs require credentials to allow access to their data. Travelport Galileo, Apollo, and/or Worldspan provider credentials should be set by default, but any additional credentials for access to low cost carriers (ACH) or other third-party content will need to be added by the Agency Administrator. The customer should have a record of their own provider credentials. Travelport would not have access to this information.
The Provider Credentials screen allows administrators to:
-
Self-provision certain providers (e.g., ACH providers) for a work area branch
-
Edit provider information
-
Deactivate providers (other than GDS providers)
-
Accept provider terms and conditions, if applicable
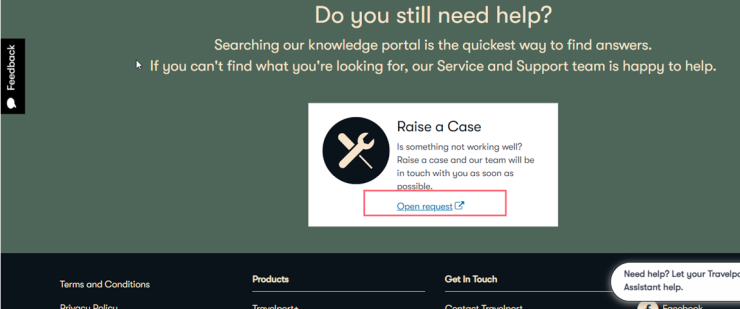
Note: You must have the proper permission in order to have access to the Provider menu. If you cannot access the Provider menu, contact Travelport Support.
Add or Modify Provider Credentials
Provider credentials are stored at the work area level of the hierarchy.
-
From the Travelport Admin Portal, click the Providers menu then Provider Credentials. If this menu item is not available to you, please contact Travelport Support for appropriate permissions.
-
Click the Select Profile link to select the appropriate Branch profile.
-
From the drop-down list, you can select which field to search, then enter a search value. An asterisk can be used as a wildcard at the end of a search term.
-
To browse the profile hierarchy, select the Browse option at the top of the Open window. When browsing, click the name to move down the hierarchy, click the shaded profile area to select it, and then click Open.
-
The Provider Management screen displays a list of providers. The Status column indicates the following:
-
 indicates that the provider is available and active.
 -
 indicates that the provider is available but not active. Agency administrators can activate these providers by supplying any necessary information.
 -
 indicates that the provider is not available to the work area branch.
-
-
Click the information icon (
 ) to view information about the provider.
 -
Click the edit icon (
 ) at the far right to add or edit provider information. The edit icon is not available for the Galileo or Apollo provider; however, the edit icon is available for all other active and available providers (i.e., those with either a green check mark or a gray X).
Note: If terms and conditions are applicable, the terms and conditions dialog displays before the edit dialog. An agency or a branch administrator must accept the terms and conditions in order to view the edit dialog. For more information, see the Terms and Conditions section below.
Self-provision a provider
Accepted terms and conditions (if applicable), enter the provider details, then click the Activate Provider Name button. It is important to enter provider credentials as per the provider’s instructions. Incorrect details could result in not being able to access provider content.
Edit or deactivate an existing provider
Edit the provider credentials as needed, then click the Save Changes button. You can also change a provider to inactive status by clicking the Deactivate button on the edit dialog. The pseudo city code cannot be modified.
Bulk Activations for ACH Carriers
You can perform bulk activations by Agency and Branch Group.
When you view the current providers at a Branch Group or Agency level, you can see if there is an activation for that carrier within the Agency or Branch Group, but cannot tell if it is for only one branch, some branches, or all branches. In other words, if even one branch within a Branch Group or Agency is activated, then those Branch Groups or Agencies show the ACH as activated.
To activate a carrier for all branches, click on the edit icon for that provider.
An activation dialog displays.
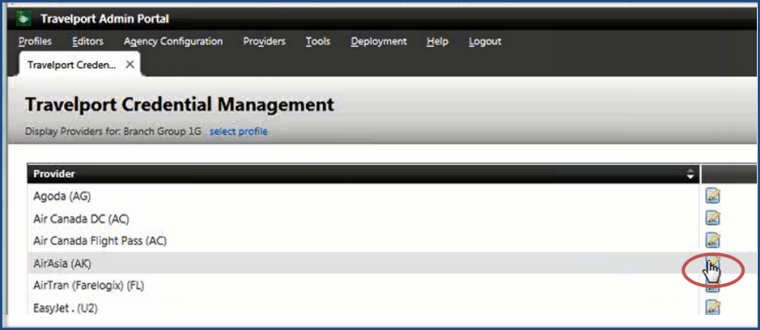
To view the status of a bulk update, click the Providers menu then Travelport Credentials, or click the profile status page link.
A Successful status confirms that the carrier has been activated for that branch. A Failed status can imply several things, including that the carrier was already activated for that branch and therefore the system failed at activating it again. If a Failed dialog displays, click on the information icon to view the associated message.
Note: Currently there is not a way to deactivate at a bulk level. Deactivation requires manual deactivation by branch.
Third-party Credentials and Selecting a Branch Profile
Select the branch, either by using your default or by clicking the change context that is in blue at the bottom of the screen.
To Search, click the Search for branches radio button and enter text for the branch name you want.
To Browse, click the Browse Branches radio button. You can either scroll through the names to locate the branch you want, or you can enter text and click the Apply Filter button.
The listing order is Branch, Agency, then Agent.
Agency Administrators can:
- Manage multiple sets of the same (named) credentials against multiple different points of the hierarchy
- Manage multiple sets of credentials against the same point in the hierarchy
- Manage credentials for an Agency, Branch and Agent.
- Define multiple types of credentials in separate fields: Access Code, User ID, Password, and 5 custom fields.
- Access code, user ID, password and unique credential data are encrypted.
- Public key, name (primary and secondary), and description are not encrypted.
Universal API Administrator Notes:
- Air Canada through ACH can be provisioned using the Provider Credentials page. Refer to the Universal API Air Canada Requirements page for Air Canada's requirements.