Tag Editor
The Tag Editor and is used to categorize information within a profile. Tags are useful to quickly access areas of information within a profile, filtering the information to be viewed. Tags are also useful when applying a profile to a Universal Record because it allows for only the tagged information to be applied to the Universal Record.
Examples of when a tag could be used would be if there were two hotel preferences, one chain used for personal travel while the other is used for business, or one credit card should be used for personal and another for business. Examples of tags would be Business, Personal, Convention, etc.
Tags are created on an Agency level; therefore, if tags are created, all Work Area Branches within the Agency’s hierarchy are able to view and use the tags.
Note: Only 15 tags are permitted per agency.
Create a Tag
-
From the Editor menu, select Tag Editor. A new tab opens.
-
To create a tag, click in the first available box. Type the tag name and a brief description on what the tag will be used for, then click on the Save button. Saved tags are available to be assigned to fields or field groups in profiles or profile templates.
Add Tags to Fields or Field Groups
Once the tags have been created, they need to be applied
to the fields or field groups that will use them. You must add tags one
profile at a time.
Note: A maximum of two tags can be applied to a
profile field or field group.
-
From the Profiles menu, select Open Profile.
-
Browse the hierarchy or search for the profile.
-
Highlight the profile and click Open.
-
Click the Details tab.
-
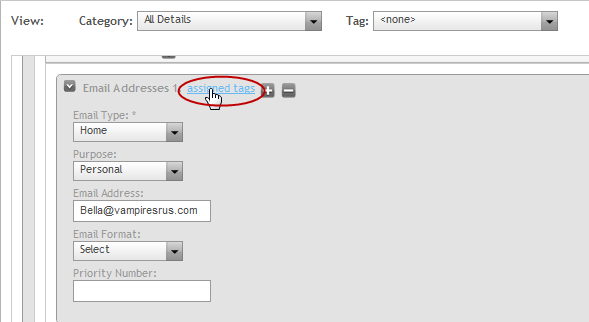
Find each field to which the tag will be applied, and click the assigned tags link.
-
Select the tag to be assigned to the field and click the Set button. A maximum of two tags can be assigned to a field or field group. Repeat this process for each field that must be assigned a tag.
-
Once all the fields have been assigned to the tag, click the Save button to save the changes to the profile.
Apply Tagged Information to a Universal Record
-
To use the tag when making a booking in Universal Desktop, click the Bookings menu tab and select a workflow using a profile, alternatively search for a profile. When the profile is displayed on your screen click the Edit This Profile icon.
-
In the view section, select the tag you want applied to the reservation. The Traveler Data only displays the tagged information.
-
Click the Apply to Booking button at the bottom of the screen. Only the tagged information is entered into the Activity Panel and is used to finalise the Universal Record.


Delete a Tag
-
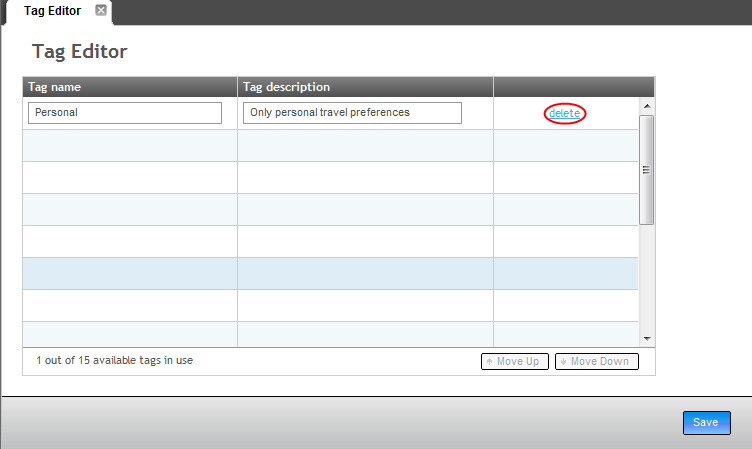
From the Editor menu, select Tag Editor. The list of available tags displays.
-
Click the delete link to the right of the tag that you want to delete.
-
If the tag is not used in any profile, the tag is deleted.
-
If the tag is used in 100 profiles or less, the list of the profiles in which the tag is used displays. If you elect to continue with the deletion, the tag is removed from the system, and all profile references to the tag are also removed. The data associated to the tag is not removed.
-
If the tag is used in more than 100 profiles, the number of profiles in which the tag is used displays. If you elect to continue with the deletion, the tag is removed from the system, and all profile references to the tag are also removed. The data associated to the tag is not removed.
Notes:
-
Only 15 tags are permitted per agency.
-
Tags are created on an Agency level; therefore if tags are created, all Work Area Branches within the Agency’s hierarchy will be able to use them.
-
Deleting a tag will not delete the data applied to the tag, only the tag itself.
-
Tags are useful when applying a profile to a Universal Record because it allows for only the tagged information to be applied to the Universal Record.