smart buttons
Creating and Using Collections
A collection is an array of elements separated by semicolons (;).
For example: 1;4;6;ABC
There are four elements in this collection, which are 1, 4, 6, and ABC.
Creating Collections
There are several ways to create collections:
Static Values Collection
You can create collections with static values. In other words, each time you run a script, the values in the collection are the same.
For example:
-
Use the Variable XML element to create a static values collection that lists the names of four colors.
<Variable VarName="ColorCollection">Red;Green;Yellow;Orange</Variable> -
Create a script to display all elements (color names) of the collection on the screen.
Copy<ButtonConf ButtonName="Colors" Description="" QuickCommand="">
<Variable VarName="ColorCollection">Red;Green;Yellow;Orange</Variable>
<ShowMessage>[ColorCollection]</ShowMessage>
</ButtonConf>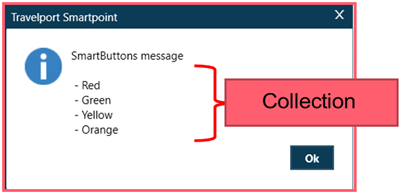
Reading Information from Terminal Commands
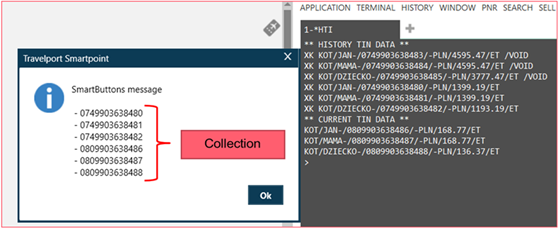
You may want to read certain information from screen, for example,read all unvoided tickets numbers from *HTI display
This is an example of a script that reads displays *HTI screen, reads all unvoided tickets and displays it on the screen:
<ButtonConf ButtonName="all unvoided tickets" Description="" QuickCommand="">
<RunCommand>*HTI</RunCommand>
<GetString VarName="UnvoidedTicketNumbers"><![CDATA[(?!.*\/VOID)\/(\d{13})\/-[A- Z]{3}\/]]></GetString>
<ShowMessage>[UnvoidedTicketNumbers]</ShowMessage>
</ButtonConf>
Read more on how to use <GetString> XML element in <GetString> topic
GDS Variables
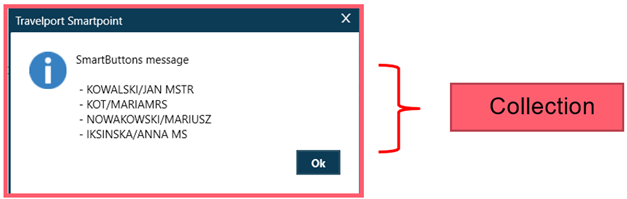
You may create a collection of elements using GDSVariable functionality, for example, to create collection of passengers.
This kind of collection will be dynamic (will read passengers names from current PNR)
<Variable VarName="PaxList">%PassengersList({LastName}/{FirstName})%</Variable>
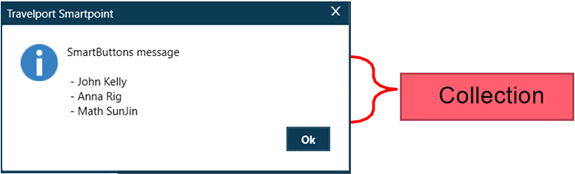
This is an example of a script that reads Passenger names (via GDS Variables) and displays it on the screen:
<ButtonConf ButtonName="Pax list" Description="" QuickCommand="">
<Variable VarName="PaxList">%PassengersList({LastName}/{FirstName})%</Variable>
<ShowMessage>[PaxList]</ShowMessage>
</ButtonConf>
Read more on how to use GDS Variables in the Variable topic.
Read Information from Excel
You can use the ReadFromExcel XML element to read data from a Microsoft Excel file.
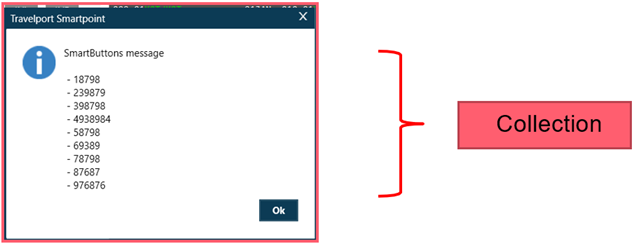
For example, if your agency wants to read customer numbers stored in an Excel file to create a collection of customer numbers.
In this example, customer numbers are read from an Excel file and displayed on the screen.
<ButtonConf ButtonName="Excel example 4" Description="" QuickCommand="">
<ReadFromExcel VarName="CustomerNumbers" ExcelPath="C:\ Desktop\CustomerDataBase.xlsx" ReadBy="Column" Column="L" Row="3:11" />
<ShowMessage>[CustomerNumbers]</ShowMessage>
</ButtonConf>
API Call
You can get information from outside databases, such as your mid-office system.
For example, you can get information about about all people authorized to request tickets for specific companies.
With the APICall XML element, you can send information to mid office system, for example, with Company Name, and you would receive back information with a list of all people authorized to request air tickets. The list would be our Collection.
<ButtonConf ButtonName="Colors" Description="" QuickCommand="">
<ApiCall VarName="AuthorizedRequestors" Url="https://backofficeAPI.com/api/AuthorizedTicketRequestors" Parameters="CustomerName" Method="GET" AuthType="Basic" AuthorizationHeaderValue="Basic QVBJMzI4OioqKioqKioqKioqKioqKio=" />
<ShowMessage>[AuthorizedRequestors]</ShowMessage>
</ButtonConf>
File Operation
A collection of elements can be also created by reading a text file with the FileOperation control. Each line of text from that file can be treated as an element of the collection (StringToCollection="True").
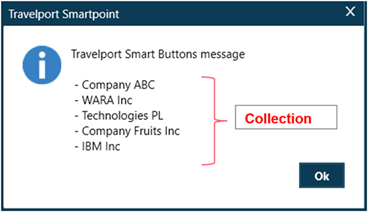
For example, you can keep all customer names in a text file.
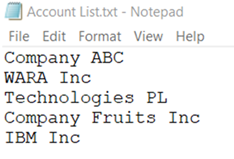
To build a script that reads all of the the account names and displays them in a message box:
<ButtonConf ButtonName="" Description="" QuickCommand="">
<FileOperation Mode="Read" VarName="Accounts" StringToCollection="True">
<FilePath><![CDATA[C:\OneDRive\OneDrive - Travelport\Desktop\Account List.txt]]></FilePath>
</FileOperation>
<ShowMessage>[Accounts]</ShowMessage>
</ButtonConf>
Using Collections
In the previous examples, elements of collection are displayed on the screen, as an example of an action that can be made with a collection.
The following examples show additional actions that can be performed with a collection.
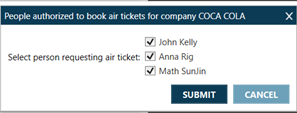
List all elements to the agent with CheckListBox XML element
When you have your Collection prepared via one of the above methods, you may want to display all the elements from collection to the agent with the CheckListBox XML element, with elements being checkable.
Loop action with ForEach XML element
Using the ForEach element, you can perform the same action for each element in a collection.
For example, if your collection is a list of all passenger names, you can add notepad remarks that contain the name of the passengers with one notepad remark per passenger.
Use both CheckListBox and ForEach
You can combine both of the CheckListBox and ForEach elements.
For example, you can display a check box list of all elements in the collection to the agent. Then, you can perform a ForEach on the new collection to allow the agent to select some of the items from the collection. For example, an agent can select two passenger names, and perform the same action for those selected items in a new collection.
Value**Key collection
In Smart Buttons, agents can create and operate on two types of collections:
Simple collection
A Simple collection is a collection of elements separated by a semicolon ;, where each element of the collection is a string of text.
For example:
-
Collection of customer numbers: 7987439;237879;872387;23;21113
-
Collection of ticket numbers: 080 7436823321;220 8393828321
-
Collection of passenger names: JOHNSON/KATE;JOHNSON/JOHN;PERRY/MATTHEW
Value**Key collection
A “Value**Key” collection is a collection of elements separated by semicolons ;, where each element of the collection contains a Value and a Key separated by two asterisks **. This type of collection can be used to create more advanced scripts that operate on two-dimensional collections.
The first part of the element before the asterisks ** is a Value and second part of the element is a Key. For example:
-
Passenger name and passenger number: JOHNSON/JOHN**1;JOHNSON/GREG**2;SMITH/KATE**3
-
Customer name and customer number: IVECOINC**938792;IBM**27632;COCACOLA**238782
This type of collection allows operations separately on the Value and the Key. It distinguishes which part of element we want to display to the agent (Value or Key) using CheckListBox and which we want to consume (change to next variable etc).
For example, consider this Value**Key collection:
-
Customer Name and Customer Number: IVECOINC**938792;IBM**27632;COCACOLA**238782
We can display only customer names (Value) to the agent, but when the agent selects a customer name, we can add related the customer number to the DI remark (Key).
Controls (XML elements) designed to work with Value**Key collections
The following controls work with Value**Key collections:
-
-
%ListOfAirSegments%
-
%ListOfCarSegments%
-
%ListOfHotelSegments%
-
%PassengersList%
-
%InvoiceRemarks%
-
%ListOfFiledFares%
-