Smart Buttons
Controls/XML Elements
Fill-In Forms <SetStringBlock>
This XML element allows agents to complete host fill-in forms with static values or values that comes from variable. User doesn’t need to tab across the forms and fill it manually, instead Smart Button script can automate it.
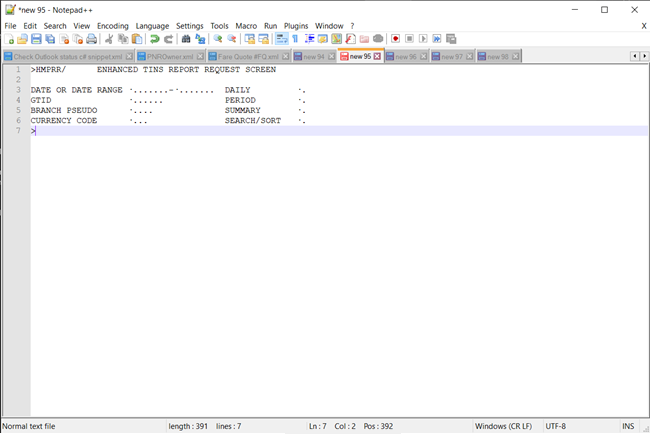
In this example, the HMPR*E/ entry runs a fill-in format for an Enhanced TINS Report in Travelport+ (1G). This form allows agents to display ticketing reports by specific parameters, such as displaying a periodical report for selected dates.
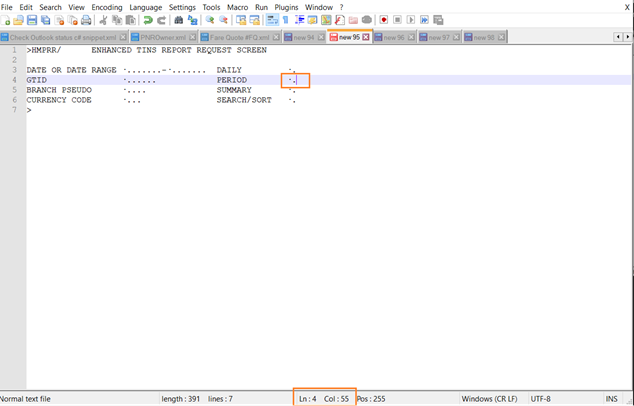
>HMPRR/ ENHANCED TINS REPORT REQUEST SCREEN
DATE OR DATE RANGE ·.......-·....... DAILY ·.
GTID ·...... PERIOD ·.
BRANCH PSEUDO ·.... SUMMARY ·.
CURRENCY CODE ·... SEARCH/SORT ·.
Configuring
In this example, the Enhanced TINS Report is configured to run a periodical report for the selected dates.
To automate a fill-in format with a Smart Buttons script:
-
Display the fill-in mask in the terminal window.

-
Copy and paste the fill-in mask to Microsoft Notepad++.
-
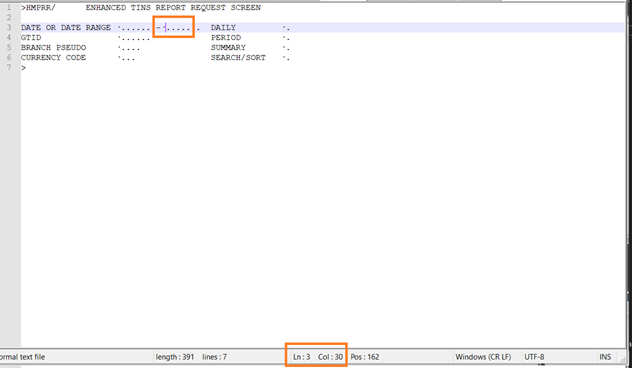
Determine the position of field that you want to fill with text.
For example, to fill in dates in for the DATE OR DATE RANGE field, determine the line number and column number for the date entry. Notepad++ shows the position at the bottom of the screen.
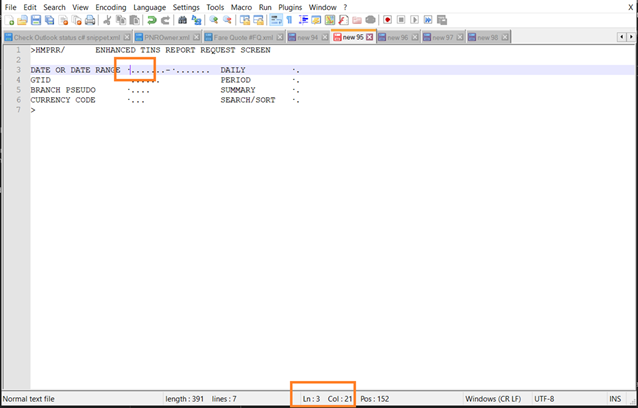
For a date range, you will need position information for each date.
-
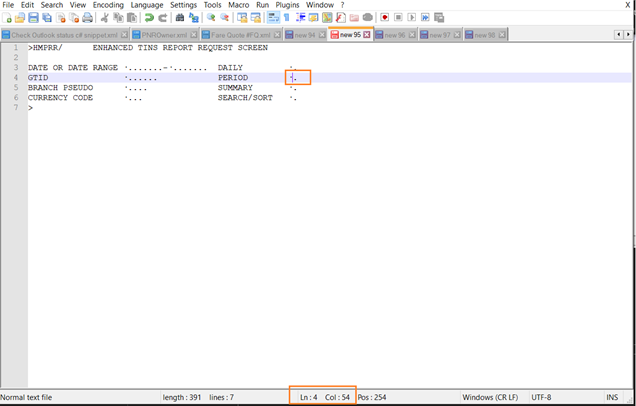
Enter X in the PERIOD field.
-
After all fields are completed, determine the position (line number and column number) where you submit the form (press ENTER).
-
After you have determined all of the positions, open the Smart Buttons Editor to create a script.
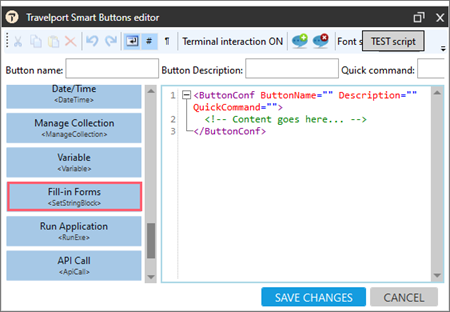
-
Click Fill-in Forms <SetStringBlock> to display the Fill-in Forms XML Generator.
-
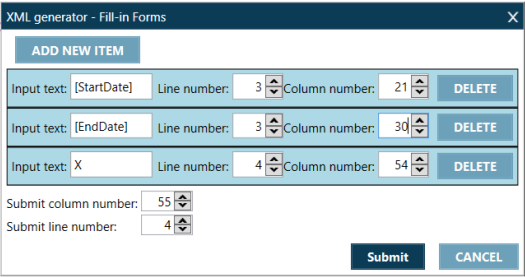
Configure the attributes for the first field entry.
Attribute
Description
Input text The static text you want to enter. For example:
-
20JAN22 for a state date.
-
[Date] for a variable date.
Line number Enter line number in your form where the text from Input text is entered. Column number Enter column number in your form where the text from Input text is entered
-
-
If applicable. Complete the attributes in Step 8 for each entry. If necessary, click ADD NEW ITEM to create additional entry items.
-
In Submit column number, enter the column number where the cursor must be present when submitting the form.
-
In Submit line number, enter the line number where the cursor must be present when submitting the form.
-
Click Submit to add the XML code to the script.
This example shows the full script code for the HMPR entry for a periodical entry for specified dates. The script also includes:
-
TextBox controls for text fields to enter start and end dates.
-
A RunCommand element to execute the terminal entry HMPR*E/ for the Enhanced TINS Report request.
-
SetString elements in a SetStringBlock for the positions of the start date, end date, and X entry for PERIOD.
Copy<ButtonConf ButtonName="HMPR Fill in form" Description="" QuickCommand="">
<TextBox VarName="StartDate" Width="80" Question="Enter start date of your report"></TextBox>
<TextBox VarName="EndDate" Width="80" Question="Enter end date of your report"></TextBox>
<RunCommand>HMPR*E/</RunCommand>
<SetStringBlock EnterClickColumnNumber="55" EnterClickLineNumber="4">
<SetString Row="3" Column="21" Text="[StartDate]" />
<SetString Row="3" Column="30" Text="[EndDate]" />
<SetString Row="4" Column="54" Text="X" />
</SetStringBlock>
</ButtonConf> -