Universal Policy Navigation
After you sign in, the page displayed depends on your admin role. You may need to select an agency or account on the Manage Agencies tab before you can manage policy data.
The top menu bar has two tabs, each with separate menu options:
- The Policies tab allows you to create and manage policy data.
- The Manage Agencies tab allows you to create and manage administrators, depending on your admin role.
Note: The example screens on this page show the top and left-hand navigation options for orientation purposes. Other pages in the online help show only the screen content and not the navigation options.
Manage Agencies Tab
The Manage Agencies tab may open by default when you sign in, depending on your admin role. The options on this tab allow you to search for and create new admins, as allowed for your role.
When you click the Manage Agencies tab, the Manage Policy Administrators screen appears. Use this page to create and manage policy administrators.
Note: The left-hand navigation options available on this screen depend on your administrator role type.
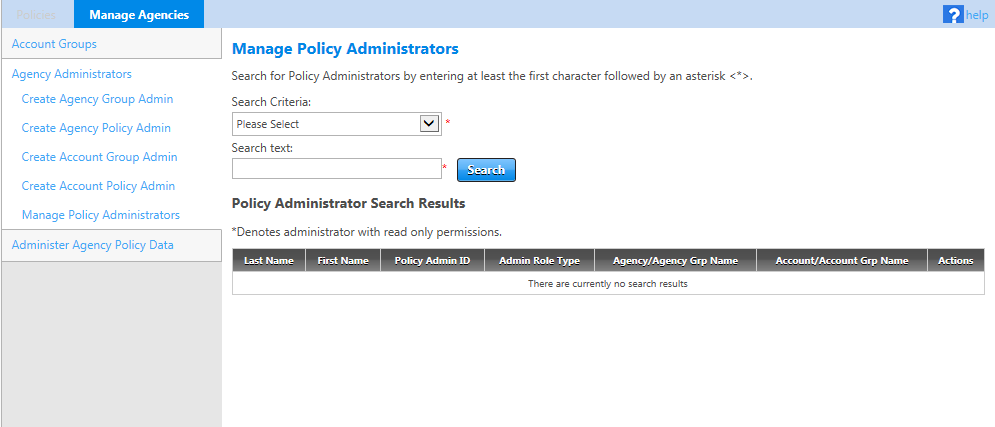
The following table lists the left-hand navigation options on the Manage Agencies tab; not all users see all options.
| Use this menu option: | To do this: |
|---|---|
| Create Agency Group Admin | Create agency group administrators. (Available only to agency group administrators.) |
|
Create Agency Policy Admin |
Create agency policy administrators across any agency hierarchy. (Available to agency policy administrators and agency group administrators.) |
|
Create Account Policy Admin |
Create account policy administrators across any agency hierarchy. (Available to all administrator roles.) |
|
Manage Policy Administrators |
Search for and manage other policy administrators. (Available to all administrator roles.) |
| Administer Agency Policy Data | Select the agency for which to manage policies. (Only agency group administrators see this option.) |
Policies Tab
The Policies tab allows you to create and edit actual policy data, once you have selected an agency or account as applicable for your admin role.
After you click the Policies tab at the top of the screen, Policy Groups screen opens. You may need to enter or select an account on this page if you have not already done so, The Universal Policy Admin Portal then displays existing policy groups and allows access to the other options under the Policies tab. Then, as you select any of those options, such as Air Policies or Car Policies, Universal Policy displays additional menu options for editing, viewing, or creating policy options.
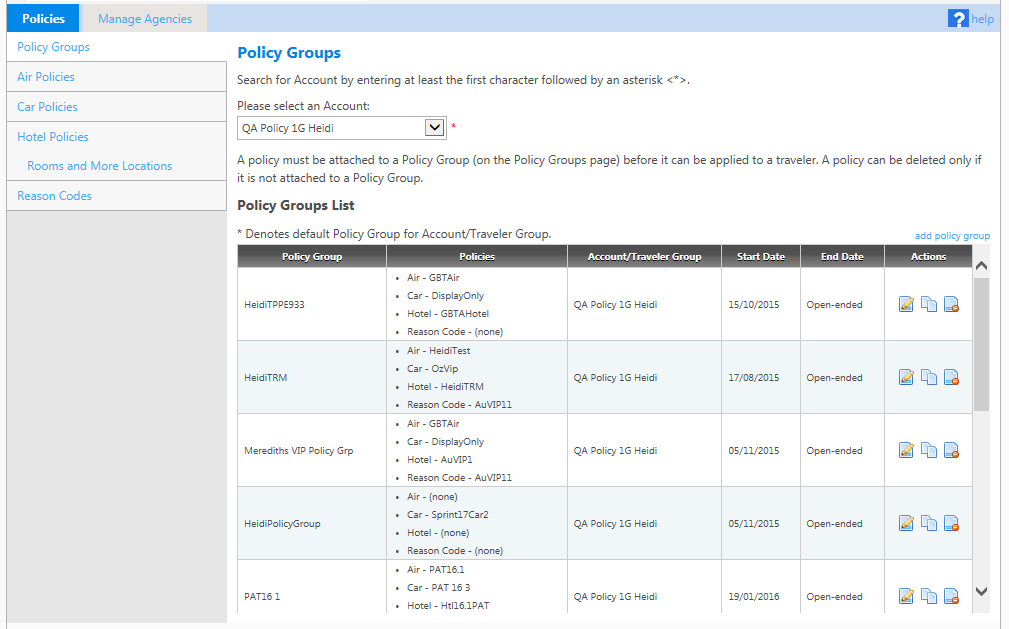
The following table lists the left-hand navigation options once an agency or account is selected.
| Use this menu option: | To create and manage: |
|---|---|
|
Policy Groups |
Policy groups, including assigning individual policies to policy groups. |
|
Air Policies |
Individual air policies. |
|
Car Policies |
Individual car policies. |
|
Hotel Policies |
Individual hotel policies. |
| Rooms and More Locations | Options for applying policy to Travelport Rooms and More content. Agencies must be provisioned in Universal API to use Travelport Rooms and More content. |
|
Reason Codes |
Configure and edit flight, car, and hotel reason codes to display when travelers are required to select a reason for booking out-of-policy travel. |
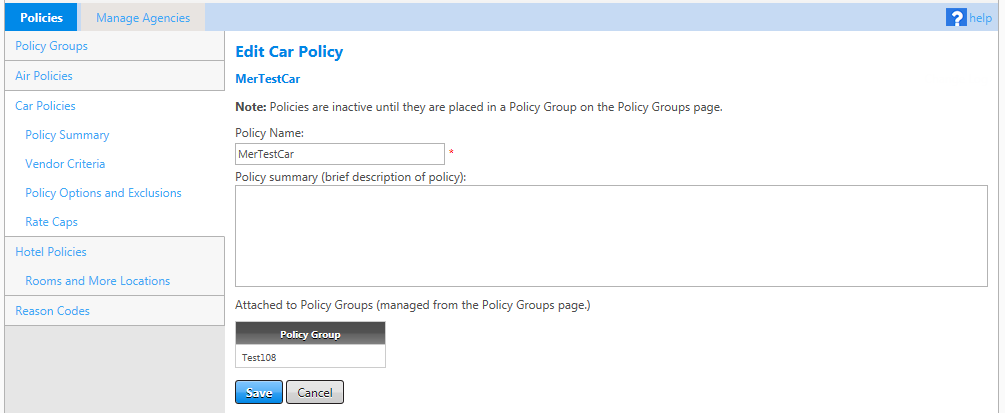
Note: For any of the options on the left-hand navigation of the Policies tab, you must select a policy or policy group to work with before the corresponding options become enabled. For example, before you can access the Vendor Criteria page, you must select a car policy on the Car Policy page. The available Car Policies navigation links are then shown, as in the example screen next.