Manage NDC bookings
Tip: Tap or select an image in the steps below to view it full sized.
This page contains information on identifying an NDC booking and viewing booking information, as well as applying a waiver code to a booking.
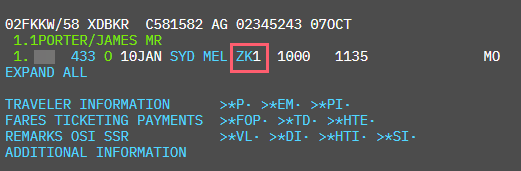
View an NDC booking. NDC bookings have a status of HK. Bookings made prior to February 5, 2026 may have a status of ZK. For more information, refer to NDC segment status.
-
The segment code HK indicates an NDC booking by default. Bookings made prior to February 5, 2026 may have a status of ZK.
-
Select *VL to display the airline locator. Like a traditional booking if there is NO airline vendor locator then the booking may not have transmitted to the airline, so please contact the airline to confirm.
-
Select *SI to display the SSR information entered in the traveler form.
-
Select *DI to view payment, document, base fare, tax, and ticket time limit information.
Apply waiver code
Involuntary schedule change
Following an involuntary schedule change, agents (subject to airline support) can apply an optional waiver code to avoid any penalties or fees. See Schedule Change Notifications for details on how to apply a waiver code.
Voluntary change
Where supported by carrier, agents can manually enter a waiver code and select a waiver type for voluntary changes.
-
Retrieve a non-disrupted reservation and select Change flight.
-
The NDC Air Search (Modify) panel displays with waiver fields in the Loyalty and discounts section. Select Apply waiver to flight results.
-
Enter a waiver code and select a waiver type from the following:
-
Change fee
-
Price difference
-
Change fee and price difference
-
Name change
Notes:
-
Waiver types list is dependent on carrier support.
-
Both Waiver code and Waiver type must be populated or an error is triggered.
-
-
Once both fields are populated, select Search. Search results display with waiver applied.
If a waiver type is selected that the carrier does not support, an error message displays to contact the airline directly.