Other Services Information (OSI)
HELP OSI or H/OSI
Other Services Information (OSI) sends a message to an airline advising of information pertaining to the passengers in the booking file. OSI provides advance notice regarding a passenger to airline personnel. However, it does not require action.
Add an OSI
Graphical view
You can add Other Service Information (OSI) using the graphical booking file. At this time, messages can only be deleted using terminal formats.
-
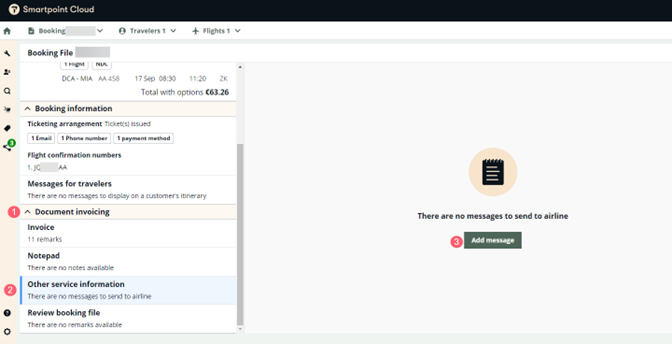
Expand the Document invoicing section of the graphical booking file, then select Other service information.
-
Select Add message.
-
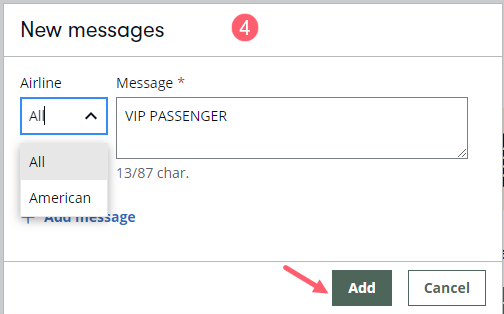
Select which airlines (or all) should receive the message.
-
Enter the message and select Add message to add another message or select Add to add the message and close the window.
Terminal view
OSIs can also be entered manually in the terminal view of the Smartpoint Cloud for GDS booking files. Refer to the following formats:
|
Format |
Explanation |
|---|---|
|
SI.KL*TCP4 with PNR 123ABC |
Passengers are travelling together with passengers from another booking file. |
|
SI.YY*1 CHLD AGED 5 |
Advise all airlines (YY) in booking file that passenger is a child aged 5 years. |
|
SI.KL*VIP HARRIES/RMR FILM STAR |
Advise airline KL, passenger is a VIP. |
|
SI.KL*TLPW.CORPORATE |
Advise airline KL, ticketing delay code. Must be added before first closure of the PNR. |
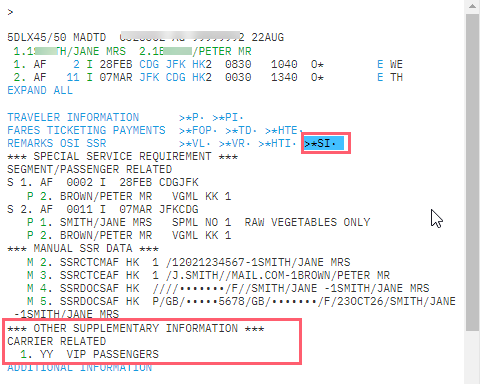
Example: Adding OSIs in Smartpoint Cloud terminal view.
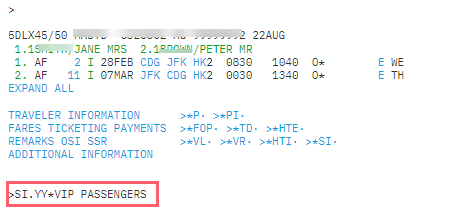
Format: SI.YY*VIP PASSENGERS
To display the Secure Flight SSRs in a booking file, press *SI in the REMARKS OSI SSR section of the terminal view:
Display an OSI
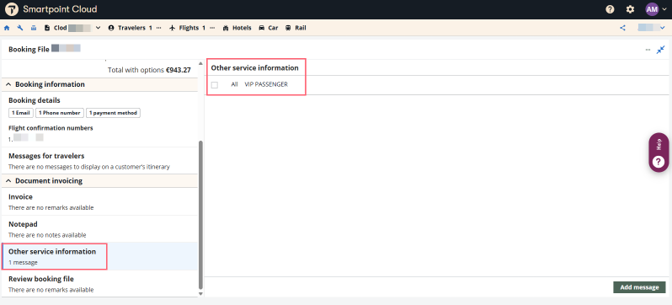
To display the OSI in graphical view, expand the Document Invoicing section.
To view the OSI in the terminal window, select or type *SI.
Change or delete OSIs in the graphical view
Change an OSI
To edit an OSI:
-
Select Other service information in the Document invoicing section.
-
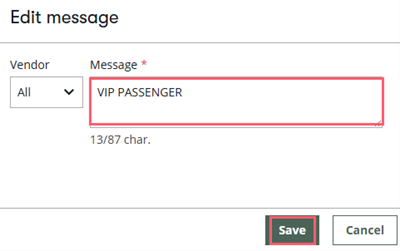
Press the options icon (3 dots) on the right of the applicable OSI and then select Edit message.

-
Make the necessary changes and press Save.
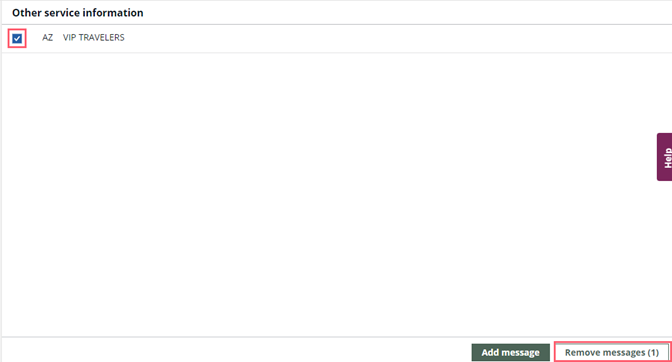
Delete an OSI
To delete an OSI:
-
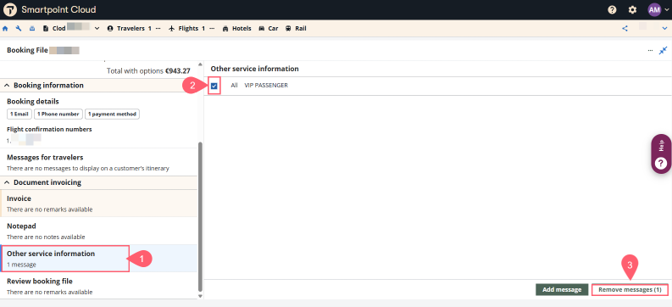
Select Other service information in the Document invoicing section.
-
Select the applicable OSI.
-
Press Remove messages.
-
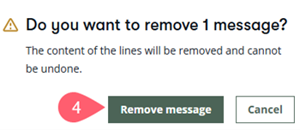
Press Remove messages again in the confirmation window.
Change or delete OSIs in the terminal view
To change an OSI in theterminal view, refer to the following formats:
|
Format |
Explanation |
|---|---|
|
SI.1@BA*NEW TEXT |
Change item number 1 to NEW TEXT. |
To delete an OS in terminal view, refer to the following formats:
|
Format |
Explanation |
|---|---|
|
SI.2@ |
Delete item number 2. |
|
SI.2- 4.6.8@ |
Delete item numbers 2, 3, 4, 6 and 8. |