Settings
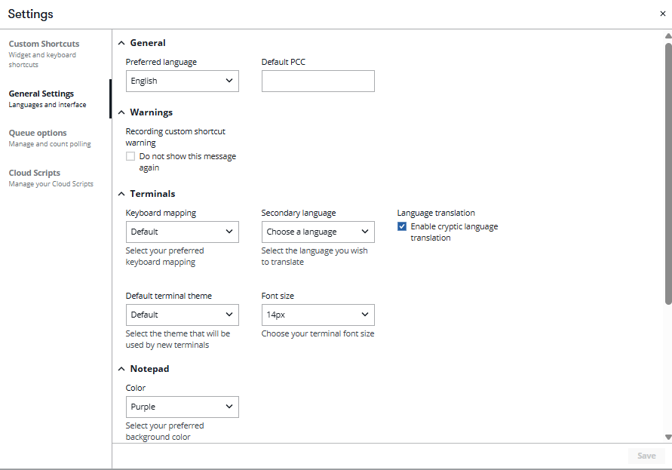
The Settings window is used to modify your preferences, such as preferred language, keyboard mapping, cryptic language translation, default terminal theme, font size, notepad background color, enable profiles enhanced view, and set received from field for booking files. Refer to Custom Shortcuts for details on creating shortcuts. Refer to Queues for details on configuring the Queue Panel.
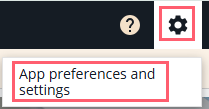
To access Settings, press the gear icon in the top right corner of the window, then select App preferences and settings.
Preferred language
The Smartpoint Cloud graphical interface applies the preferred language to menus and labels. The terminal windows are not affected.
-
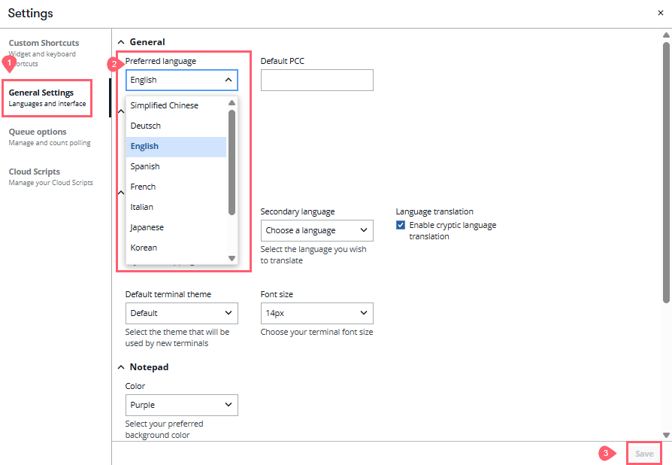
In the Settings window, select General Settings.
-
In the General section, choose your preferred language.
-
Select Save.
Default PCC
A default PCC may be configured to pre-fill the PCC field in the Sign On dialog box.
-
In the Settings window, select the General Settings tab.
-
In the General section, add the PCC in the Default PCC box.
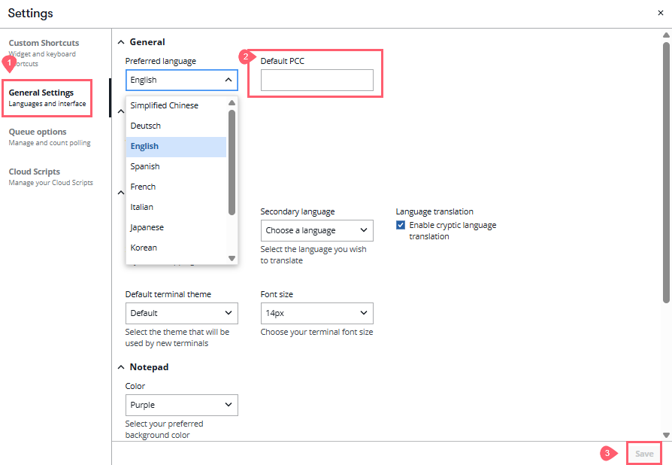
For a single emulation session, the default PCC may be overridden without modifying the saved value.
This configuration applies per agent and does not apply at the agency level.
Keyboard mapping
You can turn on/off keyboard mapping either through the Settings window or by using a cryptic entry.
To use the Settings window:
-
In the Settings window, select the General Settings tab.
-
In the Terminals section, select your preferred keyboard mapping.
-
Press Save.
To use a cryptic entry:
-
To change to a different keyboard (e.g., Worldspan), enter: #KEYBOARD WORLDSPAN
-
To return to the default keyboard mapping, enter: #KEYBOARD OFF
Worldspan keyboard mapping
|
Character entry |
Mapped to |
|---|---|
|
` |
> |
|
= |
* |
|
[ |
@ |
|
, |
# |
|
] |
$ |
Apollo keyboard mapping
|
Character entry |
Mapped to |
|---|---|
|
~ |
> |
|
= |
* |
|
[ |
@ |
|
] |
$ |
|
; |
: |
|
, |
+ |
Cryptic language translation
Important: Not every cryptic entry has a translation. The tool provides translations for basic entries.
Translation mode enables translations between a secondary cryptic language and Travelport+. When on, enter a cryptic entry in your secondary language and the Travelport+ equivalent entry displays.
You can turn on/off translation settings either through the Settings window or by using a cryptic entry.
-
In the Settings window, select the General Settings tab.
-
In the Terminals section, select the secondary language (the one that will be used to enter cryptic commands).
-
Select Enable cryptic language translation.
-
Press Save.
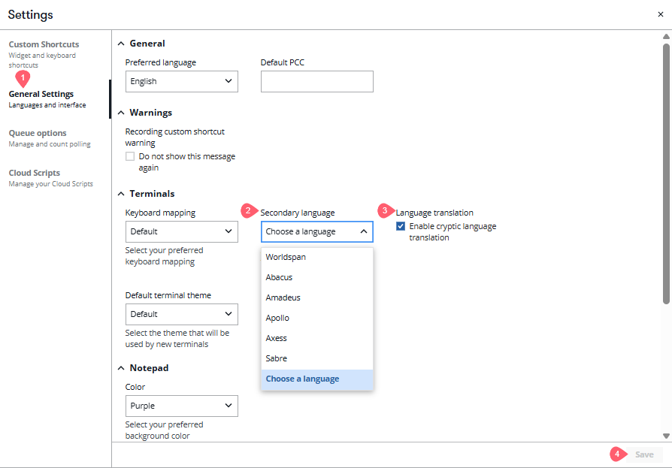
When Enable cryptic language translation is checked, enter cryptic entries in the secondary language you selected. The Travelport+ equivalent entry displays.
To use a cryptic entry, enter one of the following formats.
|
Entry |
Description |
|---|---|
|
#TRANSLATE WORLDSPAN |
Sets your secondary language to Worldspan and turns on translation. |
|
#TRANSLATE STATUS |
Check the status of the cryptic translation service. The status indicates whether the translation service is on and identifies the secondary language. |
|
#TRANSLATE OFF |
Turns off the translation service. |
|
#TRANSLATE ON |
Turns on the translation service. |
Default terminal theme
-
In the Settings window, select the General Settings tab.
-
In the Terminals section, choose a default terminal theme. This theme is used any time a new terminal window is opened.
-
Press Save.
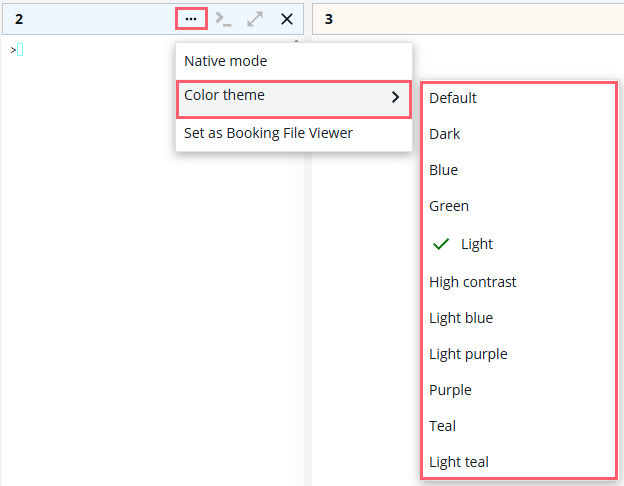
You can also change the color of individual windows by pressing the More icon and then Color theme.
Font size
-
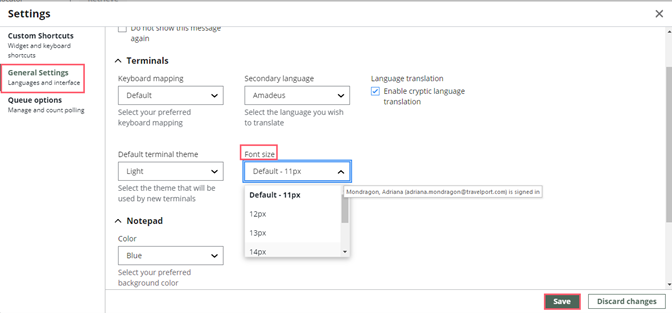
In the Settings window, select the General Settings tab.
-
In the Terminals section, choose your terminal font size.
-
Press Save.
Booking files
You can add a default "received from" entry.
-
In the Settings window, select the General Settings tab.
-
In the Booking Files section, enter the data you want to use in the Received From field.
-
Press Save.
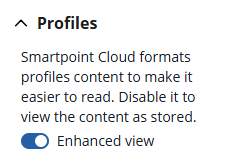
Profiles
Enables enhanced view of profile content for easier reading.