QuickCommands
Configuring Custom QuickCommands
You can create your own custom QuickCommands that can be added, edited, or removed.
Adding New Custom QuickCommands
To add a new custom QuickCommand:
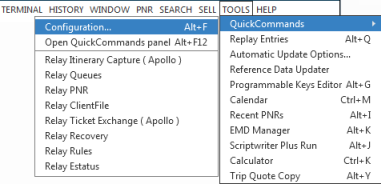
- Open the Travelport QuickCommands Configuration screen by either:
- Pressing ALT+F.
- Classic Windows. From the TOOLS menu, select QuickCommands. Then, select Configuration.
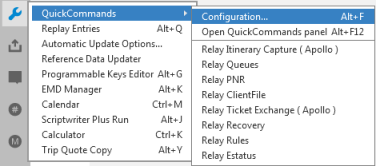
- Flex Windows. Click the Tools
 icon to select QuickCommands. Then, select Configuration.
The Travelport QuickCommands screen is displayed.
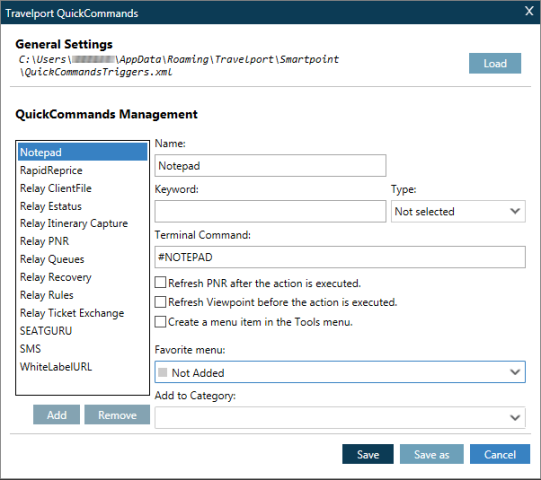
- In the QuickCommands Management section, click Add below the QuickCommands list to display the New Quick Command fields. Note that the new QuickCommand is added to the QuickCommands list.

- In Name, enter a name for the new QuickCommand.
- In Keyword, enter a search keyword.
- In Type, select from ViewpointCOM, Browser, or Execute.
- Complete the data for the QuickCommand Type that you selected.
ViewpointCOM
- In Viewpoint Method, enter the method (function).
- In Parameters, enter any parameters associated with the method, if applicable.
- Optional. Select Refresh PNR after the action is executed. to automatically update the active PNR after the QuickCommand is run.
- Optional. Select Refresh Viewpoint before the action is executed. to automatically update your data before the QuickCommand is run.
- In Url, enter the URL for the web site.
You can add CONTEXTSHARINGTOKEN to the URL as a variable to support the terminal command ZTOKENCREATETAS when the URL is launched. that allows session token information to be passed from Smartpoint to the web site.
Example: http://www.genericagency.com?ztoken={{CONTEXTSHARINGTOKEN}}
- Optional. Select Refresh PNR after the action is executed. to automatically update the active PNR after the QuickCommand is executed.
- Click the Explorer Browser Window drop-down arrow to select for Explorer, Chrome, or a third-party browser.
- Optional. Select Launch website in modal browser. if you want the launch the URL in an Explorer or Chrome browser window within Smartpoint as the primary window. The modal window remains on top, and requires the agent to complete an action to close it and continue to the main Smartpoint window.
- In App, enter the path for the executable file. Or, click BROWSE to locate the executable file.
- In Parameters, enter any parameters associated with the executable file, if applicable.
- Optional. Select Refresh PNR after the action is executed. to automatically update the active PNR after the QuickCommand is executed.
- Optional. Select Refresh Viewpoint before the action is executed. to automatically update your data before the QuickCommand is run.
- If you want to display the new QuickCommand in your QuickCommand menu, be sure to select Create a menu item in the Tools menu.
- In Terminal Command, add a custom terminal/cryptic command for the QuickCommand, if desired.
- In Favorite Menu, select Level 1 to Level 4 to indicate the level for this QuickCommand in your Category list.
- In Add to Category, select an existing QuickCommand category or a enter a new category.
- Save the new custom QuickCommand.
- Click Save to store the QuickCommand in the General Settings section of your Application Settings (your default QuickCommandsTriggers.xml file).
- Click Save As to store the QuickCommand to an another XML file.
Editing Custom QuickCommands
Note that you can edit custom QuickCommands, but you cannot edit the default QuickCommands in Smartpoint or corporative QuickCommands added by your agency.
To edit an existing custom QuickCommand:
- From the Tools menu, select QuickCommands, and then click Configuration to display the Travelport QuickCommands dialog box.
- Select the custom QuickCommand and make the desired changes.
- Save the edited custom QuickCommand.
- Click Save to store the QuickCommand in the General Settings section of your Application Settings (your default QuickCommandsTriggers.xml file).
- Click Save As to store the QuickCommand to an another XML file.
Removing Custom QuickCommands
Note that you can remove custom QuickCommands, but you cannot remove the default QuickCommands in Smartpoint or corporative QuickCommands added by your agency.
To remove a custom QuickCommand:
- From the Tools menu, select QuickCommands, and then click Configuration to display the Travelport QuickCommands dialog box.
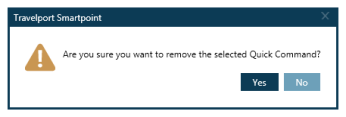
- Select the desired custom QuickCommand and click Remove.
- When the warning box displays, click Yes to confirm the removal.
- Save the new QuickCommand configuration.
- Click Save to store the QuickCommand in the General Settings section of your Application Settings (your default QuickCommandsTriggers.xml file).
- Click Save As to store the QuickCommand to an another XML file.