Cars
Passive Car Segments
Travelport+ (1G): 0CCR
See HELP CAR and KB0012114 in the Travelport Knowledge Base for more information.
Apollo (1V): 0CAR
See HELP CAR and KB0015062 in the Travelport Knowledge Base for more information.
The Car Passive screen allows you to manually record information for a car segment that is not booked through the Travelport+ (1G) or Apollo (1V) systems. When a passive segment is booked, a message is not sent to vendor and the booking does not decrement from the vendor’s inventory.
Because the segment is booked outside of Smartpoint, any changes or cancellations to the booking must be made separately. Any changes to the passive segment information must also be manually updated.
Creating Passive Car Segments
To create a passive car segment:
- Open the Car Passive dialog box.
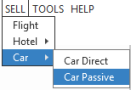
- Classic Windows. From the SELL menu, select Car, then select Car Passive.
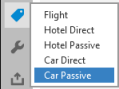
- Flex Windows. Click the Sell
 icon to select Car Passive.
The Car Passive dialog box is displayed.
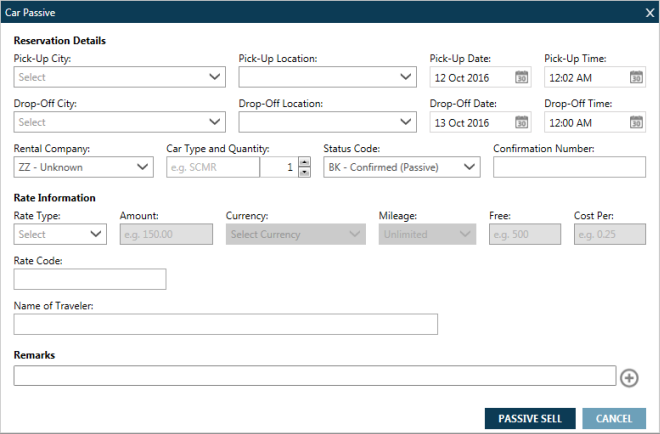
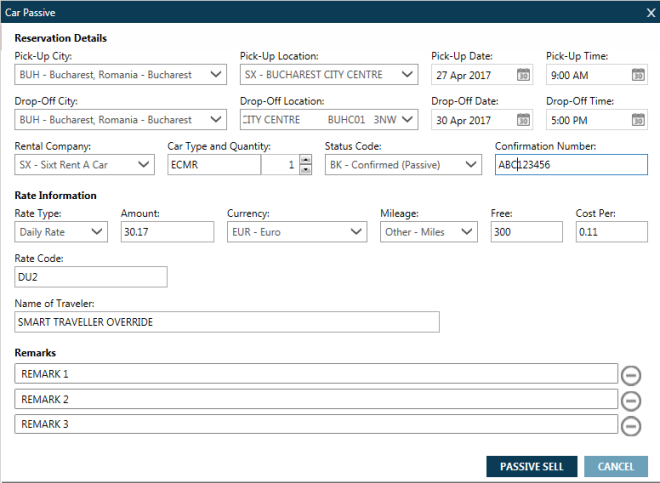
Reservation Details
- In Pick-Up City, enter the city code or city name where the traveler will pick up the rental car. Click the selected city or press ENTER.
The closest match to your entry displays at the bottom of the list. If the code is unknown, Smartpoint displays a name list when you type in the full city name.
- Optional. Click the Pick-Up Location drop-down arrow to select a vendor, specific location, and location code in the requested city. Click the selected location or press ENTER.
Note: If a Pick-Up Location is not specified, the main airport associated with the city is used.
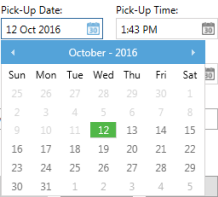
- In Pick-Up Date, enter the desired pick-up date or click the Calendar
 icon to select a date from the drop-down calendar. The current date is highlighted in green.
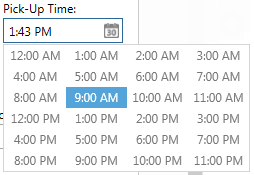
- In Pick-Up Time, enter the desired pick-up time or click the Calendar icon to select a time from the drop-down list.
You can enter any time format accepted by the host, including formats such as 1A, 1P, 13, and 1300.
- Optional. The Drop-Off City automatically displays the selected Pick-Up City. To change the Drop-Off City, enter the city code or city name where the traveler will drop off the rental car. Click the selected city or press ENTER.
- Optional. The Drop-Off Location automatically displays the selected Pick-Up Location. To change the Drop-Off Location, click the Drop-Off Location drop-down arrow to select a specific locationin the requested city. Click the selected location or press ENTER.
- In Drop-Off Date and Drop-Off Time, select the date and time that the traveler will drop off the rental car.
- In Rental Company, enter the two-character vendor code or click the arrow to select a vendor from the drop-down list. If the rental company is not known, use the default setting of ZZ - Unknown.
- In Car Type and Quantity:
- Enter the four-character Car Type code. Car Type codes combine information such as categories, classes, door counts, and fuel types. For example: CBMN = 2-Door Compact Manual No Air.
- Enter or use the arrows to select the quantity of rental cars for the rental car type.
- Click the Status Code arrow to select a status for the passive segment.
- Optional. Enter the vendor's confirmation number for the booking.
Rate Information
- Optional. Click the Rate Type arrow to select Daily Rate, Weekly Rate, or another rate increment.
- Optional. In Amount, enter the rate amount based on the selected Rate Type.
- Optional. In Currency, enter the currency code or click the drop-down list to select a currency for the Rate Type.
- Optional. Click the Mileage arrow to select the appropriate mileage allowance associated to the Rate Type.
- Optional. In Free, enter amount of free mileage.
- Optional. In Cost Per, enter the cost per mile/kilometer for mileage.
- Optional. In Rate Code, enter the applicable Rate Code for the selected vendor.
Note: Rate Type and Rate Code are mutually exclusive. If you select a Rate Type, you cannot enter a Rate Code.
- Optional. In Name of Traveler, enter the traveler associated with the booking if this traveler is not the primary traveler in the PNR/Booking File.
Remarks
- Optional. In Remarks, enter any remarks text associated with the passive car segment.
To enter a maximum of three remarks, click the Add
icon to create a new remarks line. Or, click the Delete
icon to remove a remark.
- Optional. Click +TQ to add the passive sell information to Trip Quote.
- Click PASSIVE SELL to display the passive segment information in the PNR/Booking File.
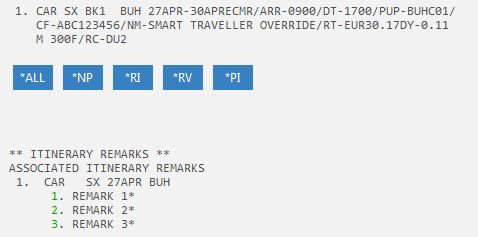
Sample Passive Car Segment
Request
Response