Seat assignments
HELP SEAT or H/SEAT
Seats are available for many NDC airlines and for GDS carriers that support seats. Some NDC carriers allow seats to be chosen before booking and some carriers only allow seats to be chosen after booking. Refer to the FAQs for a list of airline-specific knowledge base pages for more details.
This section explains how to:
-
Select seats from a seat map
-
Display seat assignments
-
Cancel seat assignments
Important:
-
Free seats (both NDC and GDS) and paid seats (NDC only) are available prior to booking.
-
For NDC and GDS bookings, both free and paid seats can be added to held or ticketed bookings.
-
For NDC and GDS bookings, paid seats can be canceled (if allowed by the airline) using the GUI seat map. However, refunds are not provided for paid seats.
-
Seat maps are not available for GDS multi-offer bookings.
Find more information to add seats to NDC bookings in the NDC User Guide.
Select seats from a seat map
Graphical view
-
Retrieve the booking.
-
Expand the Reservations section.
If you are adding seats before ticketing, scroll down and press Add extras.
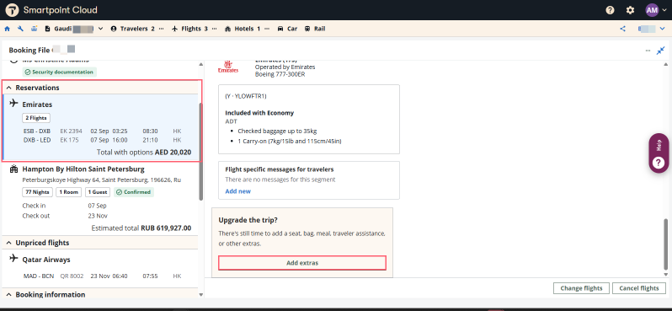
-
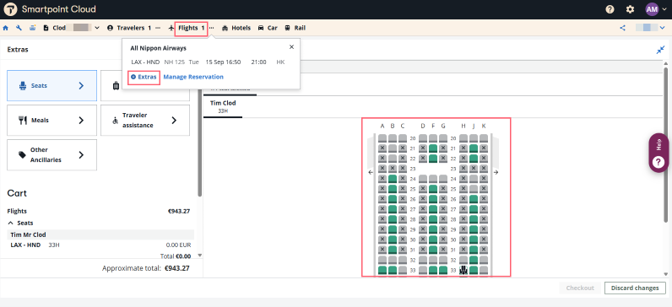
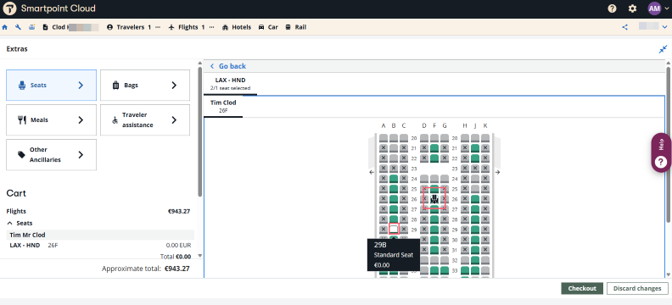
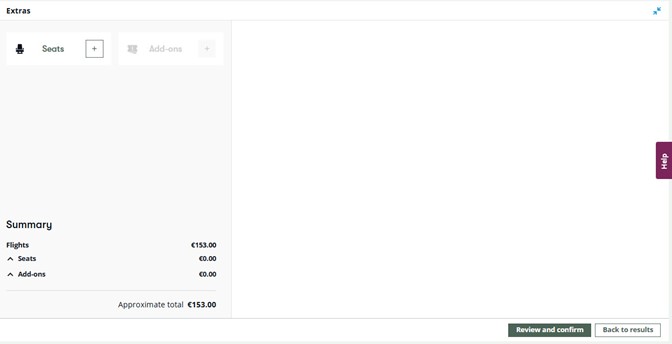
On the Extras screen, press Seats to open the seat map.
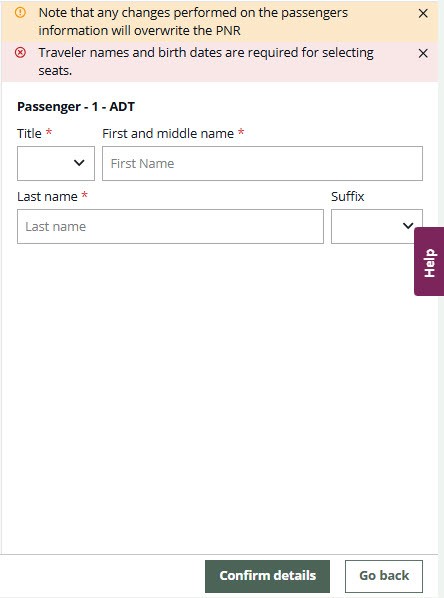
If selecting seats prior to booking and if the booking file does not contain passenger information or has a passenger mismatch, a form displays to enter the information that is required prior to selecting seats. Complete the fields and select Confirm details. This form cannot be used to add information for infants (passenger type INF/INS).
-
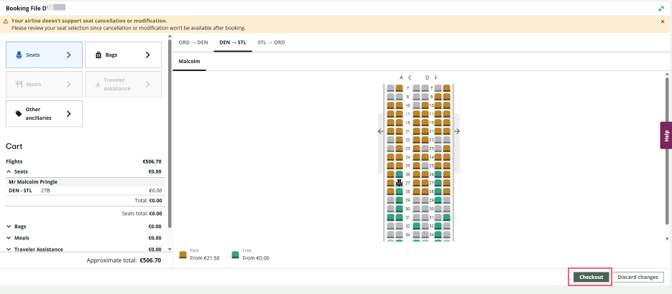
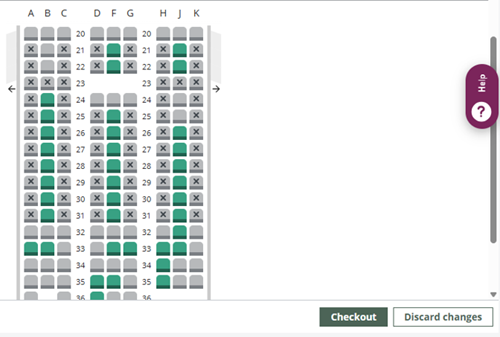
The seat map displays the first segment. The graphical seat map displays per flight. A color-coded key indicates seat availability and type.
Hover over a seat to view seat details. Select to book the seat. The first seat selected is assigned to passenger 1 by default.

Once seats on the first flight are booked, you can move through all flights and book the remaining seats in the same manner.
-
After selecting the seats, press Checkout at the bottom of the screen.

-
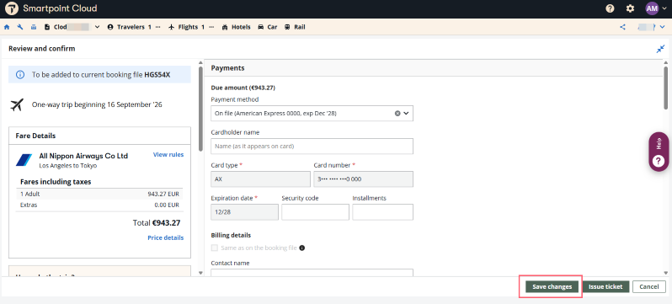
The Review and confirm screen of the graphical view appears with the details of the booked seats. To save the seats, press Save changes.
Terminal view
To select free seats after booking or ticketing for traditional bookings:
-
Retrieve the booking file.
-
In the interactive booking file (terminal window), do one of the following:
-
Select the flight class.
-
Enter a cryptic command:
-
SA*S1 will open the seat map on the first segment.
-
SA*S2 will open the seat map on the second segment.
-
-
-
The process from this point on is the same as explained for the graphical view. The Extras screen appears. Select the Seats button to view the map and book seats from the map.
The graphical seat map displays per flight. A color-coded key indicates seat availability and type. Hover over a seat to view seat details.
-
Select to book the seat. The first seat selected is assigned to passenger 1 by default.
Once seats on the first flight are booked, you can move through all flights and book the remaining seats in the same manner.
-
After selecting the seats, press Checkout at the bottom of the screen.
-
The Review and Confirm screen of the graphical view appears with the details of the booked seats. To save the seats, select Save changes.
Display seat assignments
Graphical view
You can see the booked seats in the Reservations section by selecting View Seats below the flight details on the right side of the screen.
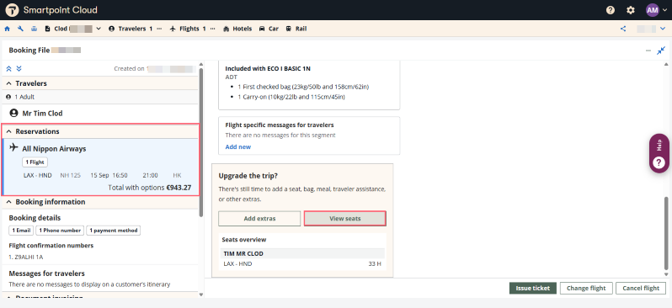
Seats may also be able to be added to a retrieved booking file, by using the option in the Flights menu from the top navigation bar.
Terminal view
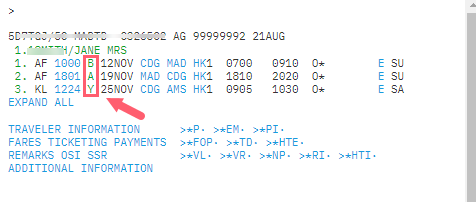
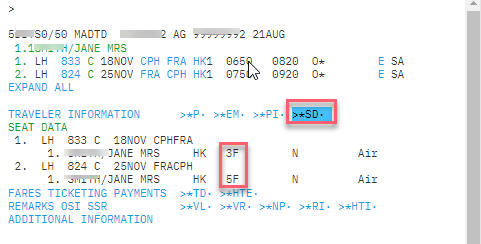
Once you assign or request seats,*SD appears in the TRAVELER INFORMATION section, and may be used to display seat data within the booking file:
Alternatively, reopen the seat map. The seat map displays the details for seats previously booked.
Change seats from the seat map
If allowed by the airline to graphically modify the seats, access the seat map.
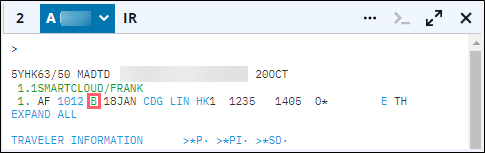
From the Terminal view, click on the booking class.
From the Graphical view, select the Reservations section and scroll down and select View seats.
The seat map is displayed by flight showing the previously booked seats. Select the new seat and press Checkout.
Once the Review and Confirm screen displays, press Save changes.
If you are in the process of creating the booking, the Extras screen will appear after selecting the fare options. Seats can be added from this screen using the same process explained here.
If the names of the passengers have not yet been entered, you will be asked to add the details.
Change seats using formats
H/ASR and H/ASRC
To change seats, refer to the following example:
S.S1@4F: modify the previously selected seat in segment 1 to 4F.

The previous seat (3F) was canceled and 4F is now booked.
Additional formats:
|
Format |
Explanation |
|---|---|
|
S.@10A- C/15J- K |
Change seats to 10A through 10C and 15J through 15K for all passengers |
|
S.@NA |
Change to non-smoking aisle seats for all passengers all segments |
|
S.P1@15B |
Change to seat 15B for passenger 1 on all segments |
|
S.S2@NA |
Change to non-smoking aisle seats for all passengers on segment 2 |
|
S.P1 S2@18A |
Change to seat 18A for passenger 1 on segment 2 |
Cancel seats from the seat map
To cancel seats graphically from the seat map, proceed in the same way as for seat changes. Once the map is displayed, click on the booked seat and do not select any other seat. Then press Checkout.
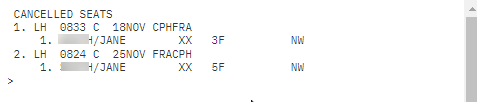
The following message will appear confirming the seats were cancelled.

Cancel using formats
All segments
To cancel seat assignments for all passengers/segments, enter S.@ in the terminal window.
Additional formats:
|
Format |
Explanation |
|---|---|
|
S.P1.3@ |
Cancel seats for passengers 1 and 3 on all segments |
|
S.S1.4@ |
Cancel seats for all passengers on segments 1 and 4 |
|
S.P1.3S2@ |
Cancel seats for passengers 1 and 3 on segment 2 |
Notes:
-
Paid seats can be canceled using the GUI seat map from GDS and NDC held and ticketed bookings.
-
The process is the same as for the modification but without selecting a new seat.
-
Important: Airlines do not give refunds for paid seats.