queues
Queue Set Up
Queue Set Up allows you to determine the Queues for monitoring. To launch, on QSETUP.
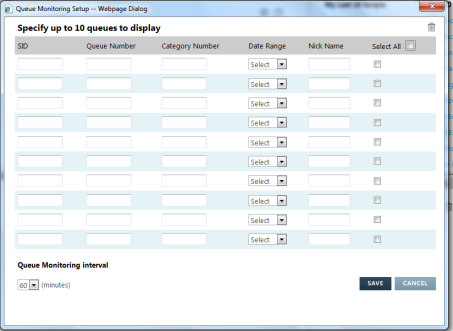
Points to note:
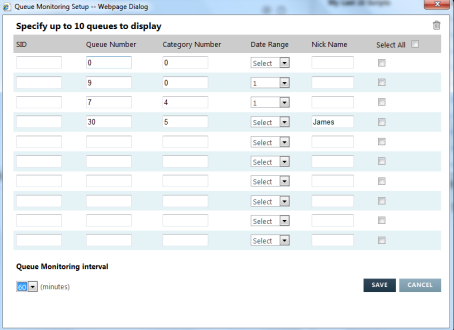
- You can select up to 10 different queues to be counted by selecting the PCC/SID, Queue Number, Category Number and Date Range
- If required you can assign a Nick Name to the Queue. If this is left blank, the system assigns the name as Queue Number, Category and if selected the Date Range. Example: Q1C3 or Q1C3D4.
- To remove a Queue from the setup, add a check mark in the box next to the Nick Name and click on the Clear All icon (the trashcan) at the top right side of the screen. To remove all Queues from the setup, add a check mark in the Select All box at the top of the screen, and click on the Clear All icon.
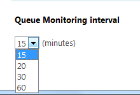
- The Queue Monitoring interval may be set for 15; 20; 30; or 60 minutes. The system automatically performs queue counts in the background based on the designated time of the interval.
Completed QSETUP Screen
After you have selected the Queues to monitor, click Save. The QSETUP screen will close automatically and the queues appear at the bottom of screen:

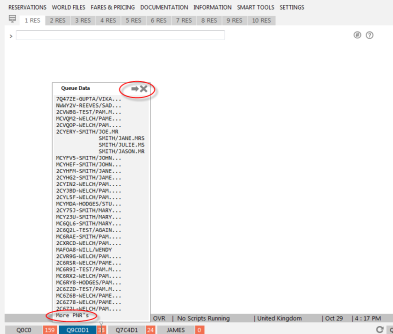
The number inside the red box indicates the total number of records in this queue and its categories. Clicking on the number of records displays a list of the PNRs on the queue showing the Record Locator and customer name.
Note: Clicking on the Record Locator and customer name, displays the PNR but away from the Queue.
-
If there are too many records to show on the display, the note ‘More PNR’s’ displays at the bottom of the list.
-
At the top right side of the list are two icons:

| Icon | Description |
|---|---|
|
|
Clicking on the arrow will access the Queue. |
|
|
Clicking on the X will close the tooltip |


Open the PNR Viewer window, then access the Queue. The PNR is displayed in the Smart Screen and in the PNR Viewer window where additional shortcut buttons display to assist in working the PNRs.