Quick Menu
Troubleshooting
If the toolbar is not working the way you expect, the first thing to check is the configuration screen.
To open the Menu Management screen:
-
Press the arrow on the toolbar in the lower-right corner.

-
Then click Add or Remove Buttons.

-
On the Menu Management screen, make sure each button shows the desired assignment. To view each assignment, click each item in the list and confirm that the properties on the right are correct.
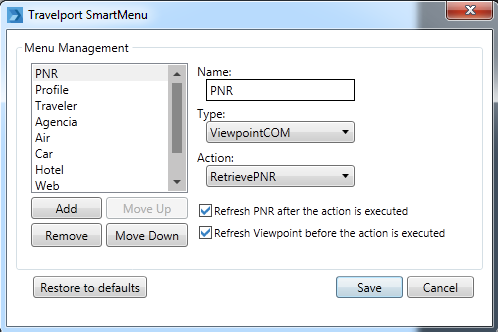
To reset the toolbar/menu to the default buttons, press the “Restore to defaults” button and then press the “Save” button.
If you are still having trouble with toolbar, you can delete the configuration file located at C:\Users\nnnnn\AppData\Roaming\Travelport\Common\QuickMenu.xml (where nnnnn is your username in Windows).
If you cannot see the Quick Menu toolbar with Smartpoint running, try the following steps:
- From the Smartpoint terminal window, type #MENU.
- If you still can’t see the toolbar, try typing the command #MENU RESET. By doing this, the toolbar should place itself over the bottom of the terminal window.
- If you still can’t see the toolbar, check that the DLL is present in the folder:
C:\Program Files (x86)\Travelport\Smartpoint\Extensions
(if you are running 32-bit Windows the folder name is C:\Program Files\Travelport\Smartpoint). The DLL to look for is: Travelport.Smartpoint.Extensions.QuickMenu.dll. - If the DLL is present but the toolbar doesn’t display at startup, confirm that the version of the DLL is 1.0.1.2 or later. You can confirm the version by right-clicking on the DLL mentioned above, and selecting the option that says “Properties”. Then, on the Properties window click on the “Details” tab.
- If the correct version of the DLL is present but the toolbar doesn’t display at startup, try resetting the Smartpoint plugin cache by typing the command #DELETEPLUGINCACHE and then restart Smartpoint.