Settings: Extractions
The terminology of ‘extraction’ is used to describe the data that is read from a PNR and inserted to a command that is then posted back into the PNR, via the cryptic handler. There are two categories of extractions: Default Extractions and Agency Custom Extractions. Agency administrators can view default extractions by expanding each category. Agency administrators can create, edit, and delete their own Agency Custom Extractions. Agency users can view Agency Custom Extractions.
To access the Extractions page, click the Settings tab then select Extractions.
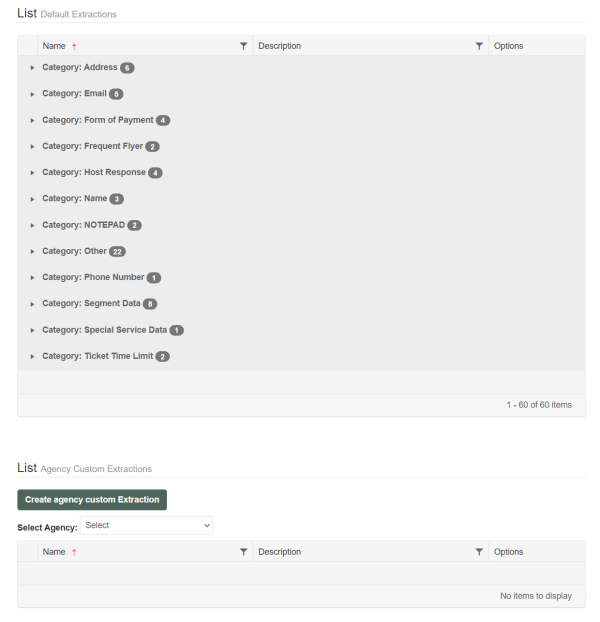
Default Extractions
Refer to Extractions for an explanation of the default extractions available through Queue Control Console, as well as an example of an extraction usage.
Creating/Editing a Custom Extraction
- Click the Settings menu, then select Extractions.
-
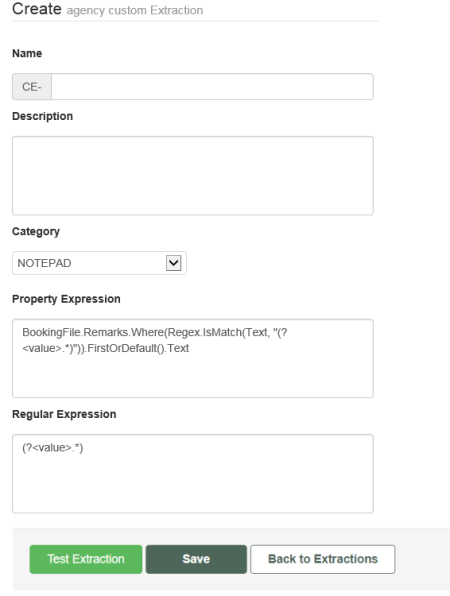
Click the Create agency custom Extraction button.
-
Enter a name for the extraction. The name that is used must be unique. If a user attempts to input a previously used name, an error message ‘Duplicate name found’ will be displayed.
- You can enter description of the extraction.
- Select the category for the extraction. The Expression fields are pre-populated, depending on the category selected.
- Enter or modify the property expression command used to locate the specific data required within a PNR.
- The Regular Expression field requires the user to be able to write a regular expression to extract exact data from the property expression. This expression will be tested via a ‘Test Extraction’ button.
- Click the Test Extraction button to test the Regular Expression.
- Click Save to save the extraction. Or click Back to Extractions button to return to the Extractions page without saving.
Test Extraction
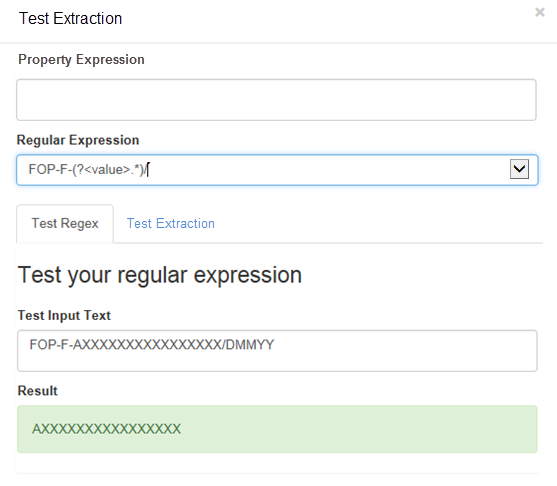
When Test Extraction is selected from the Create Extraction page, a Test Extraction page displays. The purpose of this page is to test that a regular expression is extracting the required data the user is looking for from the Property Expression.
The modal also provides the ability to test the regular expression, against a PNR, to ensure the result is what is required and that the property expression will work against the agencies PNR’s.
- The Property Expression field is populated with the contents provided from the Property Expression field in the Create Extraction page.
-
The Regular Expression field is populated with the contents provided from the Regular Expression field in the Create Extraction page. The contents of this field are editable so the user can make any required adjustments.
A dropdown list, for acceptable characters, has been provided in order to assist users to create the required Regular Expression. The list contains Characters, Groups, and Repetitions that are acceptable.
-
There are two tabs provided on the Test Extraction page. The first tab is Test Regex and the second tab is Test Extraction.
 Test Regex
The Test Regex tab provides an area for a user to test the composition of the Regular Expression against the Property Expression, to ensure the required data is extracted.
- The Test Input Text field displays the string of data provided by the Property Expression.
- The Result field displays the result of the Regular Expression against the Property Expression.
- When the result returns a positive test, the result is displayed.
- When the result returns an invalid test, the result will display ‘Invalid Regular Expression’.
- When the result returns a negative test, the result will display ‘No Value Found’.
Test Extraction (against PNR)
The Test Extraction tab provides an area for a user to test the composition of the Regular Expression against a PNR within a specific Pseudo City Code (PCC).
- Select the agency’s method of access.
- Enter a valid PNR for testing.
- Click Test Extraction to test the Regular Expression against the PNR Locator.
- The Property Value field displays
<XXXXXXXXXXXXXXXXX>. - The Result field displays the result of the test. The results displayed will be:
- When the result returns a positive test, the result is displayed.
- When the result returns an invalid test, the result will display ‘Invalid Regular Expression’.
- When the result returns a negative test, the result will display ‘No Value Found’
- Click Save Changes button to save and transpose the data to the Create Extraction page and return to the Create Extraction page. Click Close to return to the Create Extraction page without saving any changes.
Adding a Cryptic Command Using an Extraction
Worldspan: Not available to Worldspan users.
Once an extraction has been created it can be call upon within a Cryptic Command handler. Refer to Example of Extraction Usage for an example of using an extraction in a cryptic command.
Add/Edit Command
- Depending on how the user accesses this page, they can either Add or Edit a cryptic command.
-
In Edit mode, the Save, Delete, and Back buttons are available.
-
In Add mode, the Save and Back buttons are available.
-
In the Command section, create the cryptic command that will be posted to Host, once saved and actioned by the Cryptic Handler.
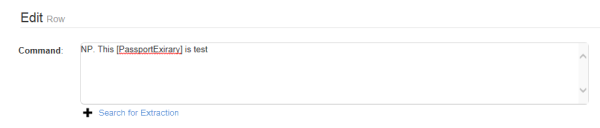
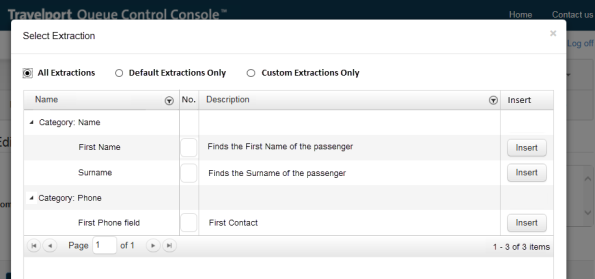
- To insert an extraction, click the Search for Extraction link.
- You can select which set of Extractions to display.
- All Extractions displays all Extractions for selection.
- Default Extractions Only displays Default Extractions Only for selection.
- Custom Extractions Only displays Agency Custom Extractions Only for selection.
-
The Select Extraction grid displays.
-
The Name column lists the Category title given to a created Default and/or Agency Custom Extraction. The column is filter and sort enabled. Each Category lists the sub categories (the name given to the extraction) and the categories are expandable and collapsible to list the sub categories.
-
The Description column lists the description given to the Name of the extraction. The column is filter and sort enabled.
-
The Insert column contains an Insert button. The Insert button is available for all Names listed for both Default and/or Agency Custom Extractions, when listed. When a user selects the Insert button, the Regular Expression (created for the extraction) is inserted into the Command section and the modal will close, directing the user back to the Add/Edit Row page.