Settings: Commission Tables
Worldspan: Not available to Worldspan users.
Commission Table option provides flexibility for corporate agencies to configure commissions as per their regional requirements.
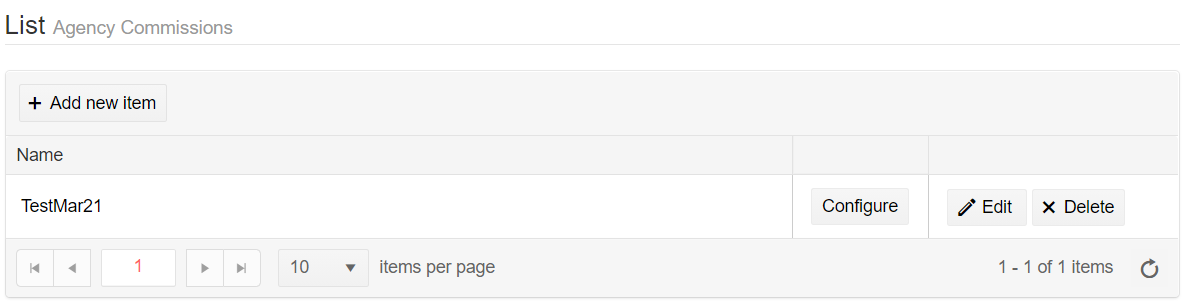
To access the Commission Tables, click the Settings tab at the top of the screen, then select Commission Tables. Default commissions as well as agency-defined commissions display. Click Configure to display, modify, or activate/deactivate existing commissions.
Add an Agency Commission
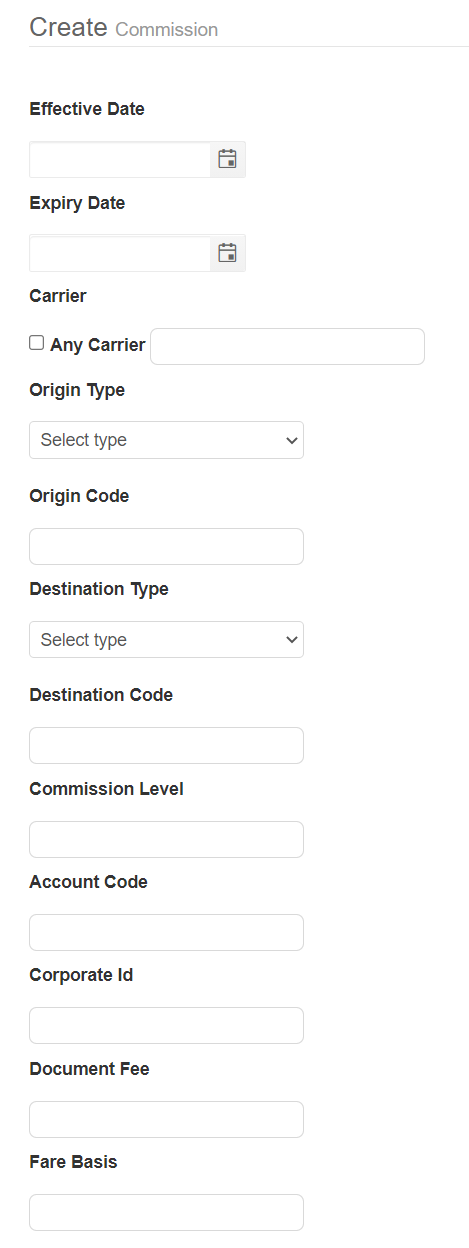
The activation date, expiration date, carrier, origin, destination, account code, and fare basis fields are used to determine whether or not a commission will be applied. The commission level, corporate ID, and document fee fields are used to update the PNR/field fare.
-
In the Agency Commission List, click Add new item.
-
Enter a name for the commission.
-
Click Update.
-
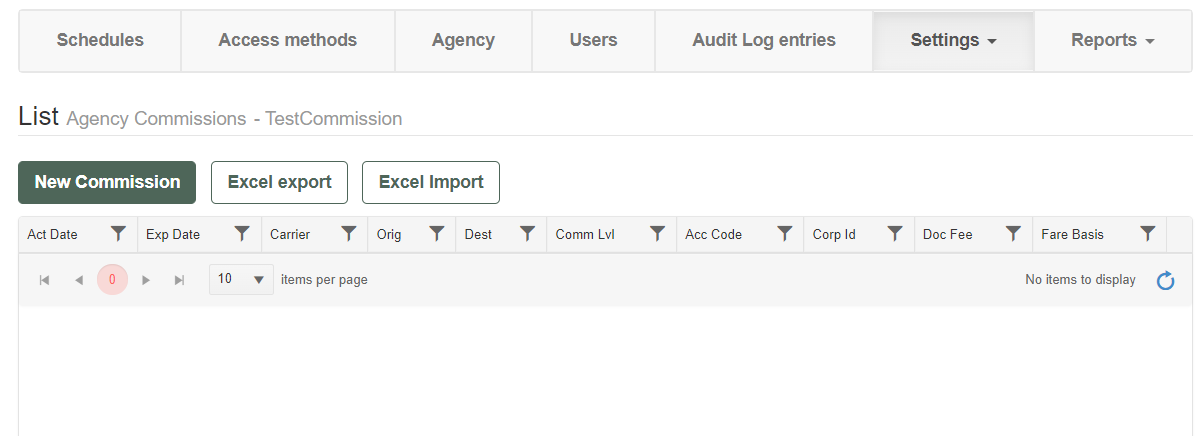
Click Configure to add commission records.
-
From the Commission Details screen, click the New Commission button.
-
Complete the fields to create a new commission.
-
Date ranges are used to divide queue categories for queue management. They can only be activated if the queue category has been activated.
-
Select Any Carrier if the commission can apply to any carrier. Otherwise, enter the two-character carrier code. Only one carrier code is allowed.
-
If the commission applies to any location, select Any from the Origin/Destination Type drop-down list. If the commission only applies to certain origins and destinations, enter the location code and select the location type from the drop-down list. Only one location code is allowed per Origin/Destination.
-
Enter the commission percentage in the Commission Level field (e.g., if the commission level is 5%, enter 5).
-
(Optional) Enter the account code applicable to the commission level or corporate ID. If a different commission level is to be applied for certain account codes, enter the account code that will appear in the filed fare for the commission to be applied. Or enter account code and applicable corporate ID in the next field, which is to be applied for QF OSI input.
-
(Optional) Enter the QF corporate ID. This ID will be entered as an OSI to QF when matched to the account code in the filed fare.
-
(Optional) Enter a document fee. A commission and a document fee can both be applied to an entry. The currency is determined by the agency's country.
-
(Optional) Enter the fare basis in full. If a different commission level is to be applied for certain fare basis, enter the fare basis that will appear in the filed fare for the commission to be applied.
-
Click Create.
Export/Import Commissions
To export or import commission records for a given commission, click Configure from the Commission Tables page. On the Commission Details page, click the Export or Import button.
Important: When importing a new commission table, the imported file must contain all required data, as all existing commission table data will be overwritten. If any errors occur during import, troubleshooting information is provided.
Before importing commission files, customers must validate that the Origin Type and Destination type are one of the below values and must adhere to the "sentence case" as below:
- City 3-letter code
- Agency Region
- Country
- Region
- Any
Based on the above validation rules, the following must apply for editing existing commission records or while importing a commission file:
- If Origin or Destination Type is City or Any, the Origin or Destination must be 3-letter city codes or Any.
- If Origin or Destination Type is Country or Any, the Origin or Destination must be 2-letter country codes or Any.
- If Origin or Destination Type is Region or Any, the Origin or Destination must be one of the predefined Queue Control Console regions or Any.
- If Origin or Destination Type is Agency Region or Any, the Origin or Destination must be one of the predefined Queue Control Console agency regions or Any.
- The carrier must be a 2-letter code.
Delete a Commission
When you delete a commission from the Commission Tables page, that commission option no longer displays in the robotic ticketing drop-down list for commissions. To delete a commission, click the Delete button from the Agency Commissions list and then click OK.